
To be completely honest, I don’t really remember when the Olya Shirt by Paper Theory appeared on my sewing “radar”. It’s not a pattern that appears in any of the menswear feeds that I’m exposed to. I’ve managed to find ONE example on Instagram where it’s worn by a guy. Maybe my experience can change that a bit; because, as you’ll see here, I’m a little obsessed with this shirt now.

If you’re looking for something different, something unique, when it comes to shirts; the Olya may be exactly what you’ve been seeking. I purchased two colors of linen shirting from Gorgeous Fabrics this past winter when Ann was having her big moving sale. I know a bargain when I see one! Being the frugal sewist that I am, I didn’t want to waste great fabric on a “so-so” shirt.
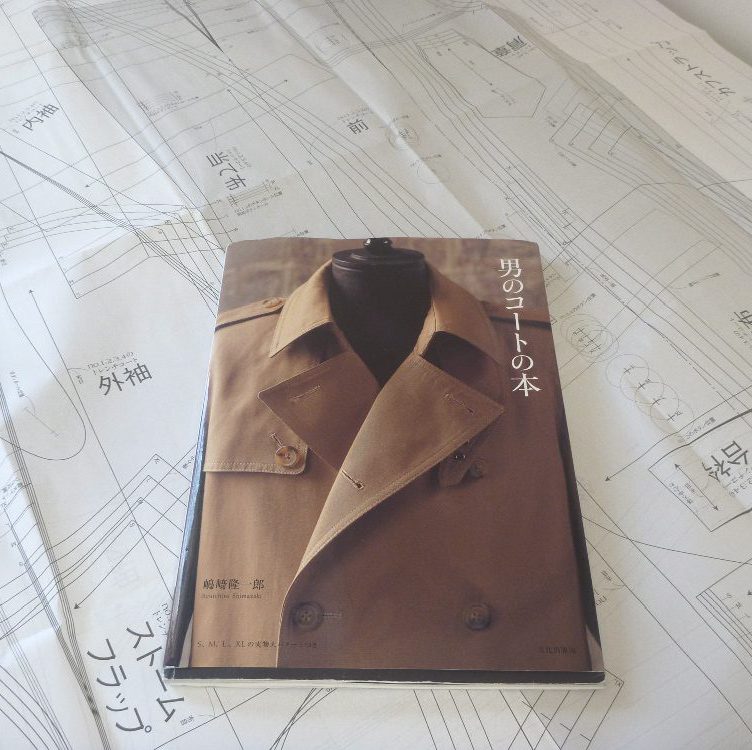
I knew I wanted linen Spring / Summer shirts, but I wanted something more interesting than my usual TNT baggy button-down. One of the downsides of menswear is that there’s not a whole lot of variety. That’s why we menswear sewists are frequently prowling on Esty and eBay for vintage patterns. There was a lot more creativity back in the 50’s, 60’s and 70’s. (The 80’s are best left forgotten IMO). Case in point……this shirt from a McCall’s “Today’s Man” pattern.
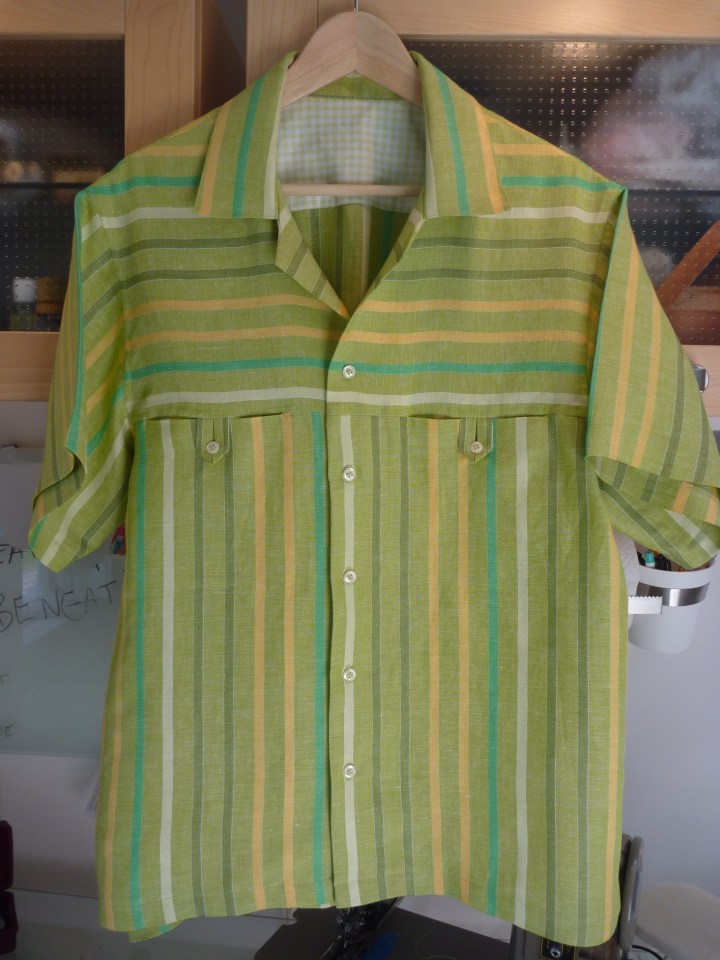
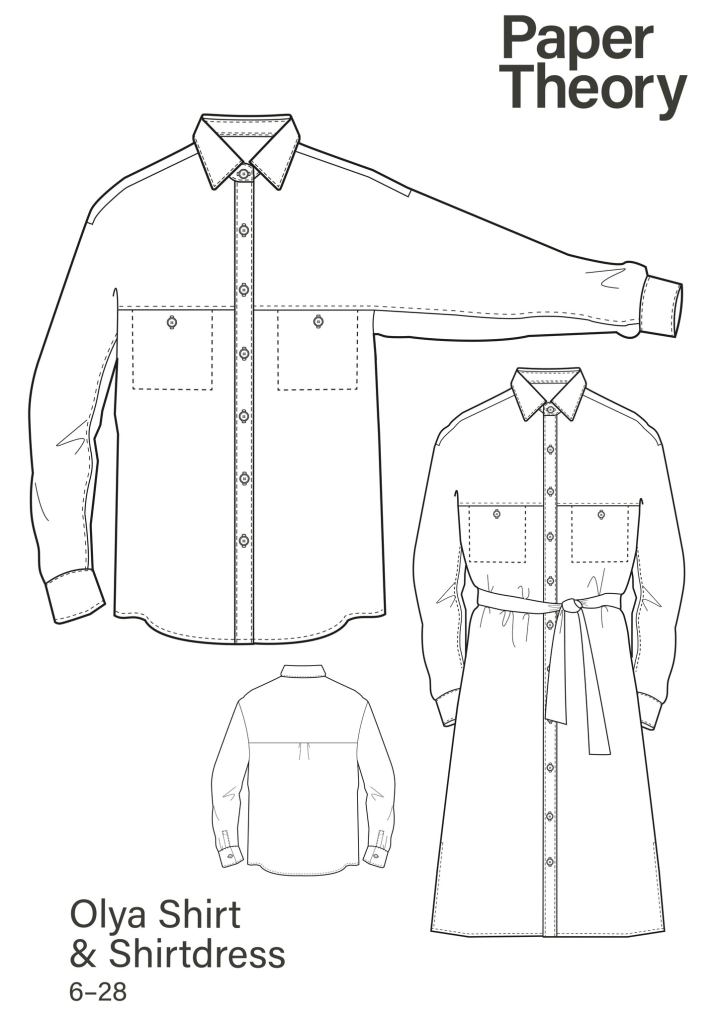
I made this linen shirt back in 2014 and I never wear it. It’s oversized in all the wrong ways. I ditched the pattern at one of Peter Lapin’s MPB Days years ago. I’m always thinking that I should dig it out and try to “fix” it, but I’m way too lazy. I only mention it here because the pocket arrangement is very similar to the Olya; only the Olya is way better. One need only look at the line drawings. That sleeve! Brilliant!
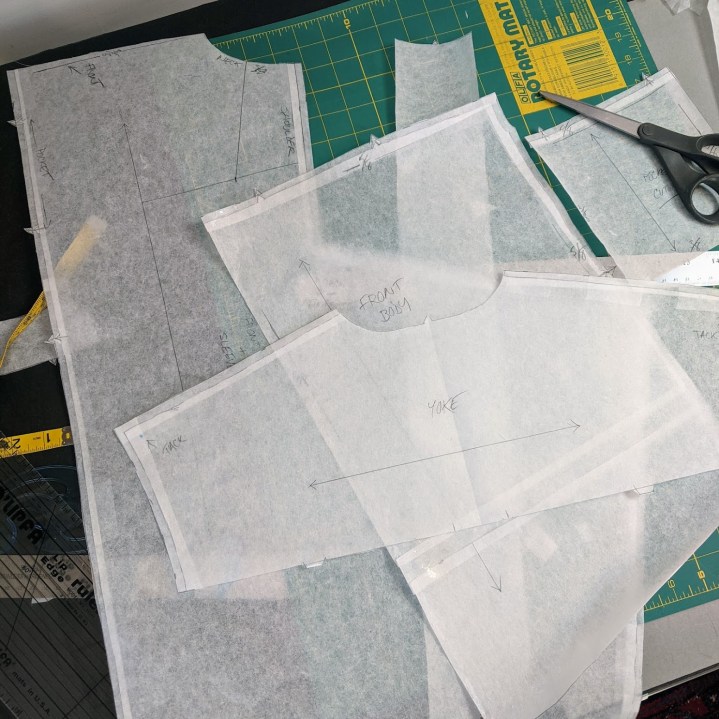
This is a very oversized shirt which I wanted to be relaxed and wrinkly in a, dare I say, sophisticated way, not a huge 80’s way. As a man working with a pattern designed for women, I work from my measurements and the finished garment measurements, (which are thankfully provided with this pattern). A huge “Thank You” is deserved for that! I ignored the 6 – 28 sizing all together and started with the neck measurement. I measured the collar band from button hole to button. My neck size is 15 1/2 which corresponded to a size 10. From there I proceeded with a muslin, which I can’t recommend enough. There is some unusual construction with this shirt, and having a practice run is well worth the time. That way you’ll be ready for the tricky bits when they arrive.
I traced off the pattern and then decided later to increase most of the seam allowances to 5/8″. (It’s designed for 3/8″) I’m very glad that I did, just for the peace of mind and extra confidence that it gave me during the construction.
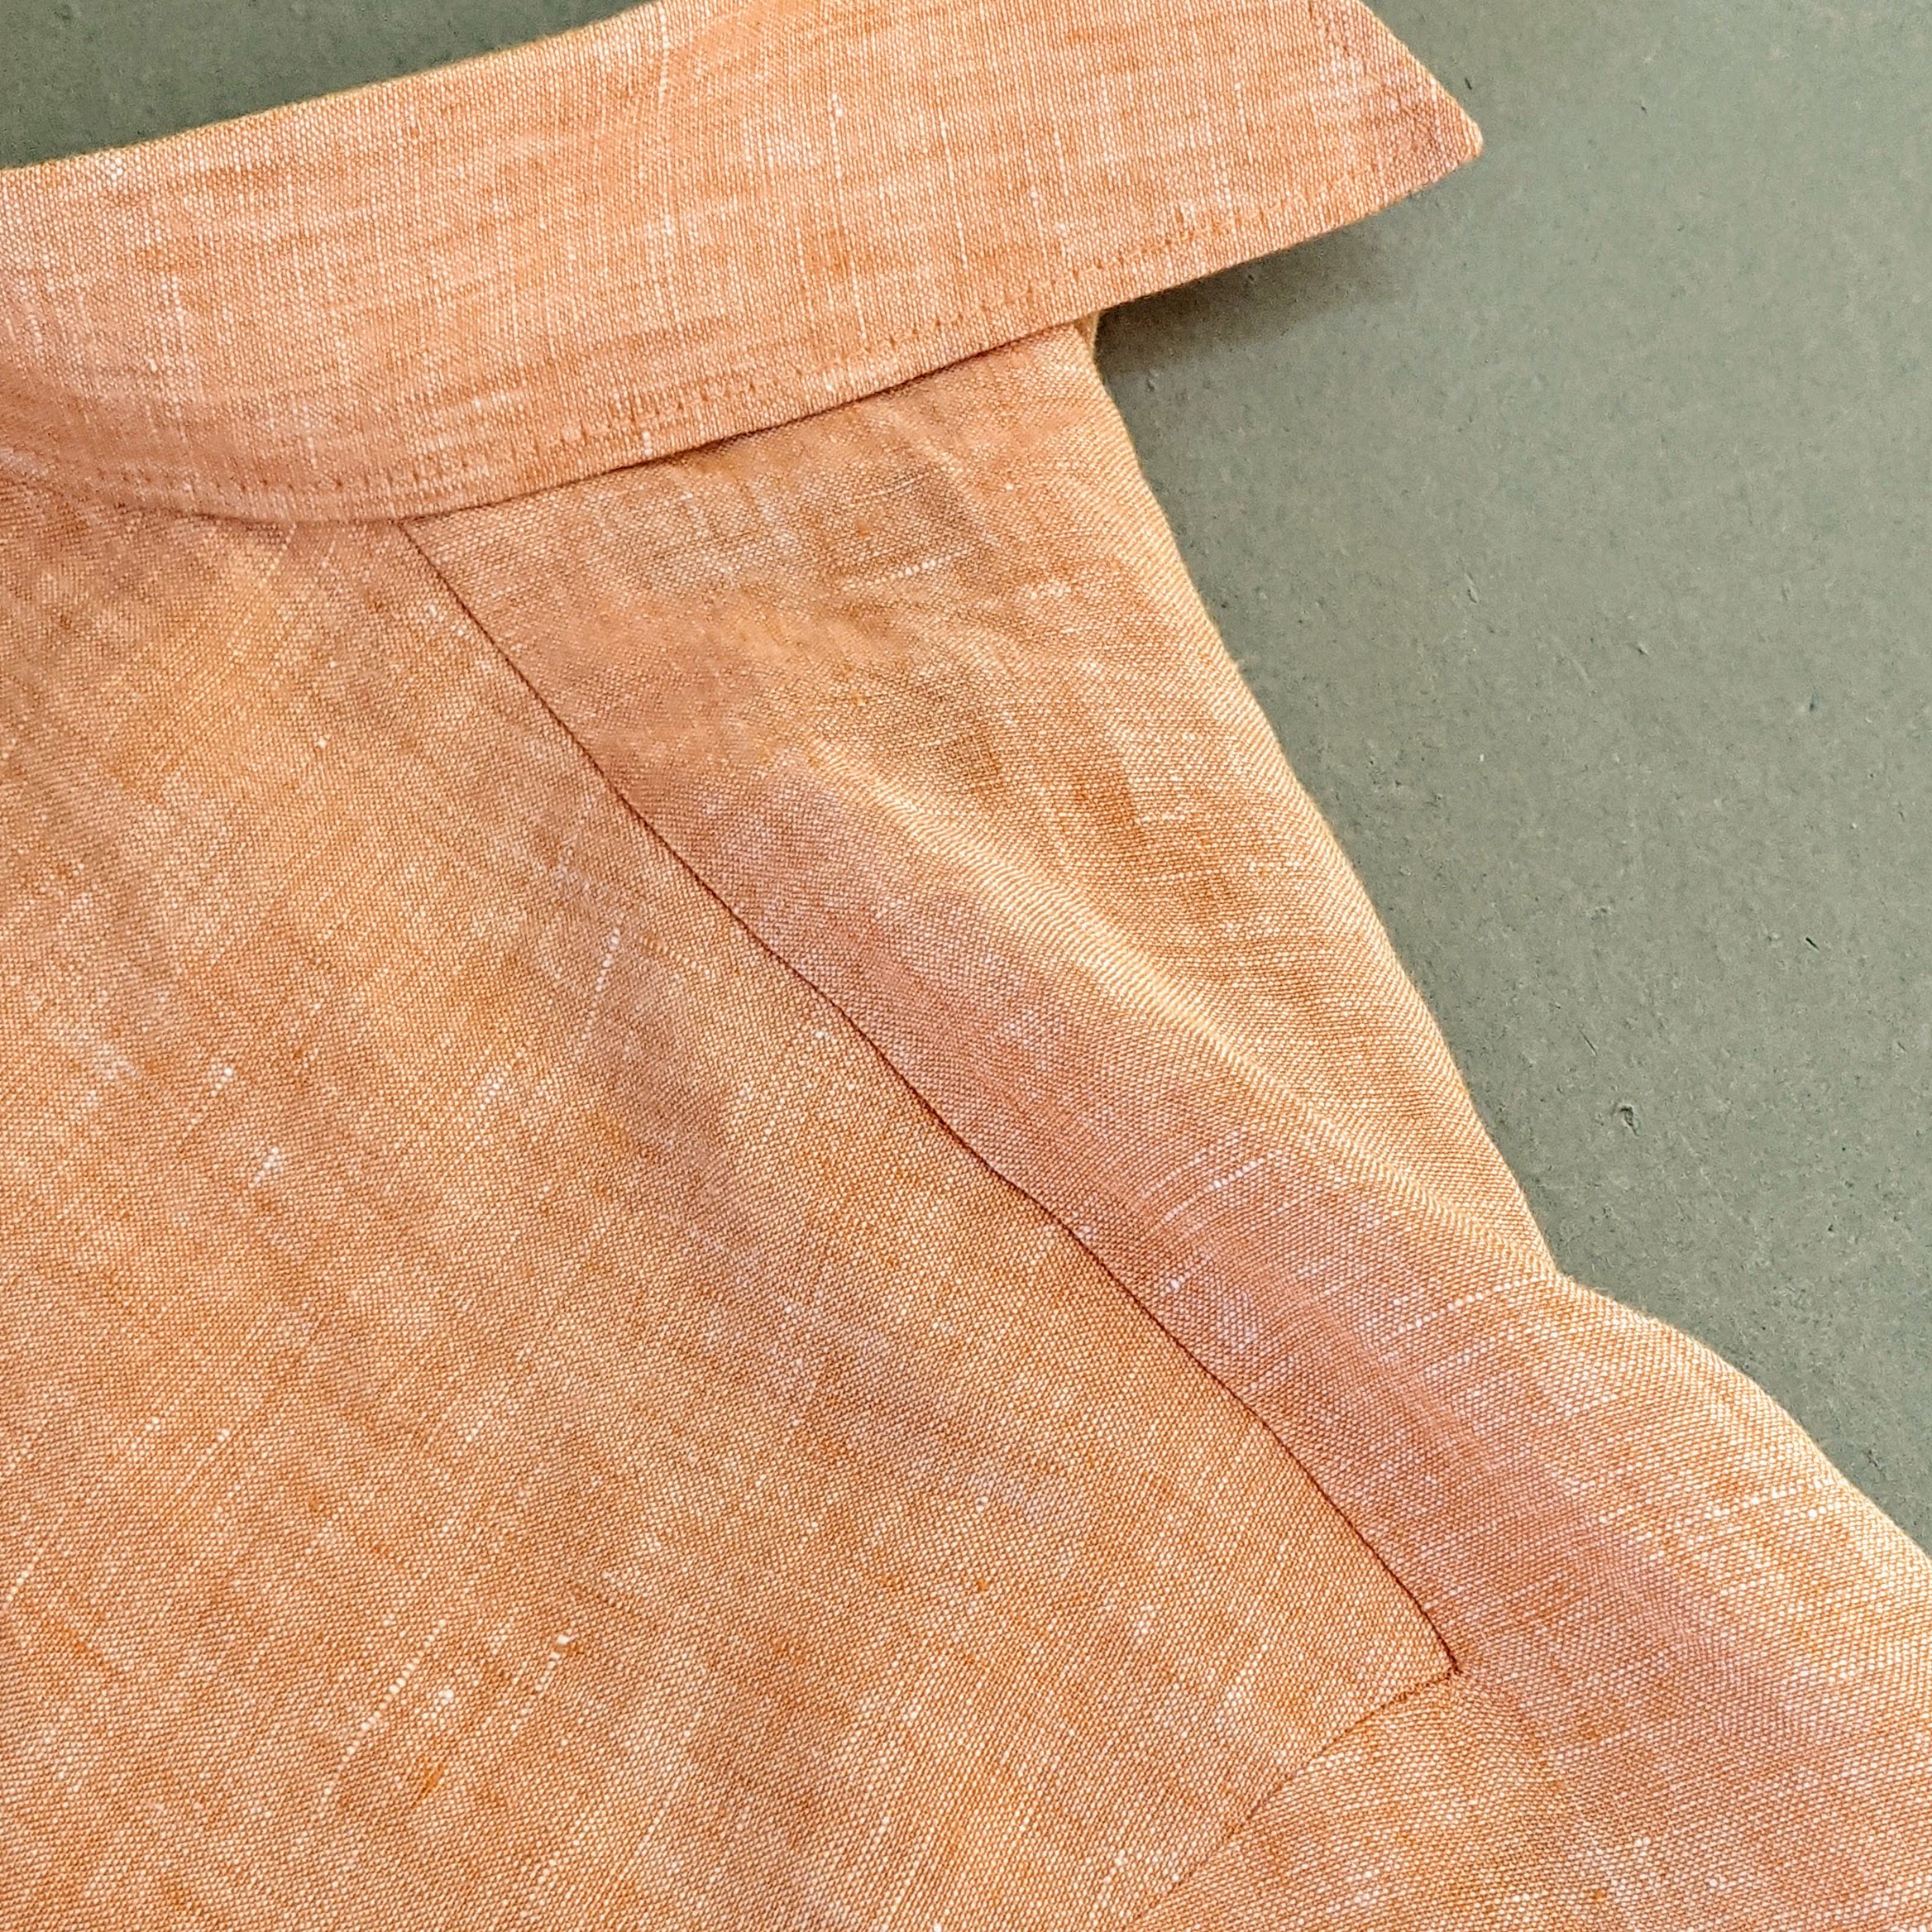
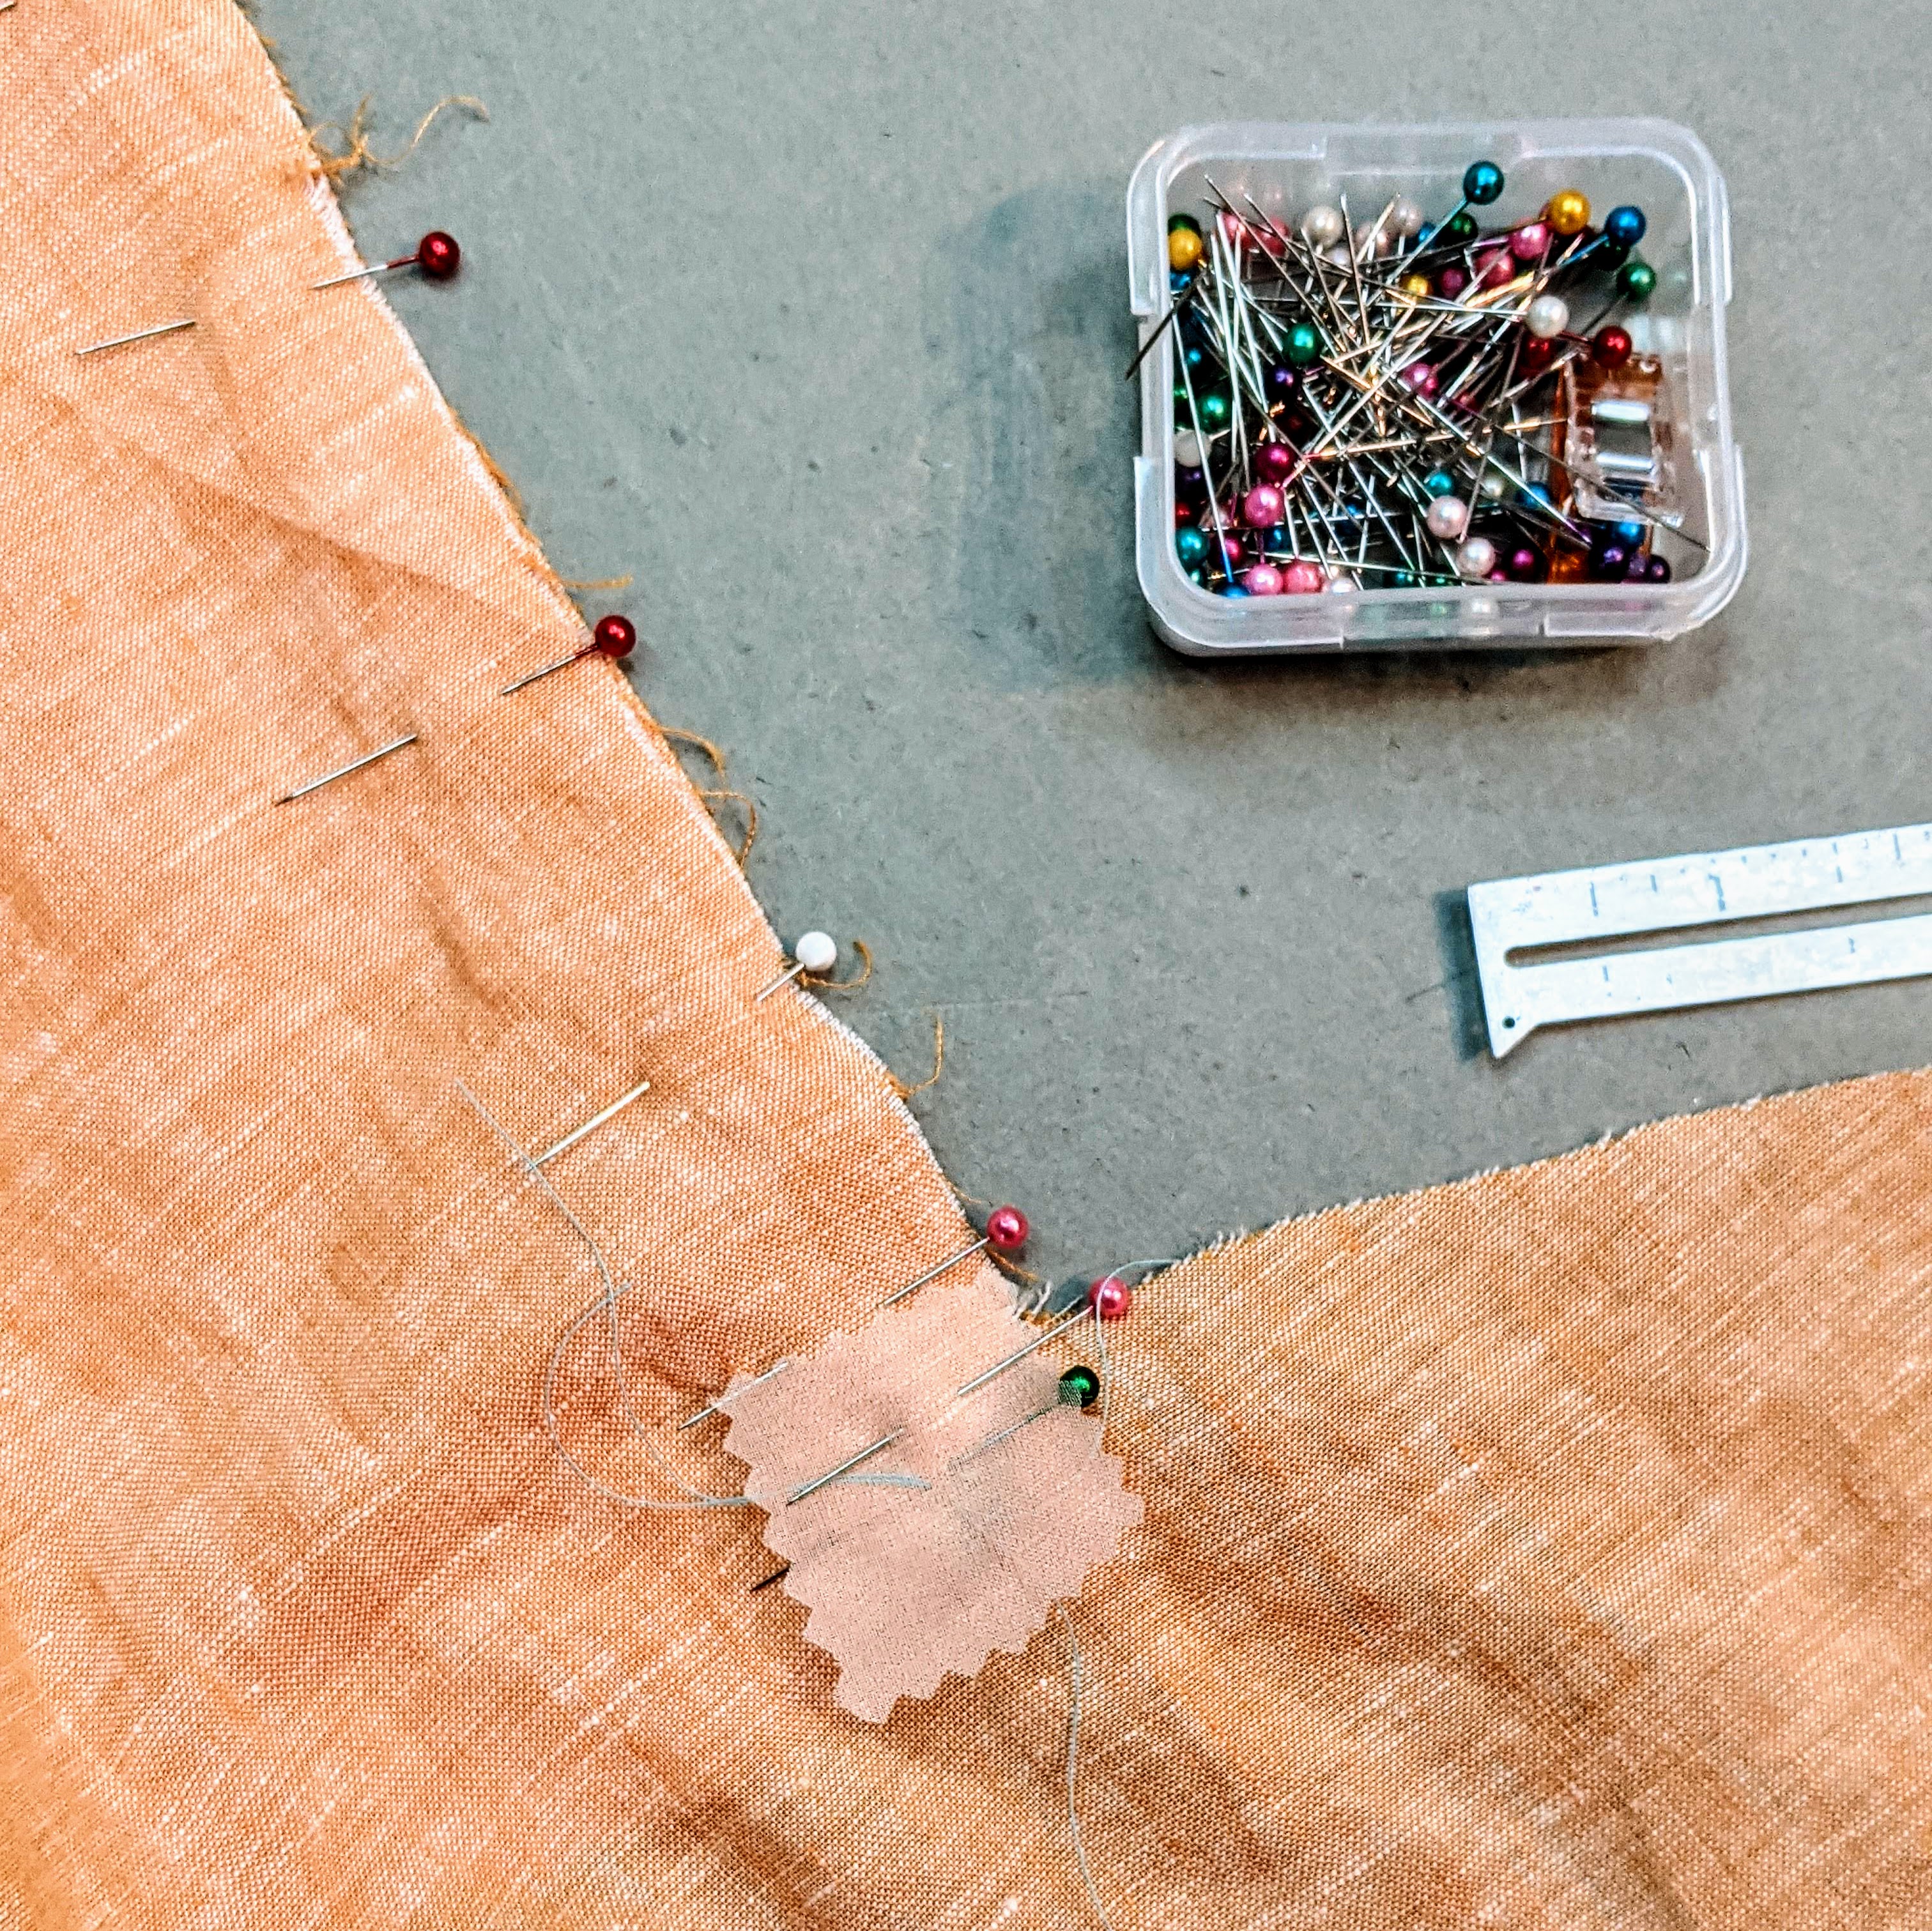
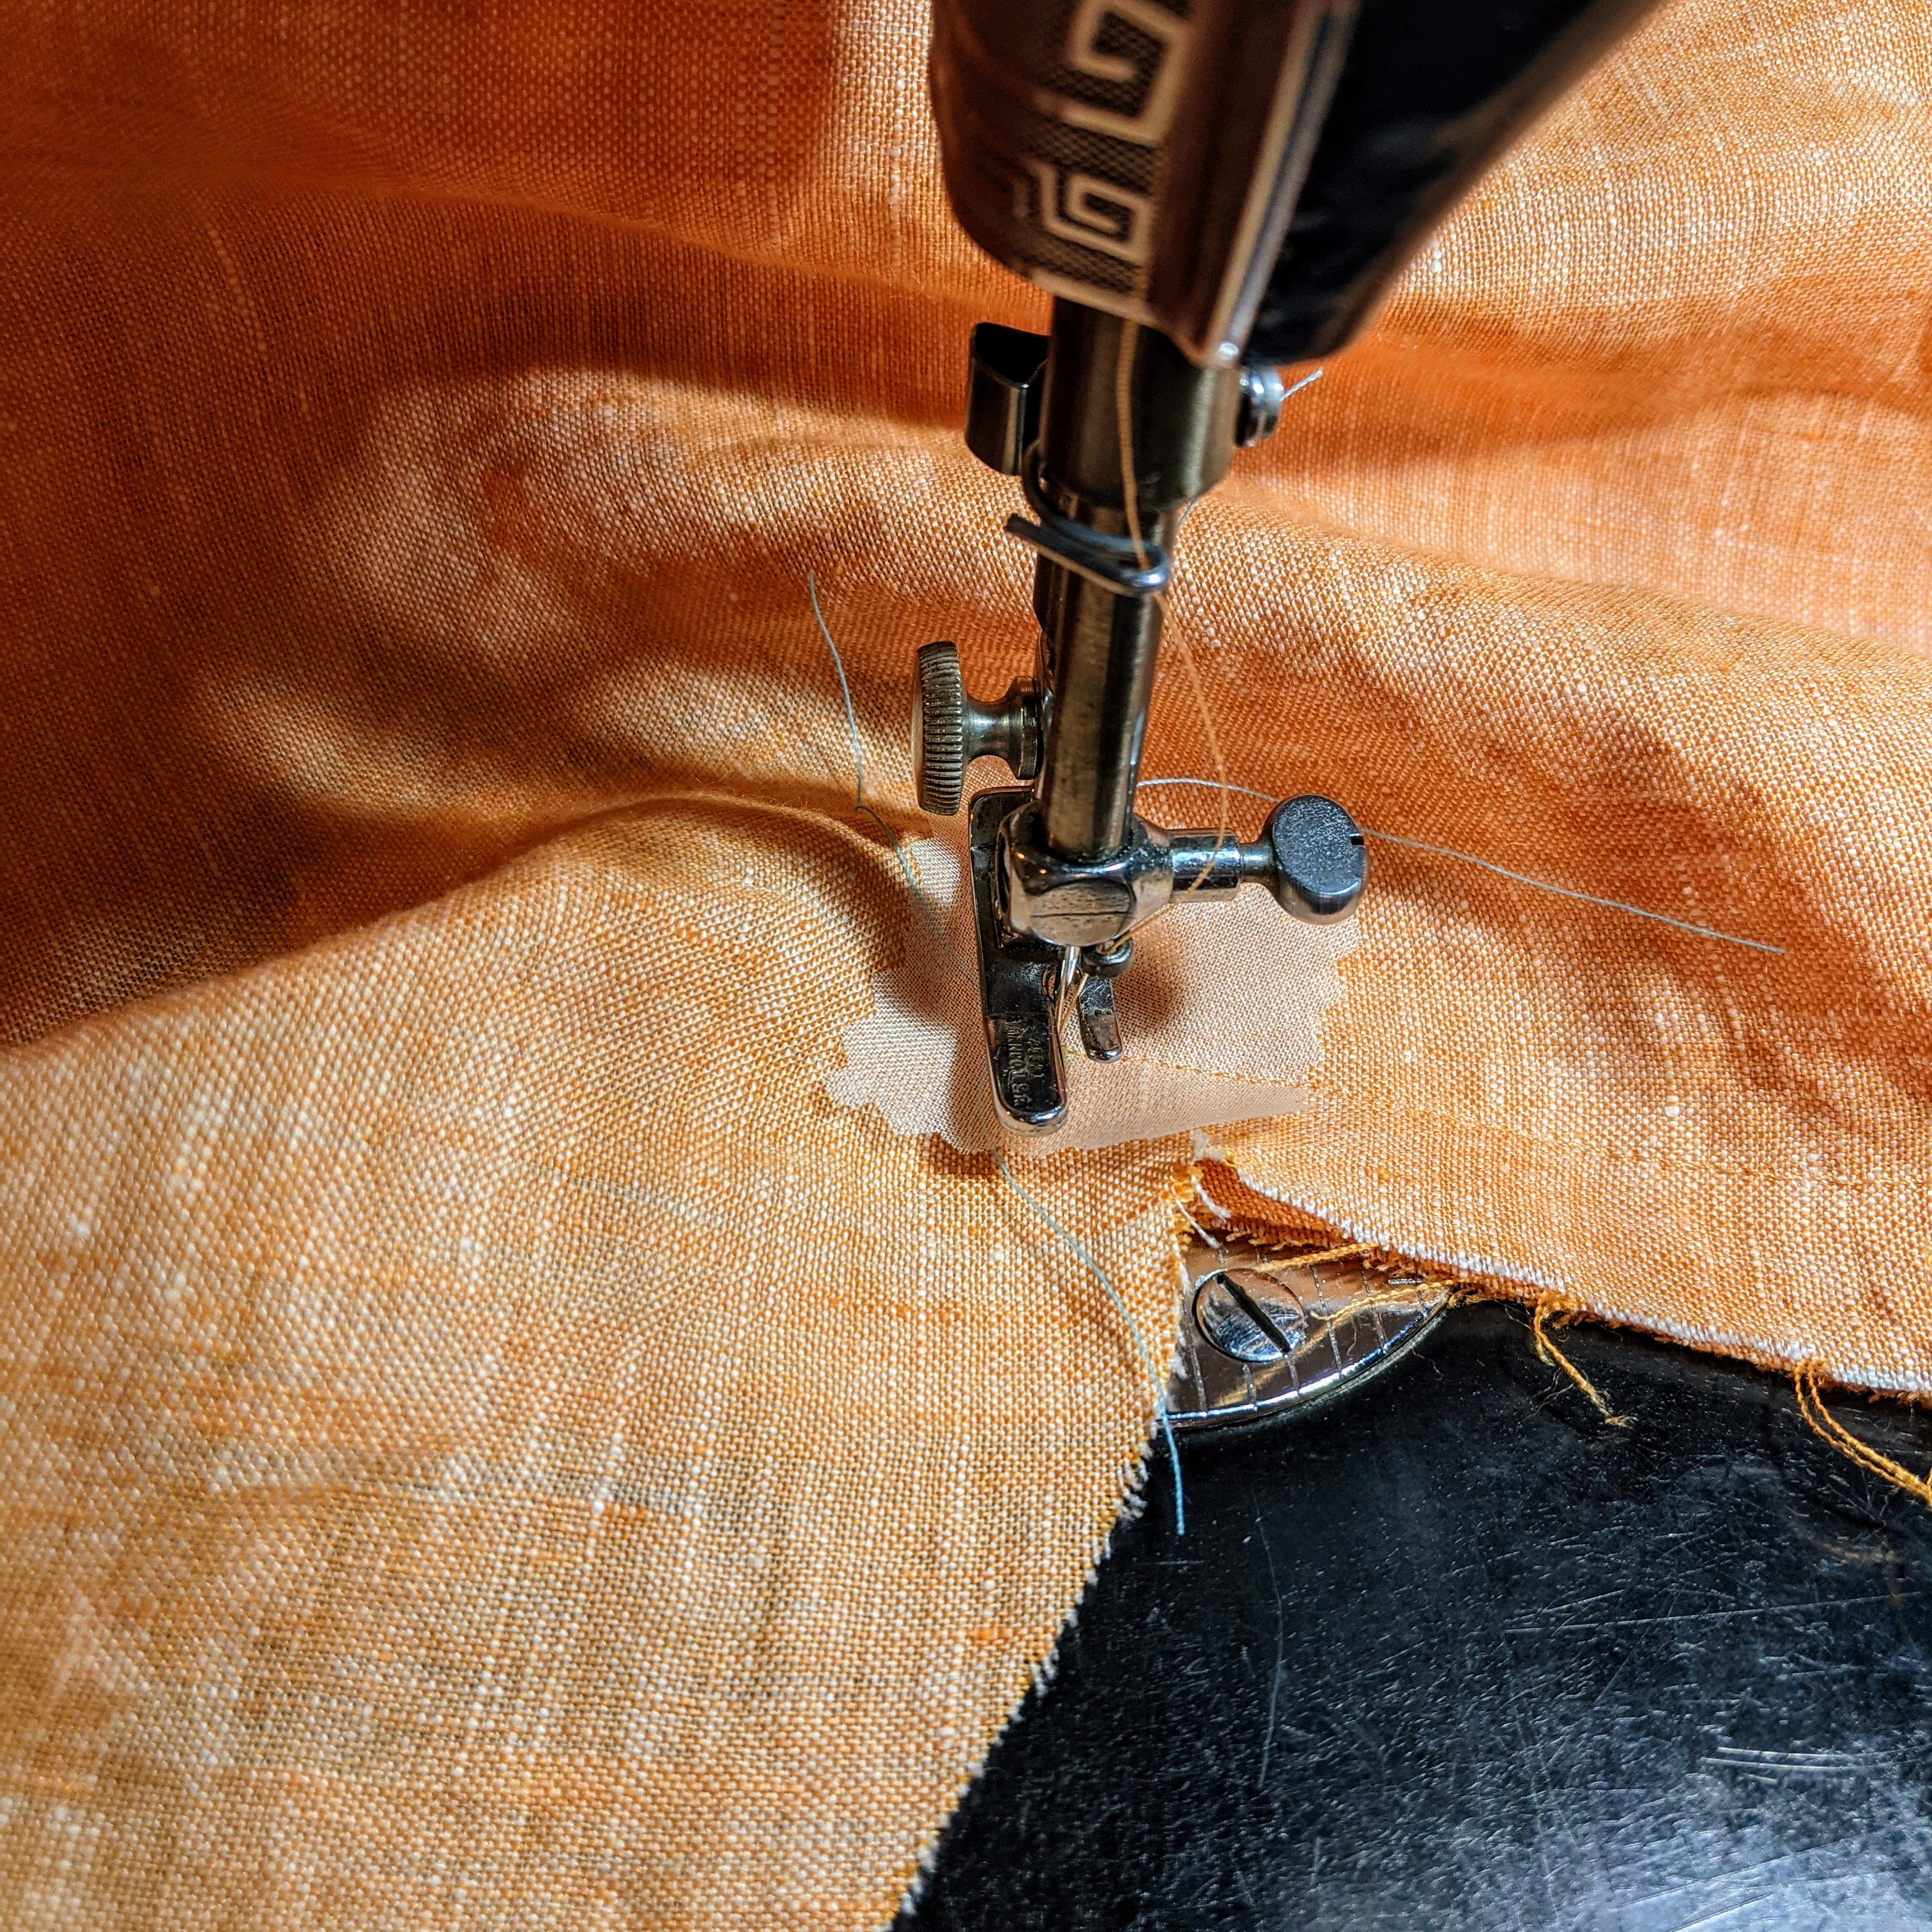
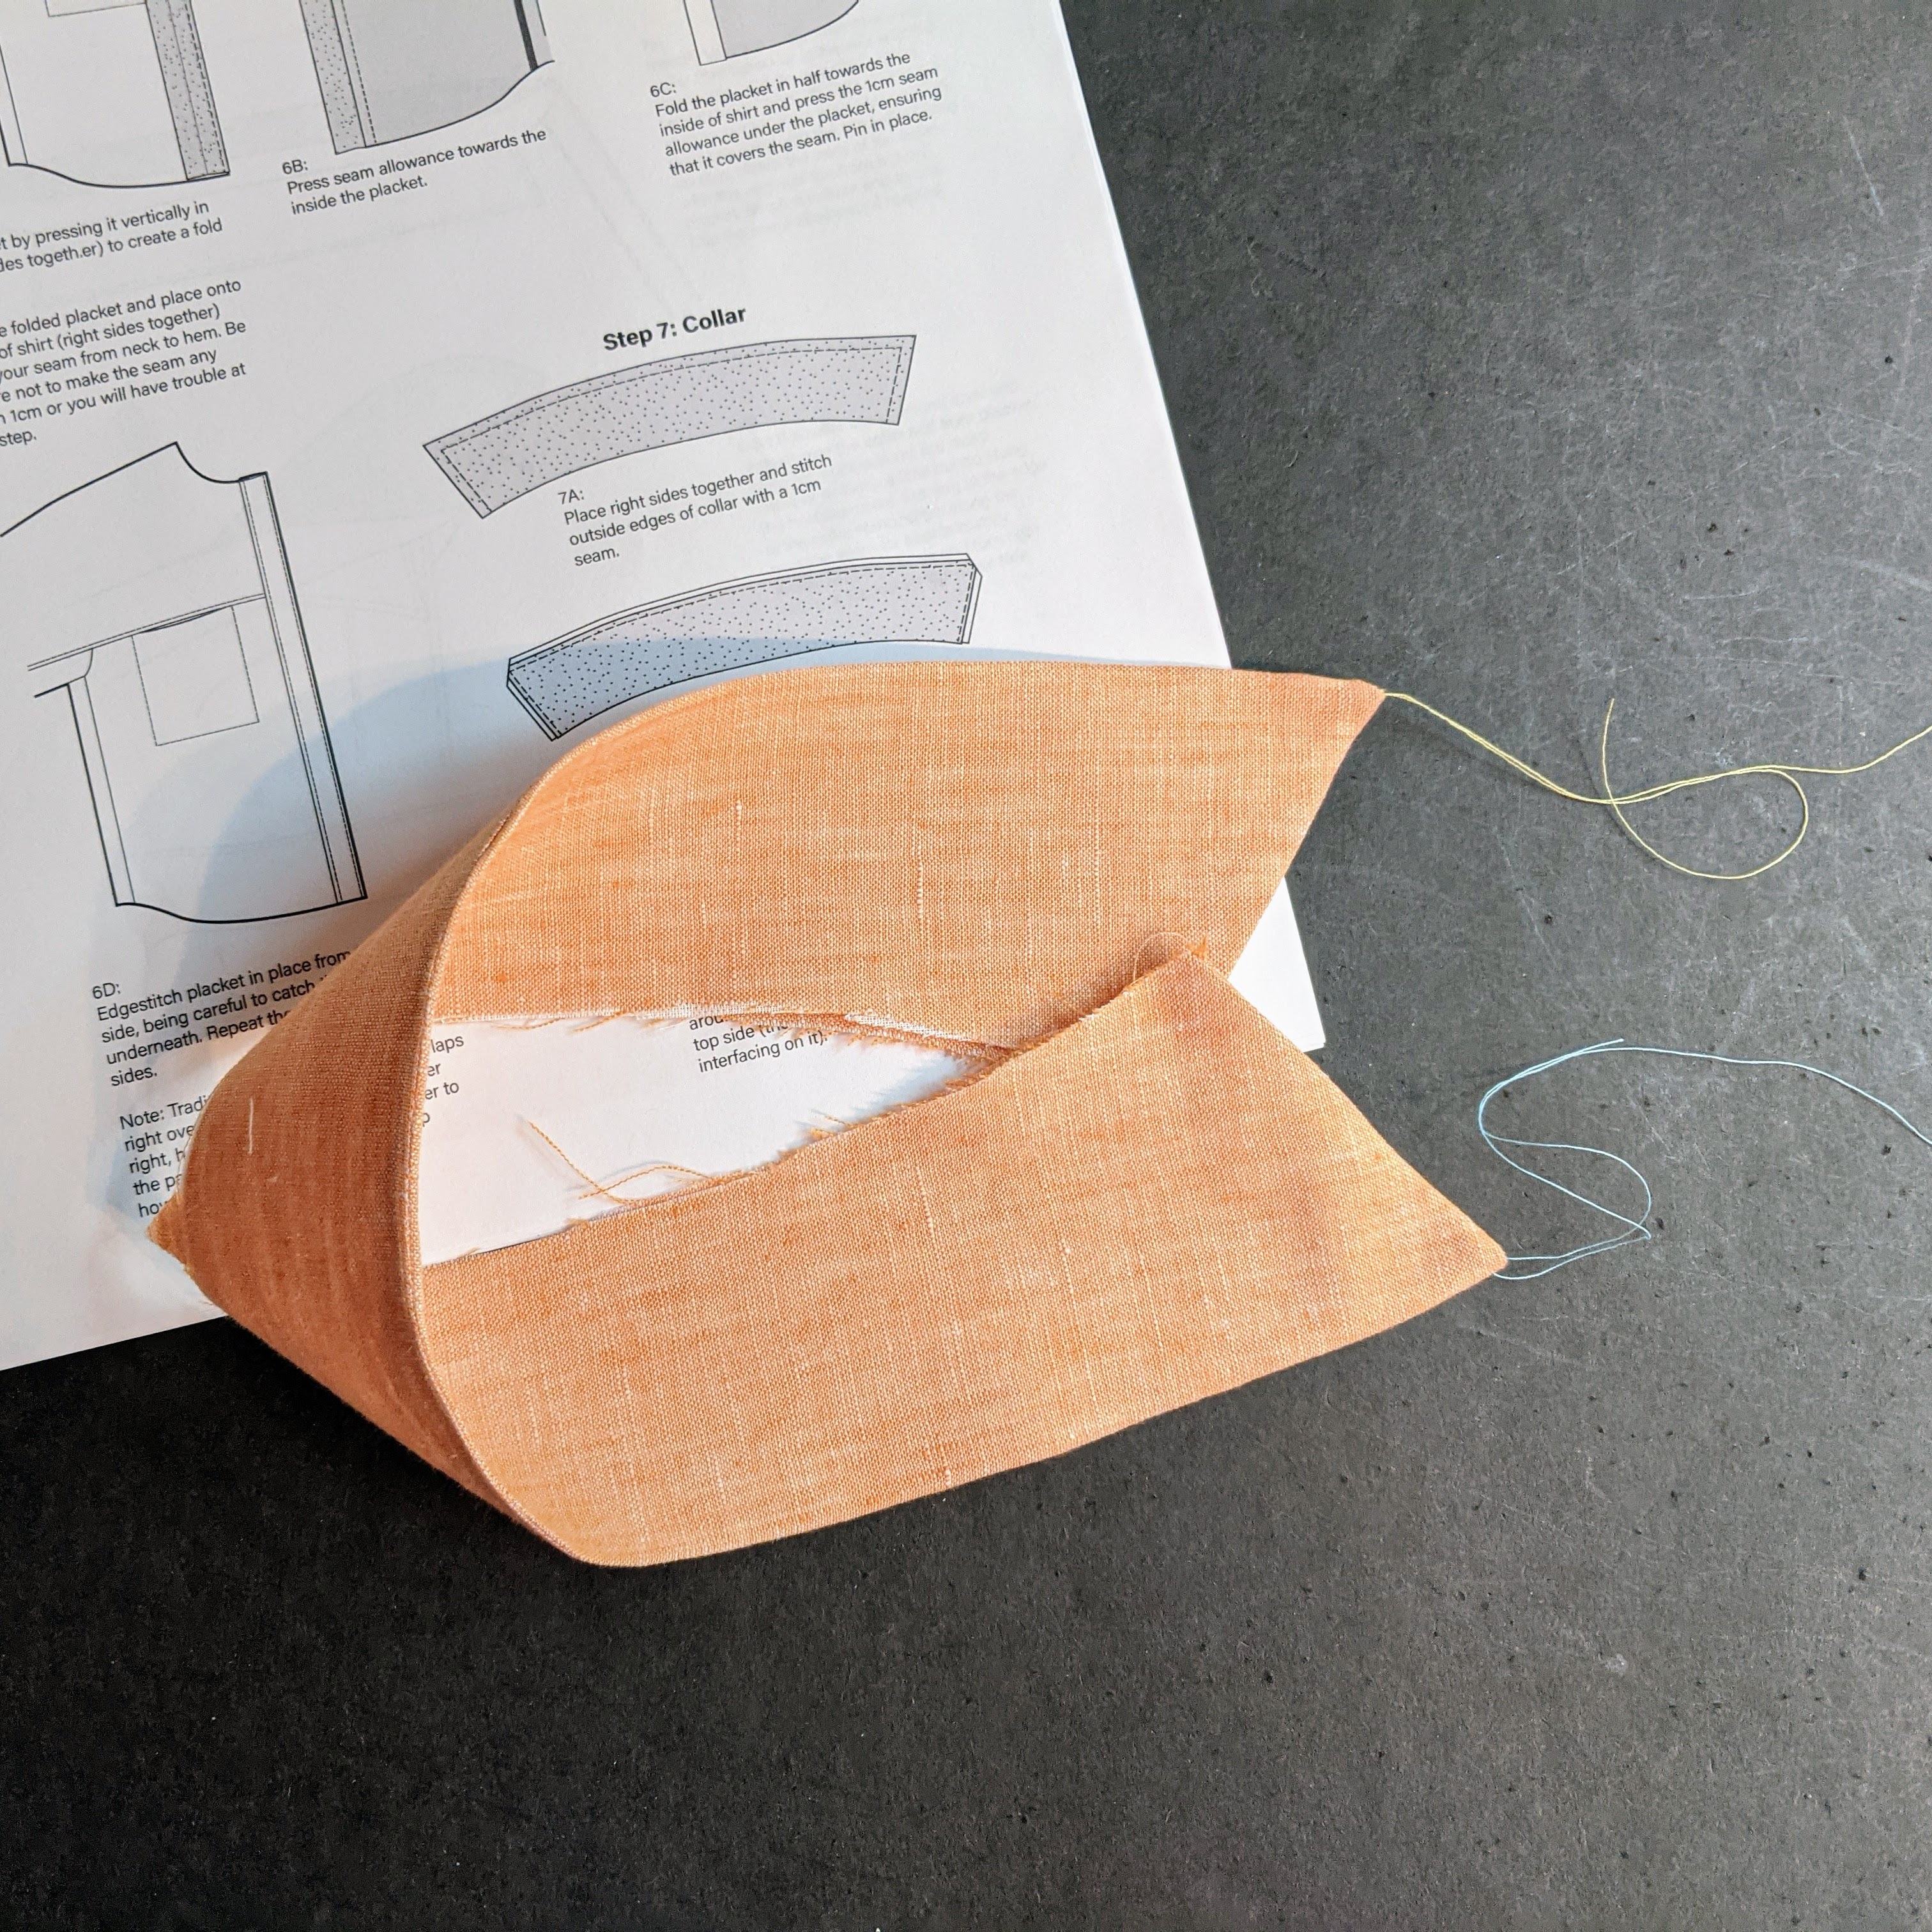
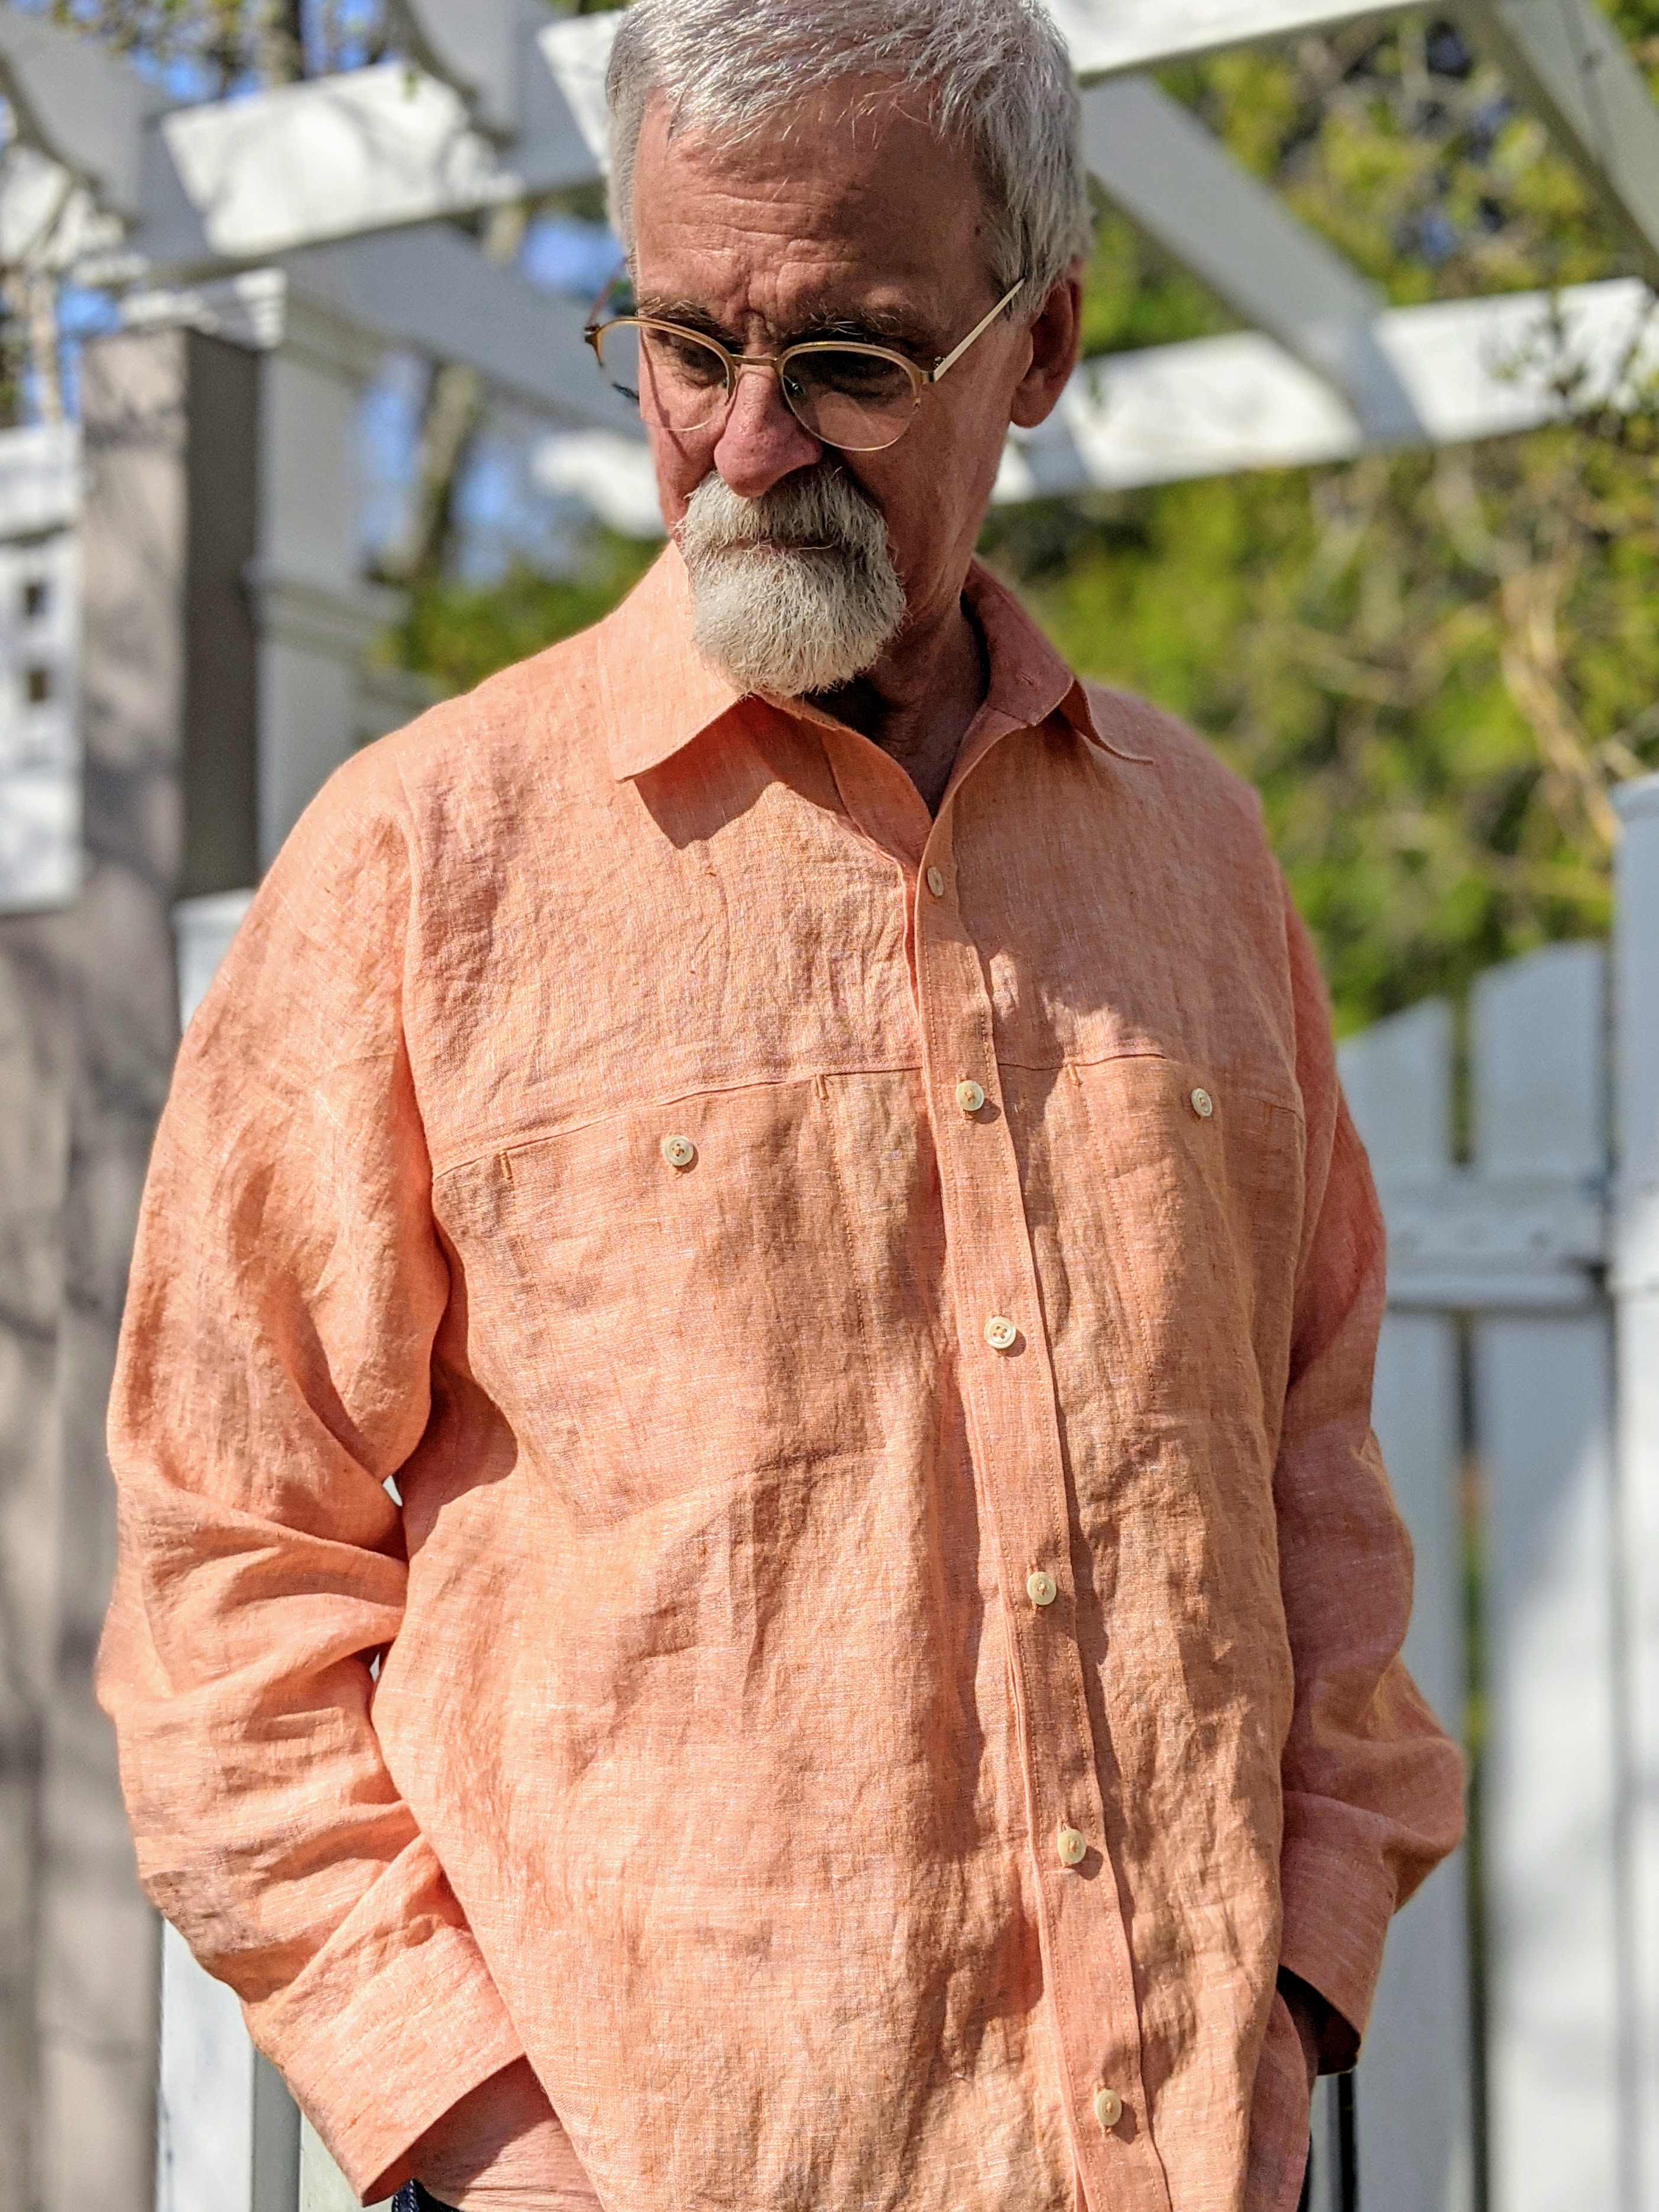
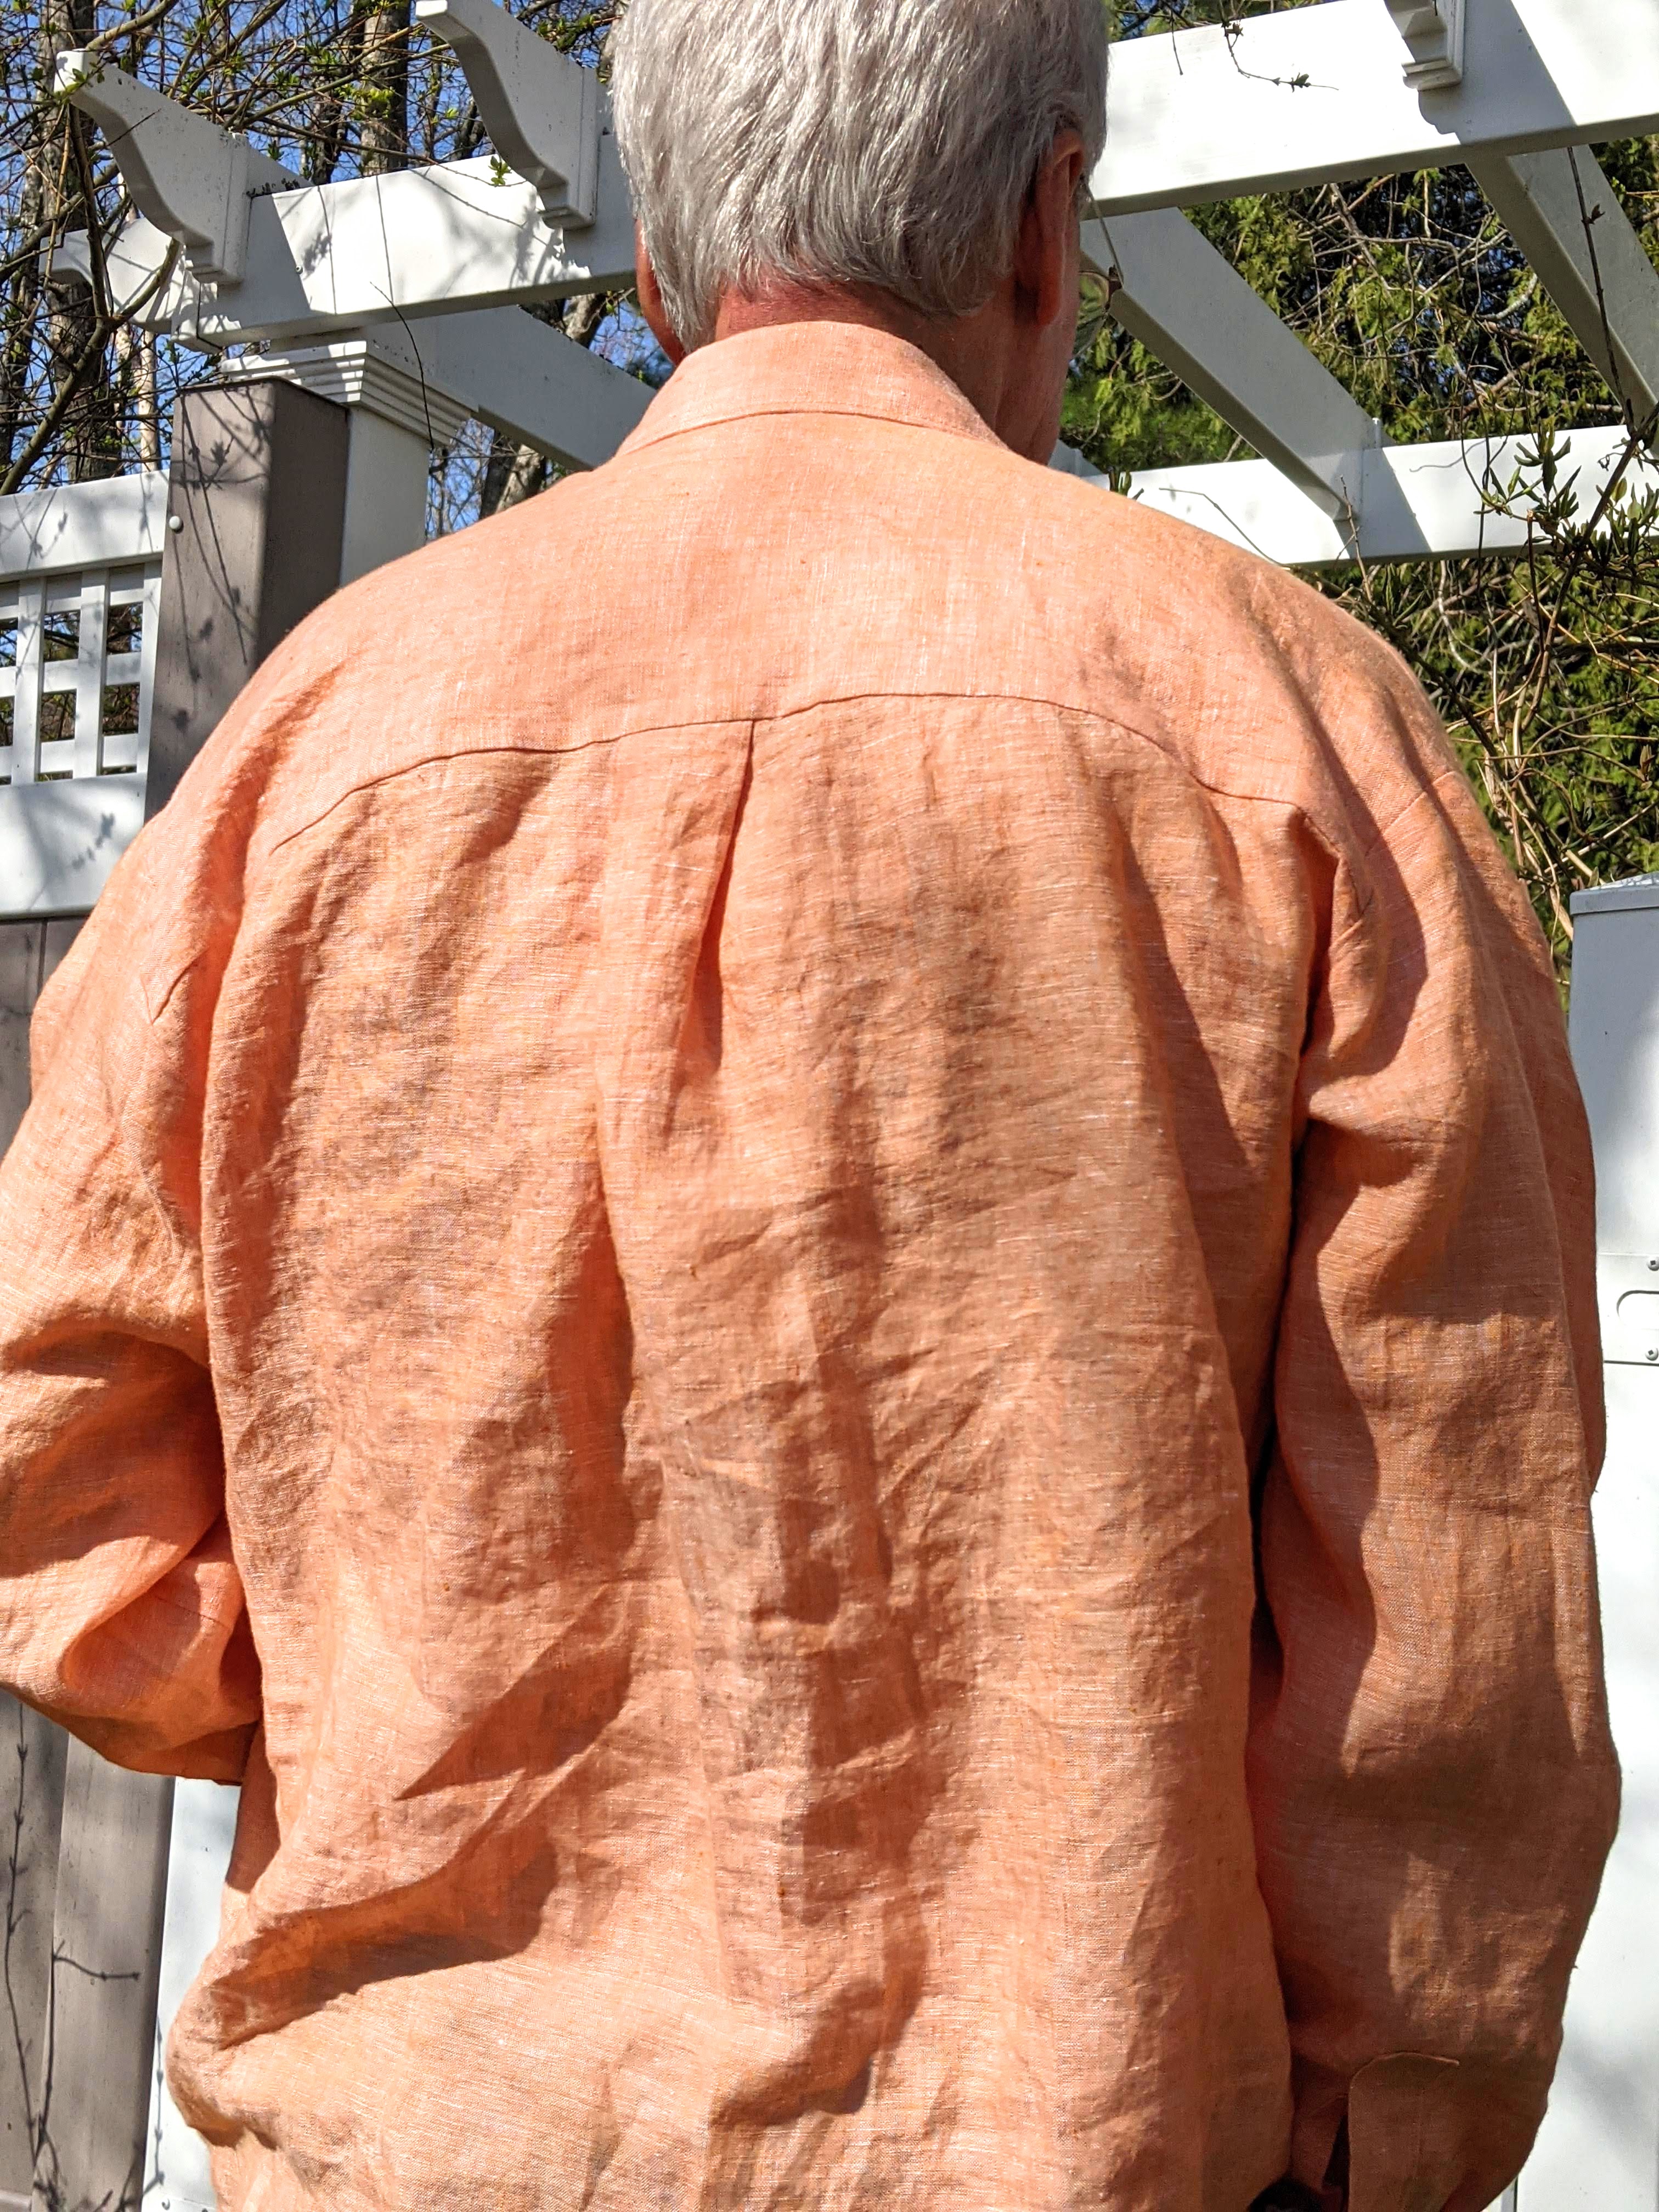
The real defining feature of this shirt is the 90 degree corner where the back yoke meets the upper front / sleeve piece. I’ve never seen anything like it, and I love it! It requires some careful clipping (always nerve-wracking), so you’ll be glad you did that practice run. Because the clipping produces a degree of weakness along the seam, I reinforced the corner with a little scrap of silk organza. Hopefully, it will help preserve this feature from coming undone, which would be devastating. Paper Theory has an excellent YouTube sew-along for this shirt. I found it indispensable and reassuring, especially during some of the unique construction bits.
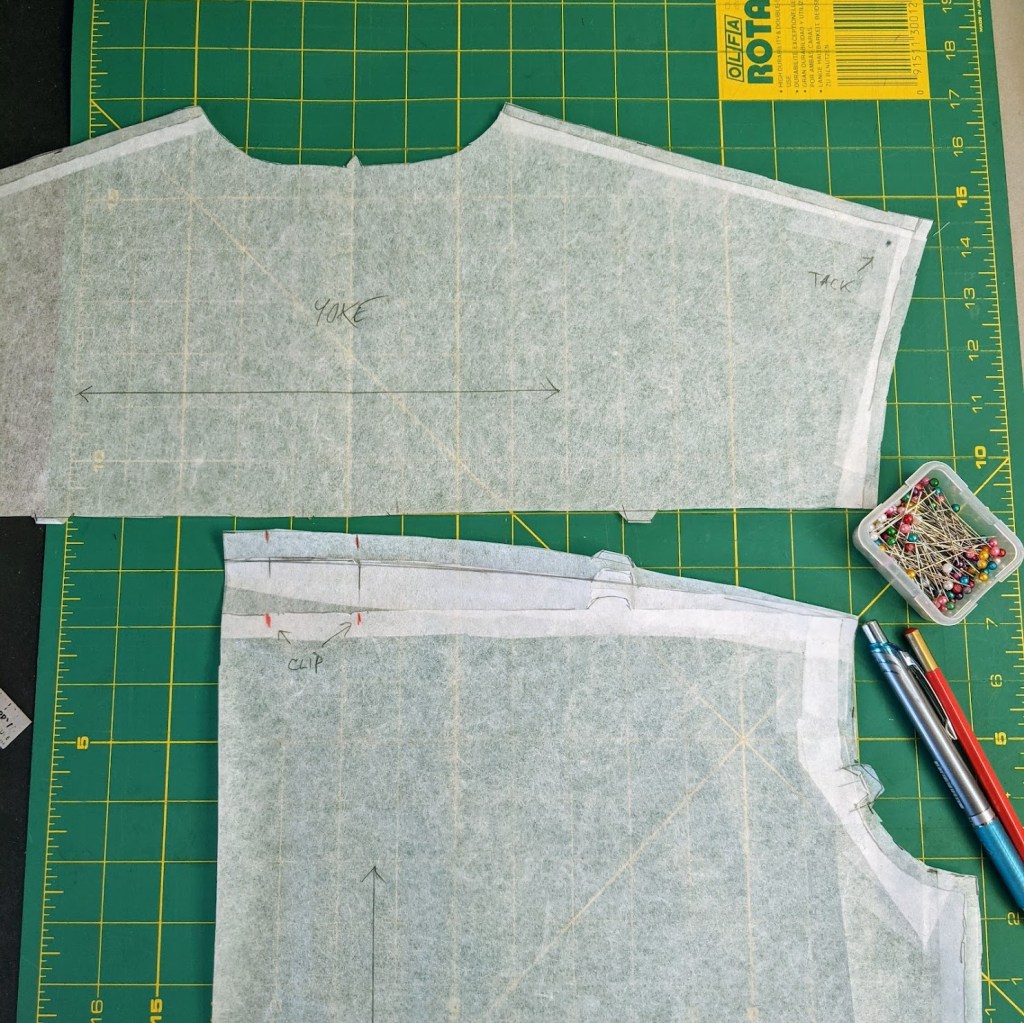
I almost always have fitting problems at the back of a collar. Because my upper back has curved forward with age, collars will pull away from the back of my neck. On a shirt with a yoke like the Olya, I counter this by adding a curve to the back piece. This provides the extra length that’s needed for the collar to move forward. The adjustment looks like this. The bottom of the yoke remains straight (important if you’re working with a striped fabric).
I also tweaked the collar and stand to give them a more “traditional menswear” appearance. I referred to my shirtmaking books by the late David Page Coffin to make those subtle changes. He was the consummate shirt “engineer”; and when I’m stumped by a fitting / pattern issue, the answer is always in one of his books.
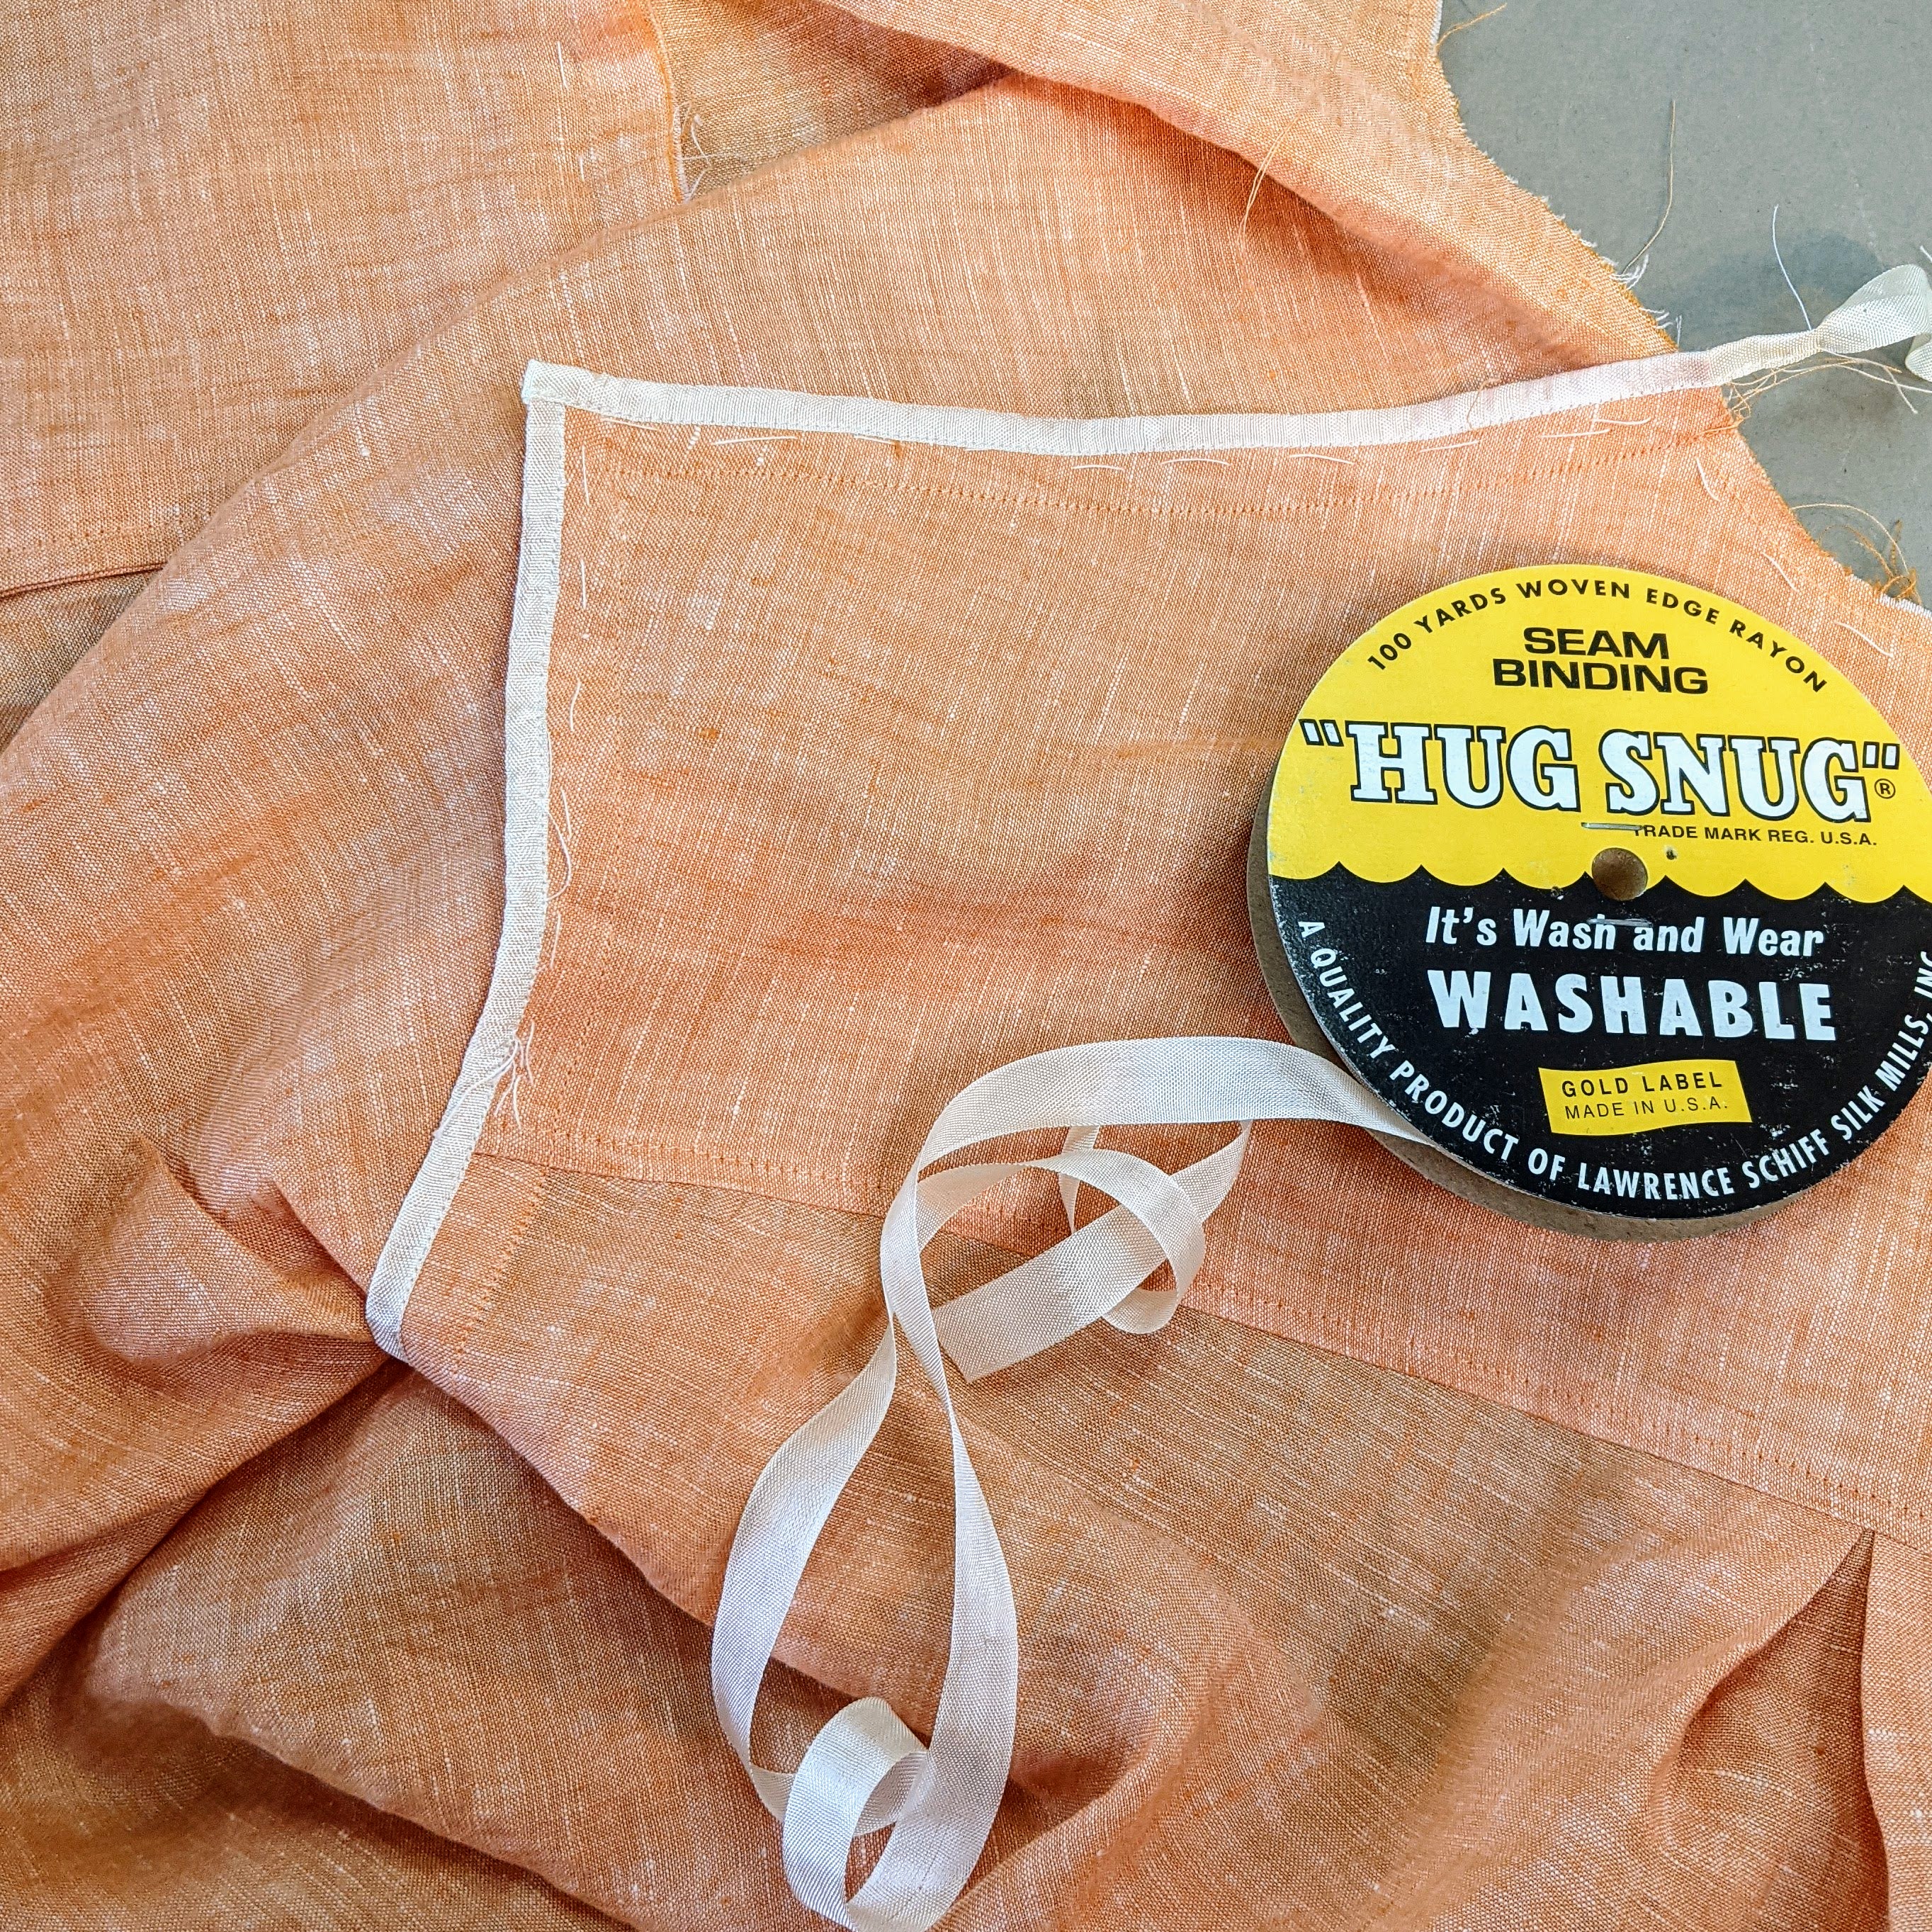
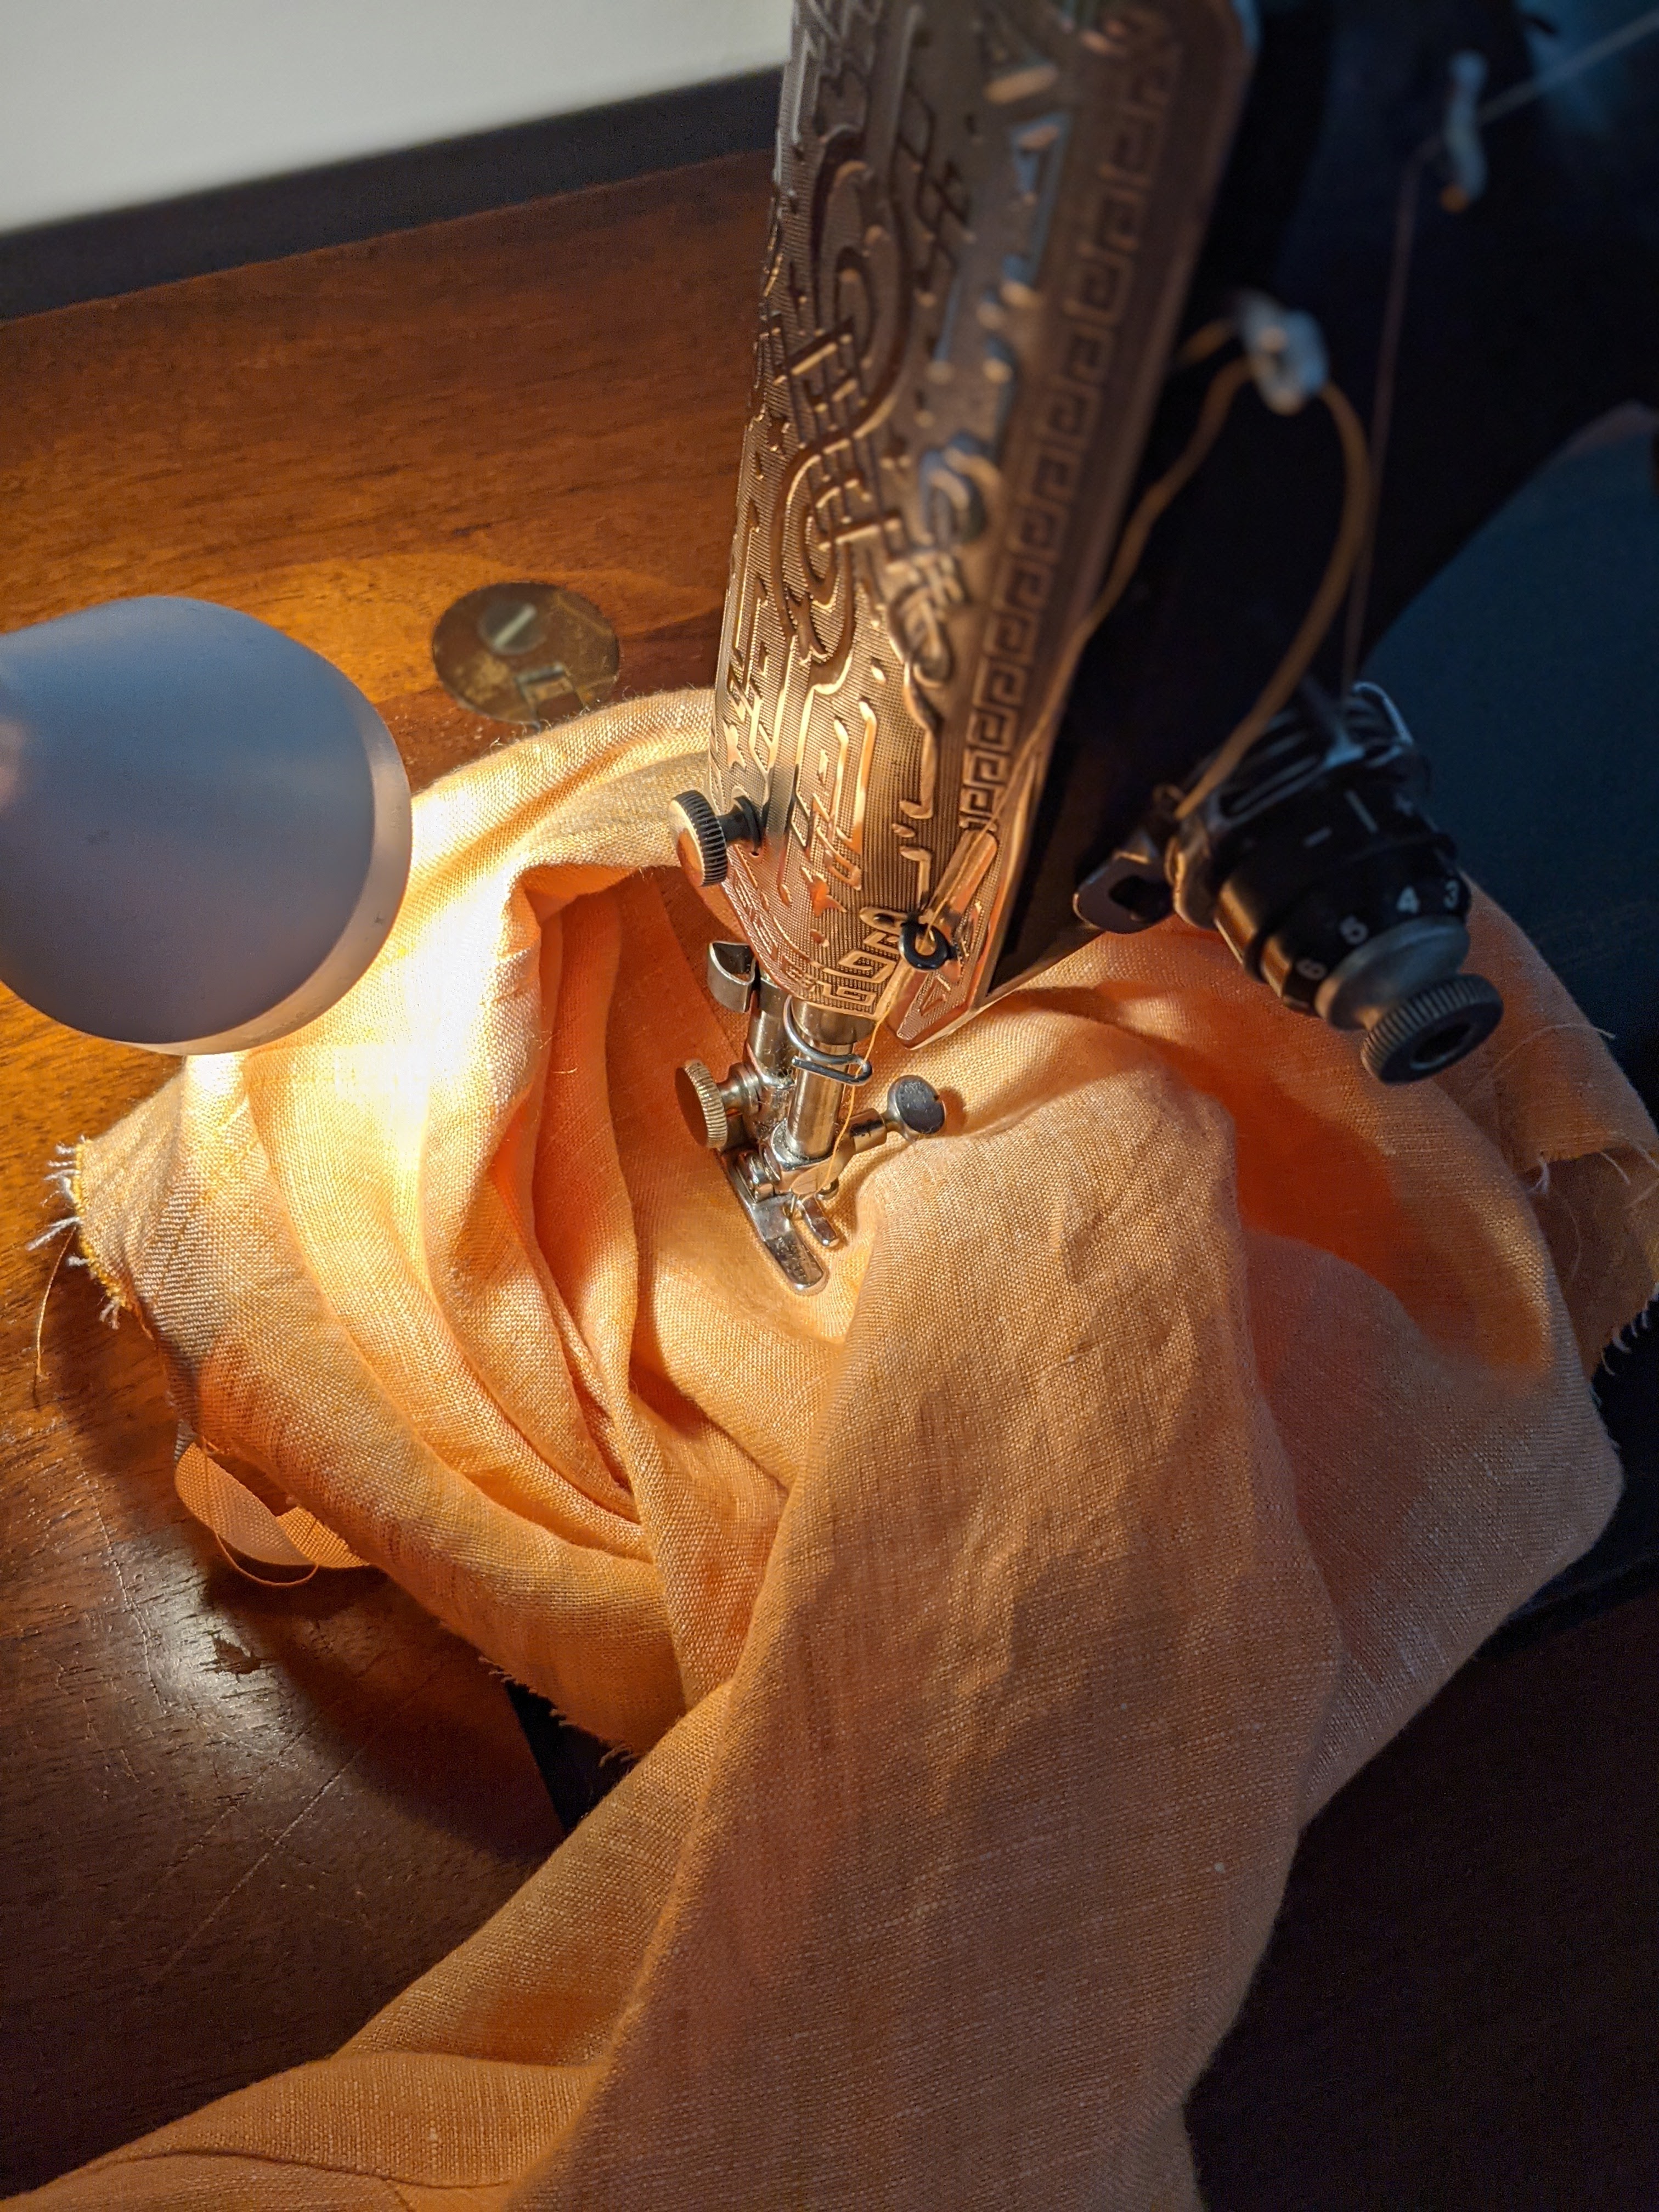
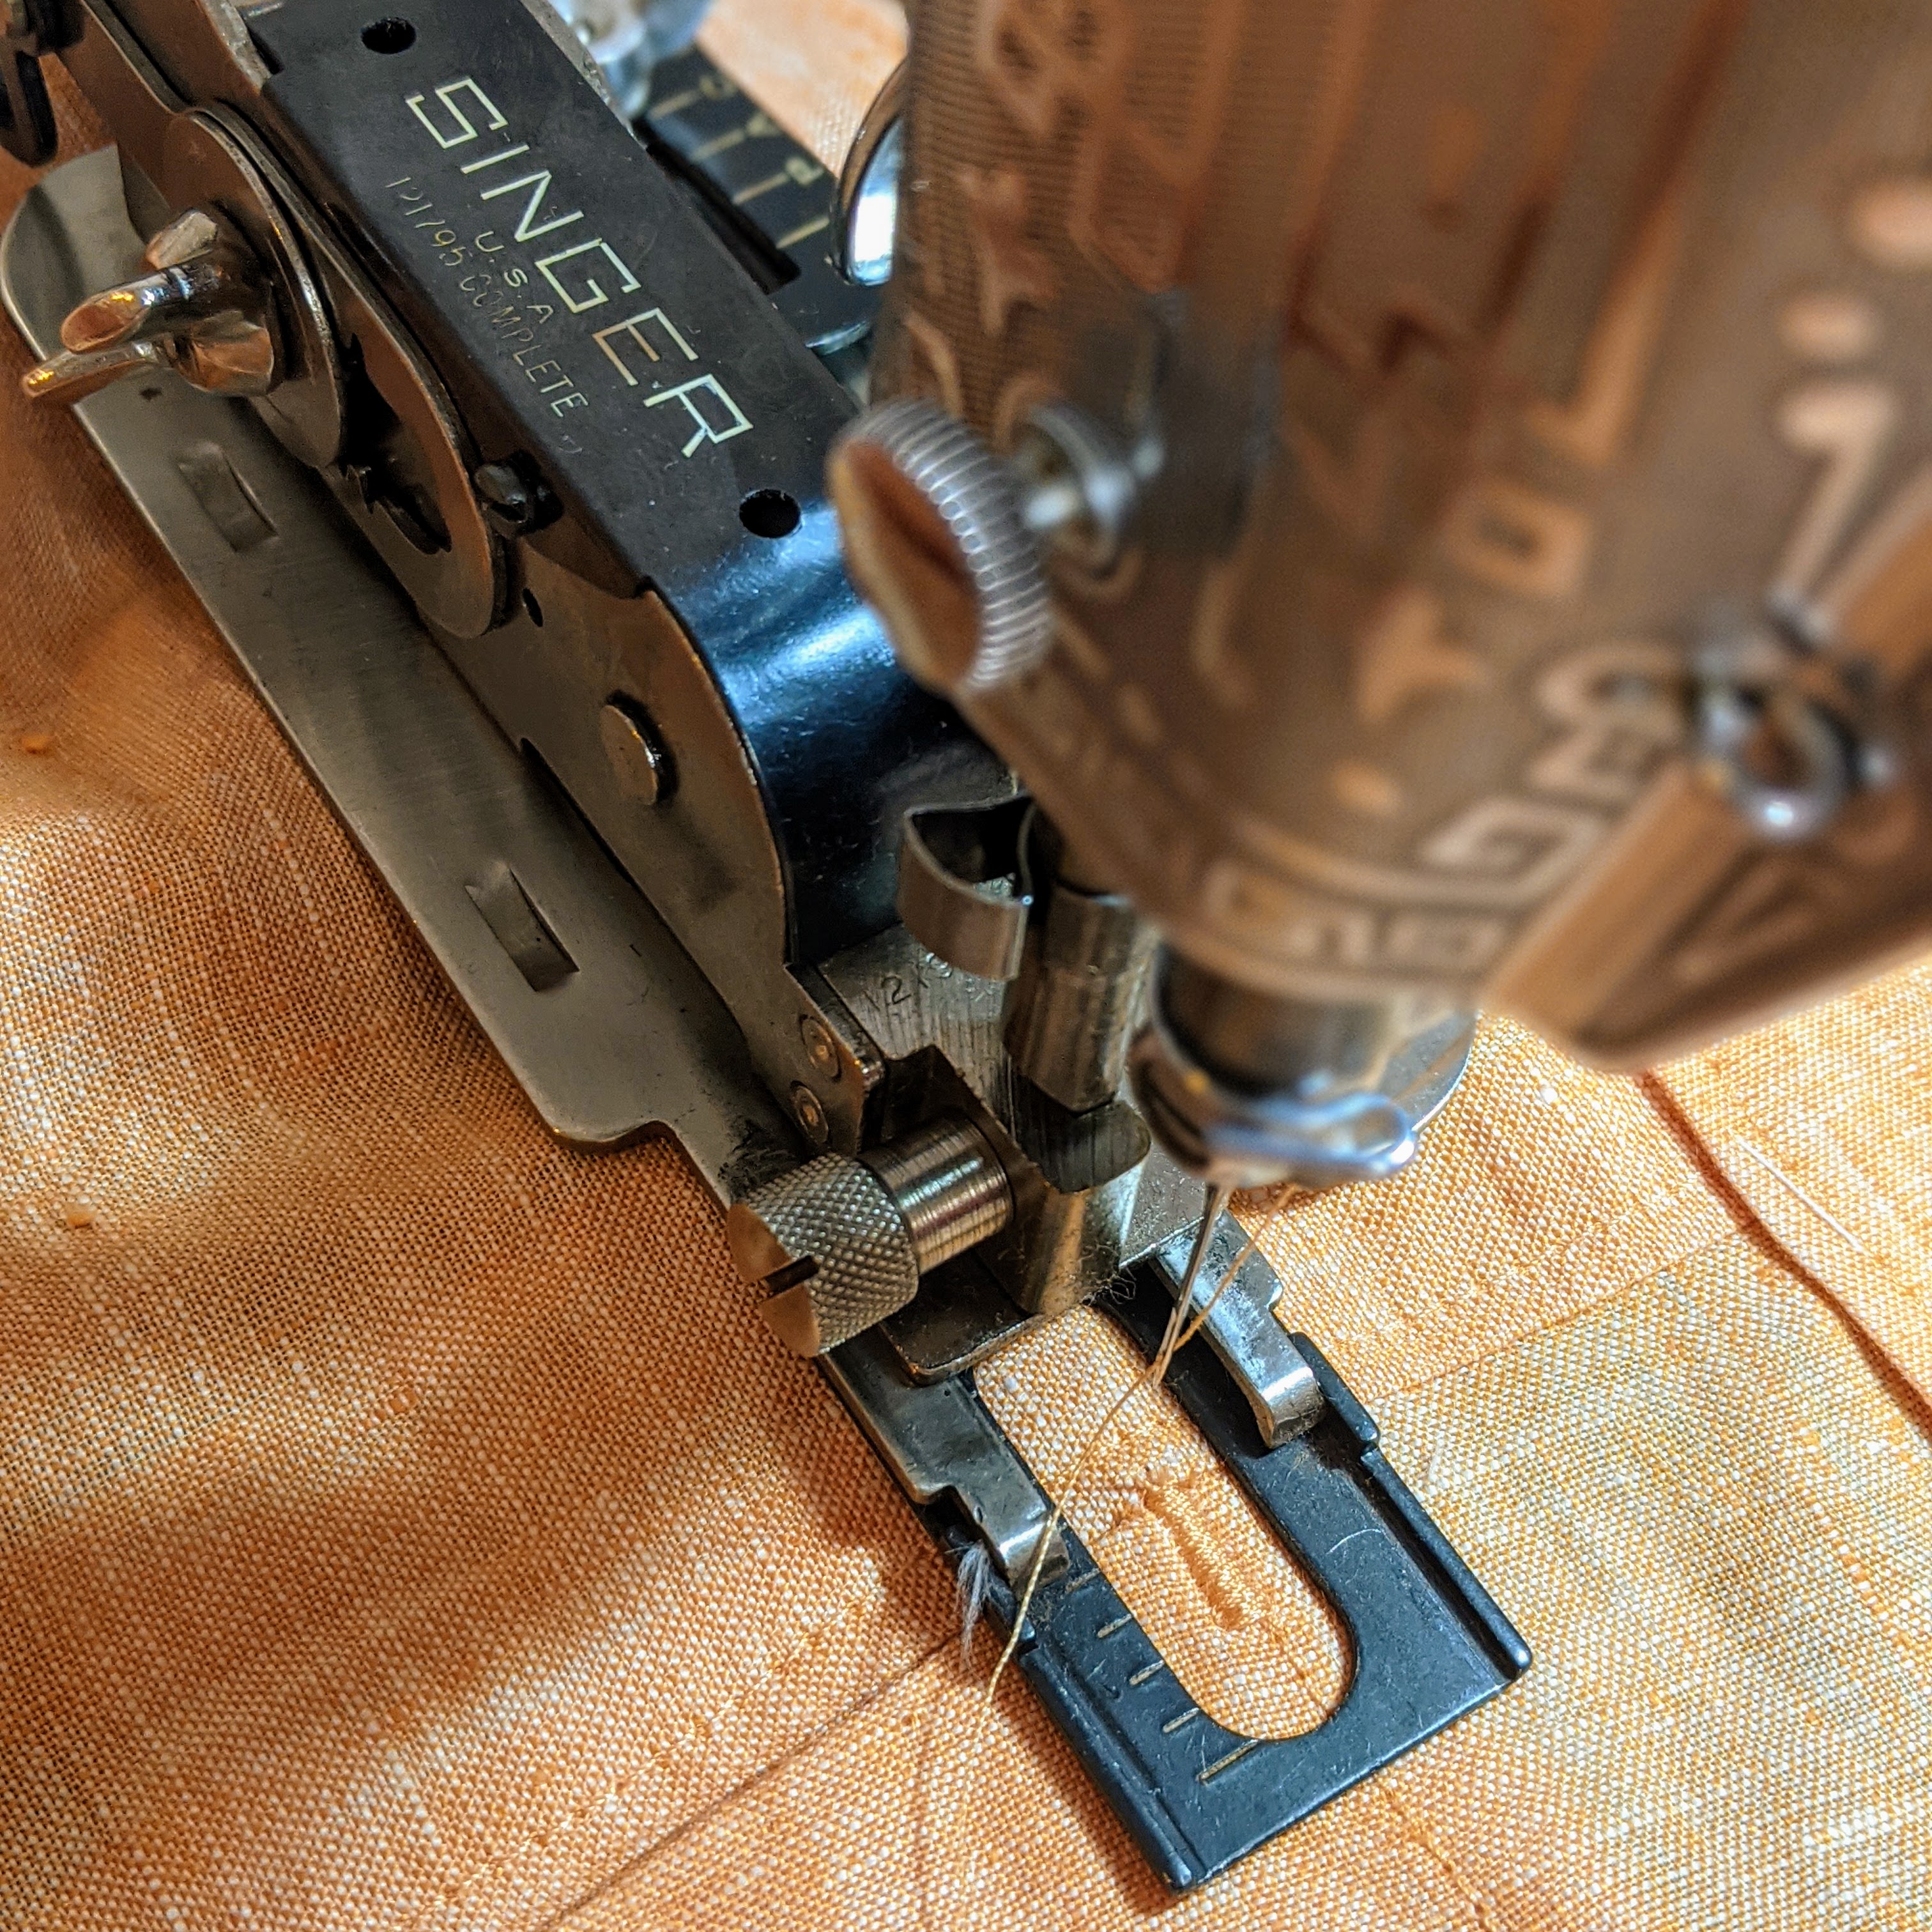
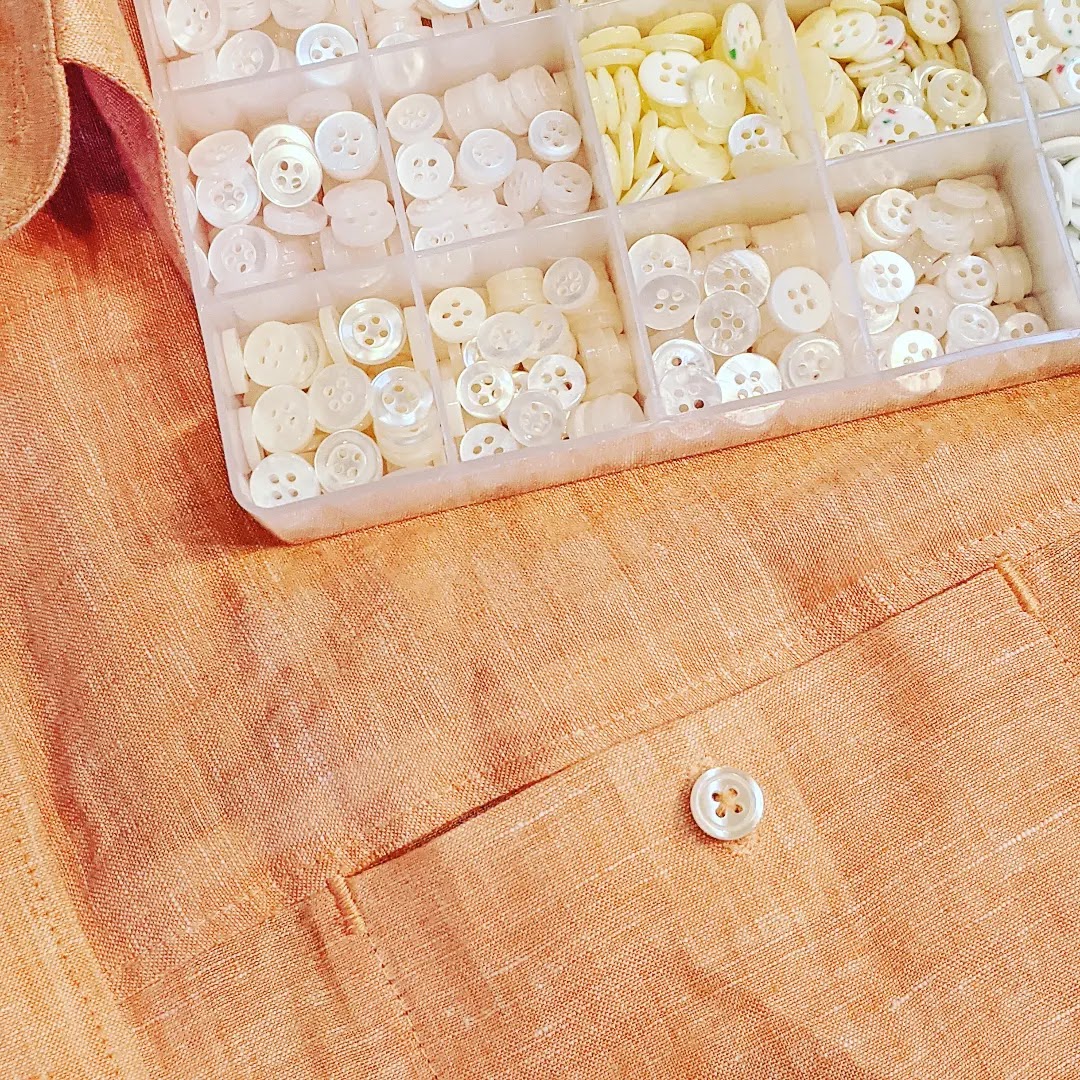
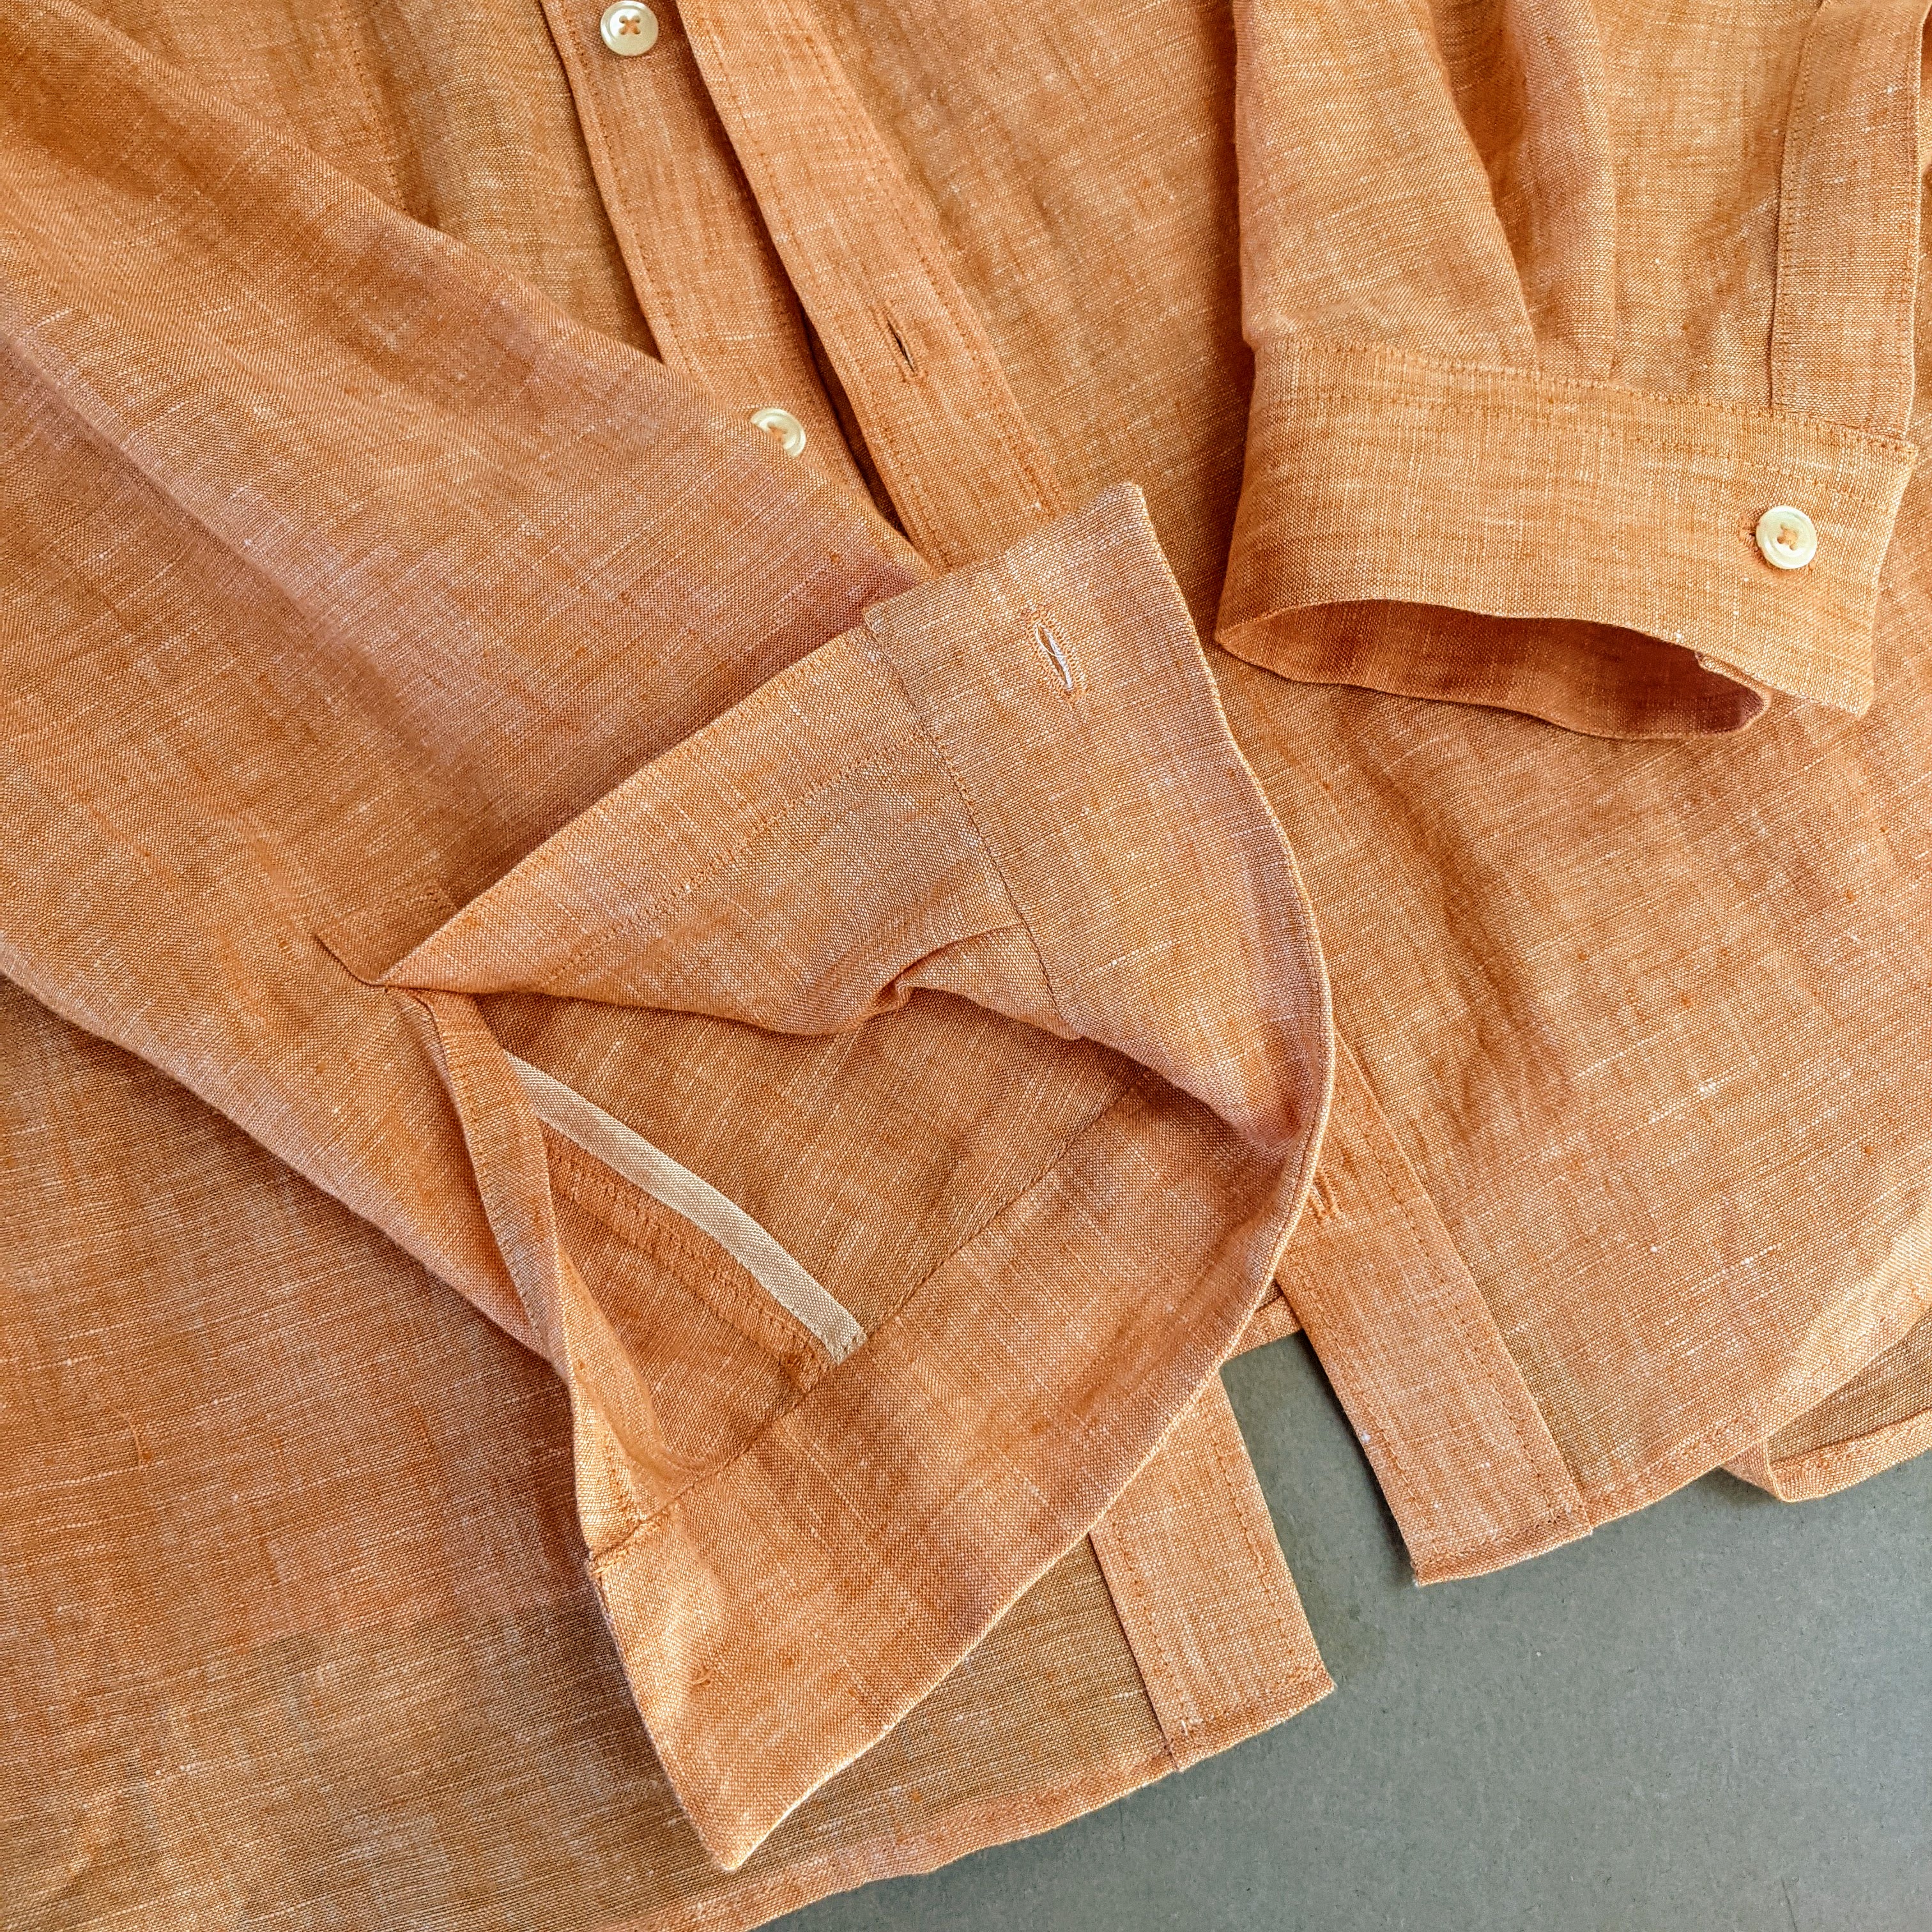
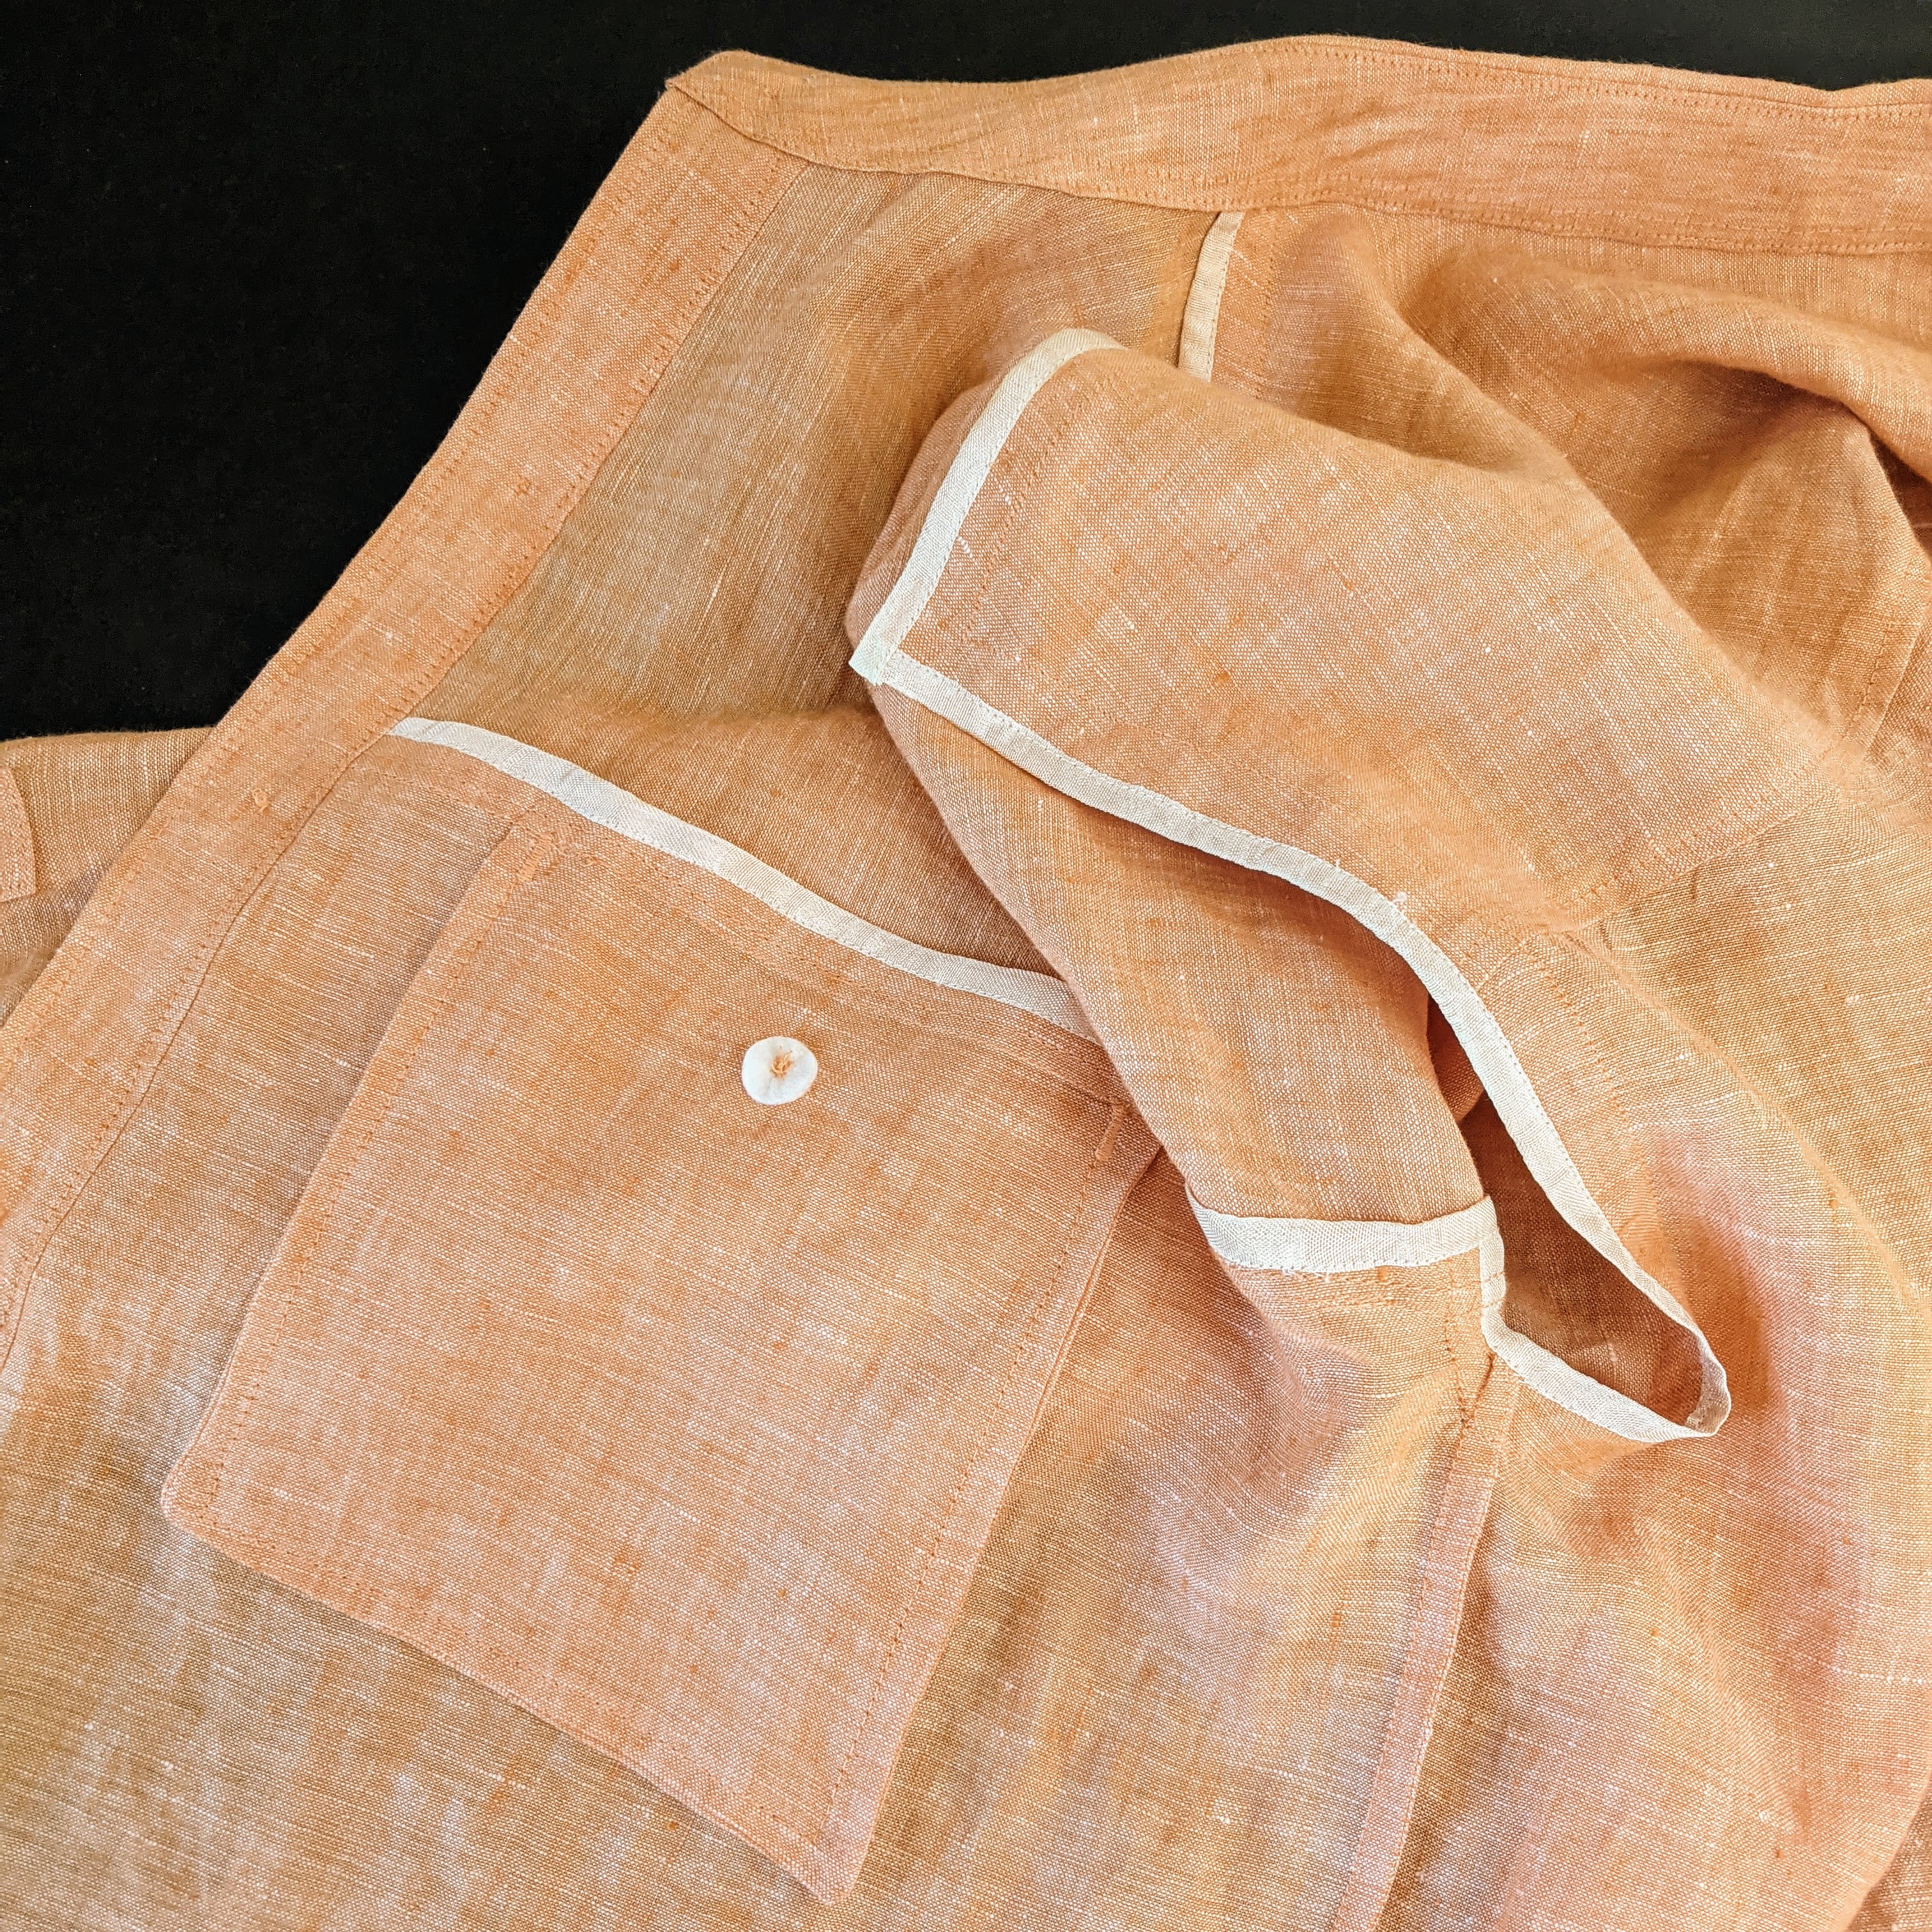
I like my shirts to be as finished on the inside as they are on the outside. The side seams are done with a French seam, and all the other seams are finished off with rayon seam binding. I added bartacks to the front pockets with my vintage Singer buttonhole attachment. Buttonholes were added to the front pockets. This step was a bit of a nail biter. It’s a nice touch though, because it keeps the pockets from gaping open. If you decide to attempt it, I’d suggest doing it early in the construction.
I didn’t even bother to iron this shirt before the backyard photoshoot; so here’s my Olya in all it’s wrinkled linen goodness. Which is as it should be!
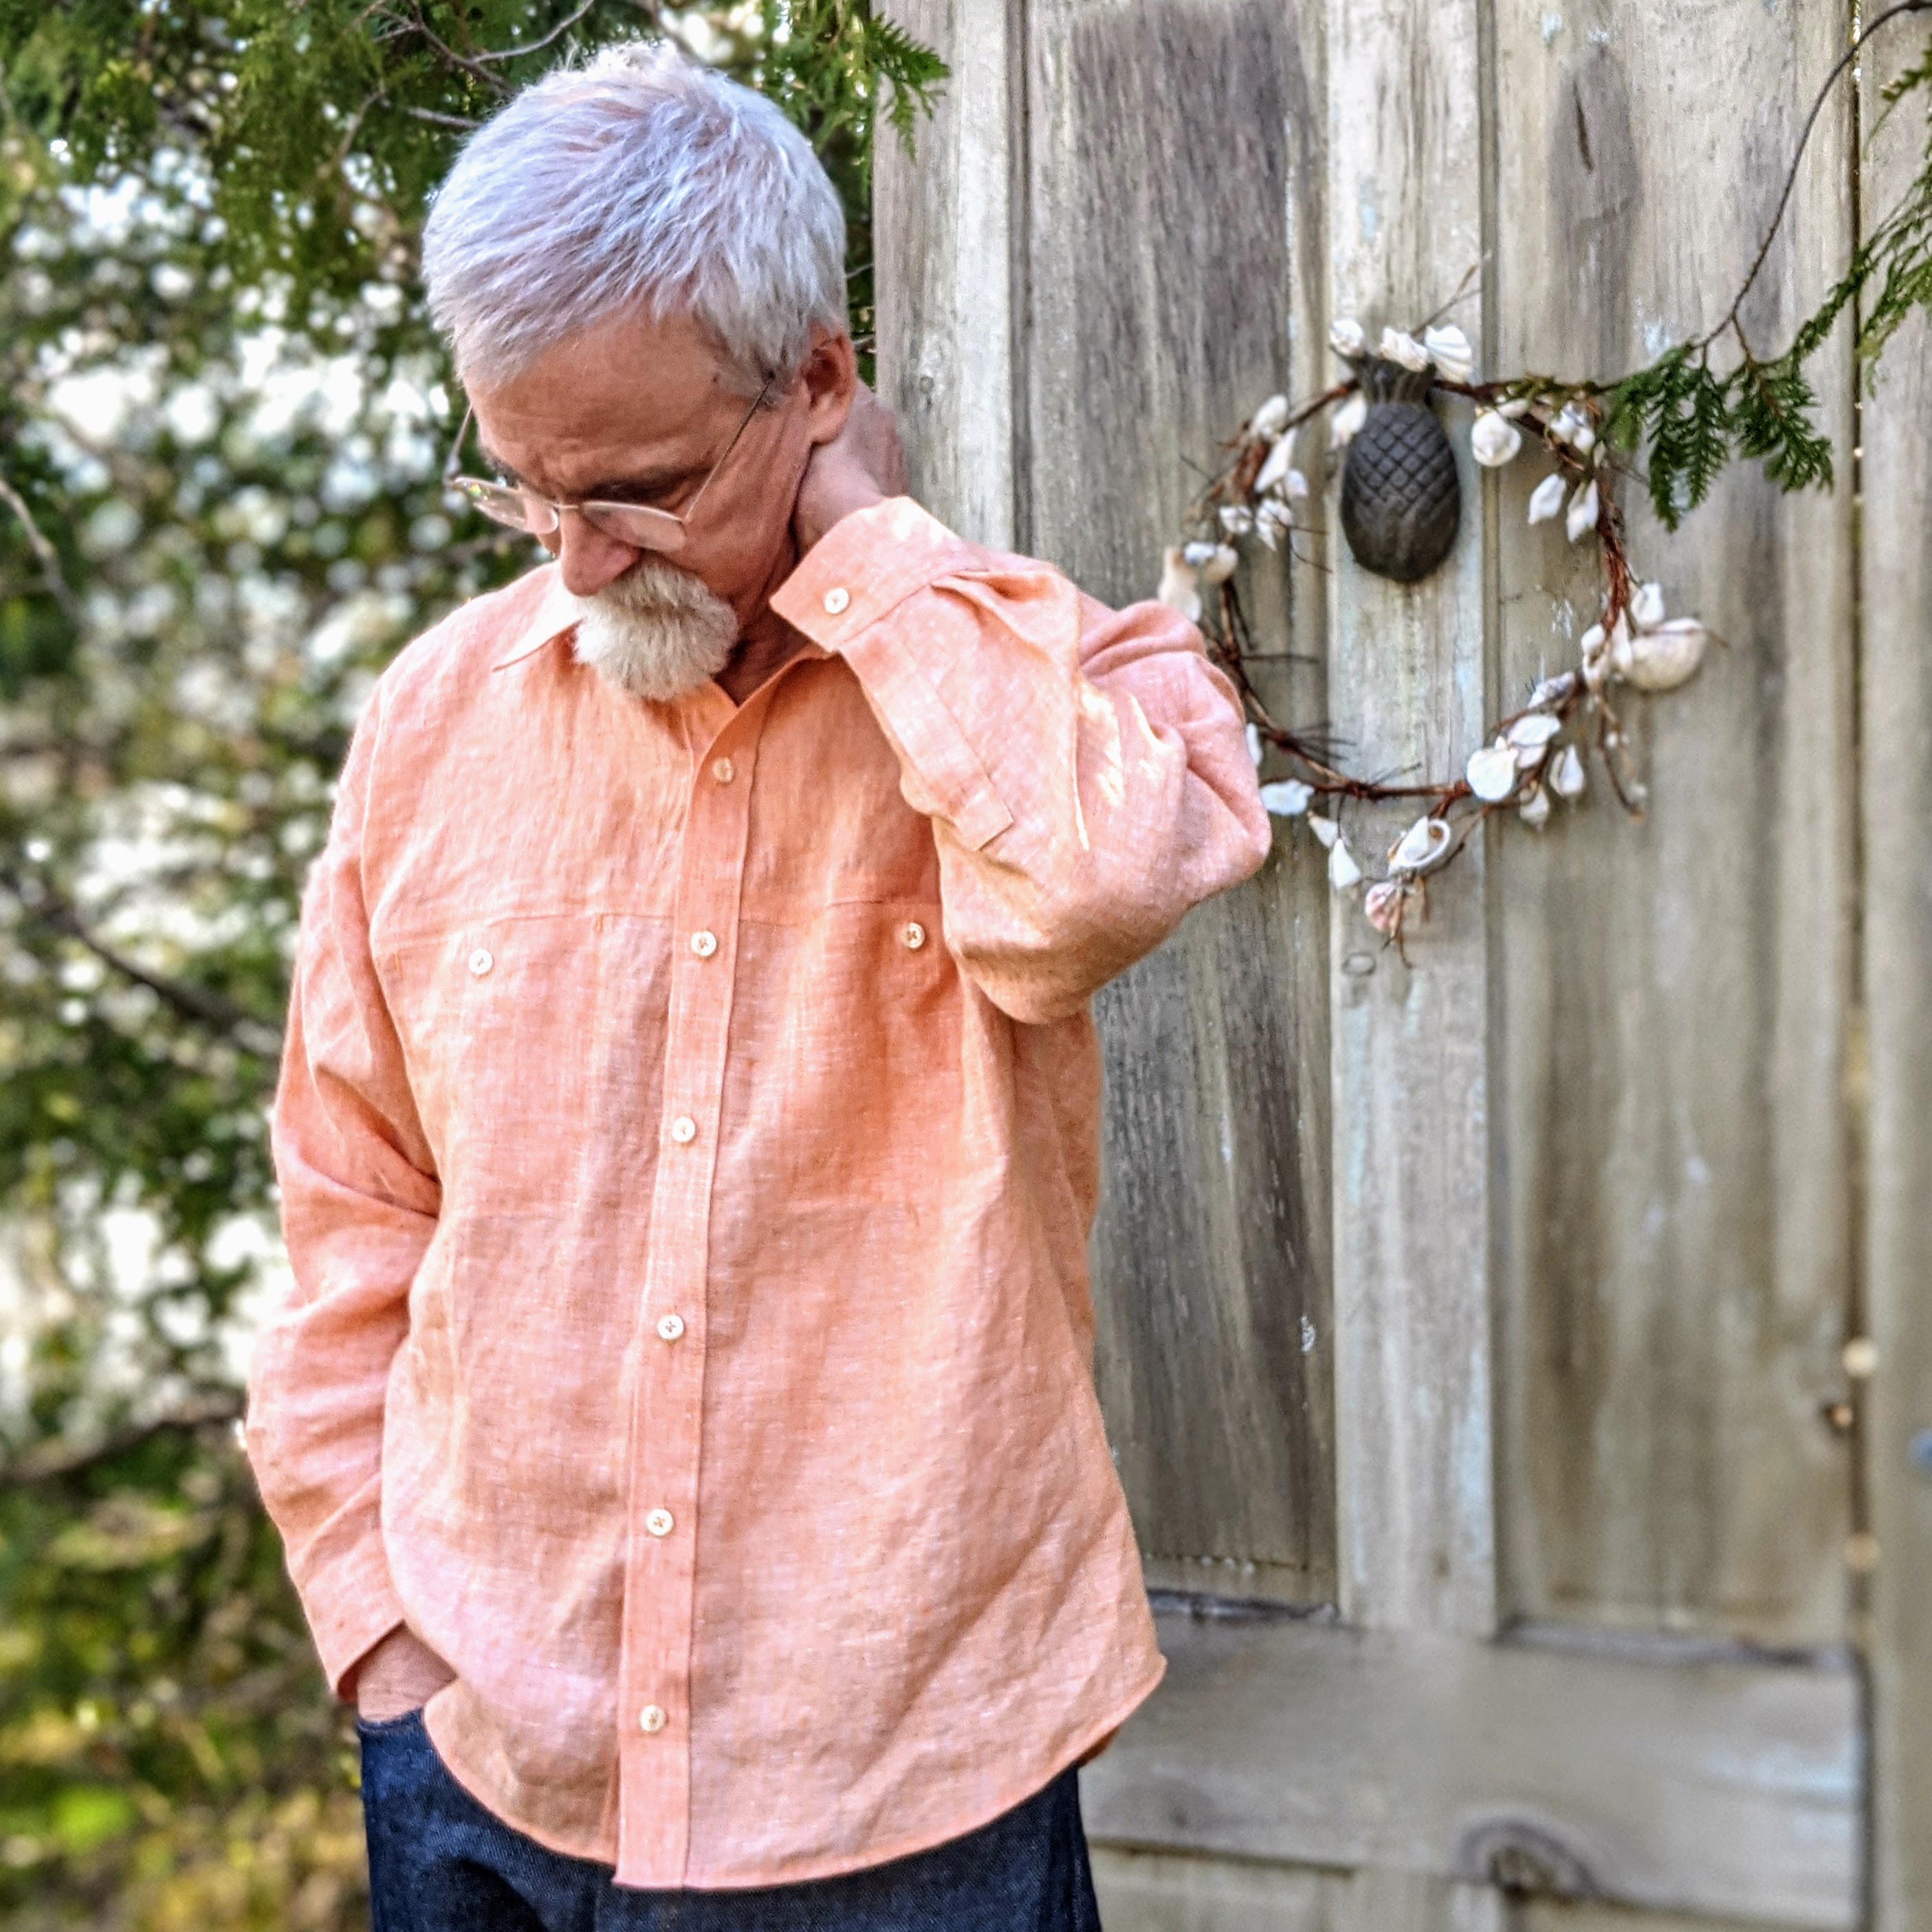
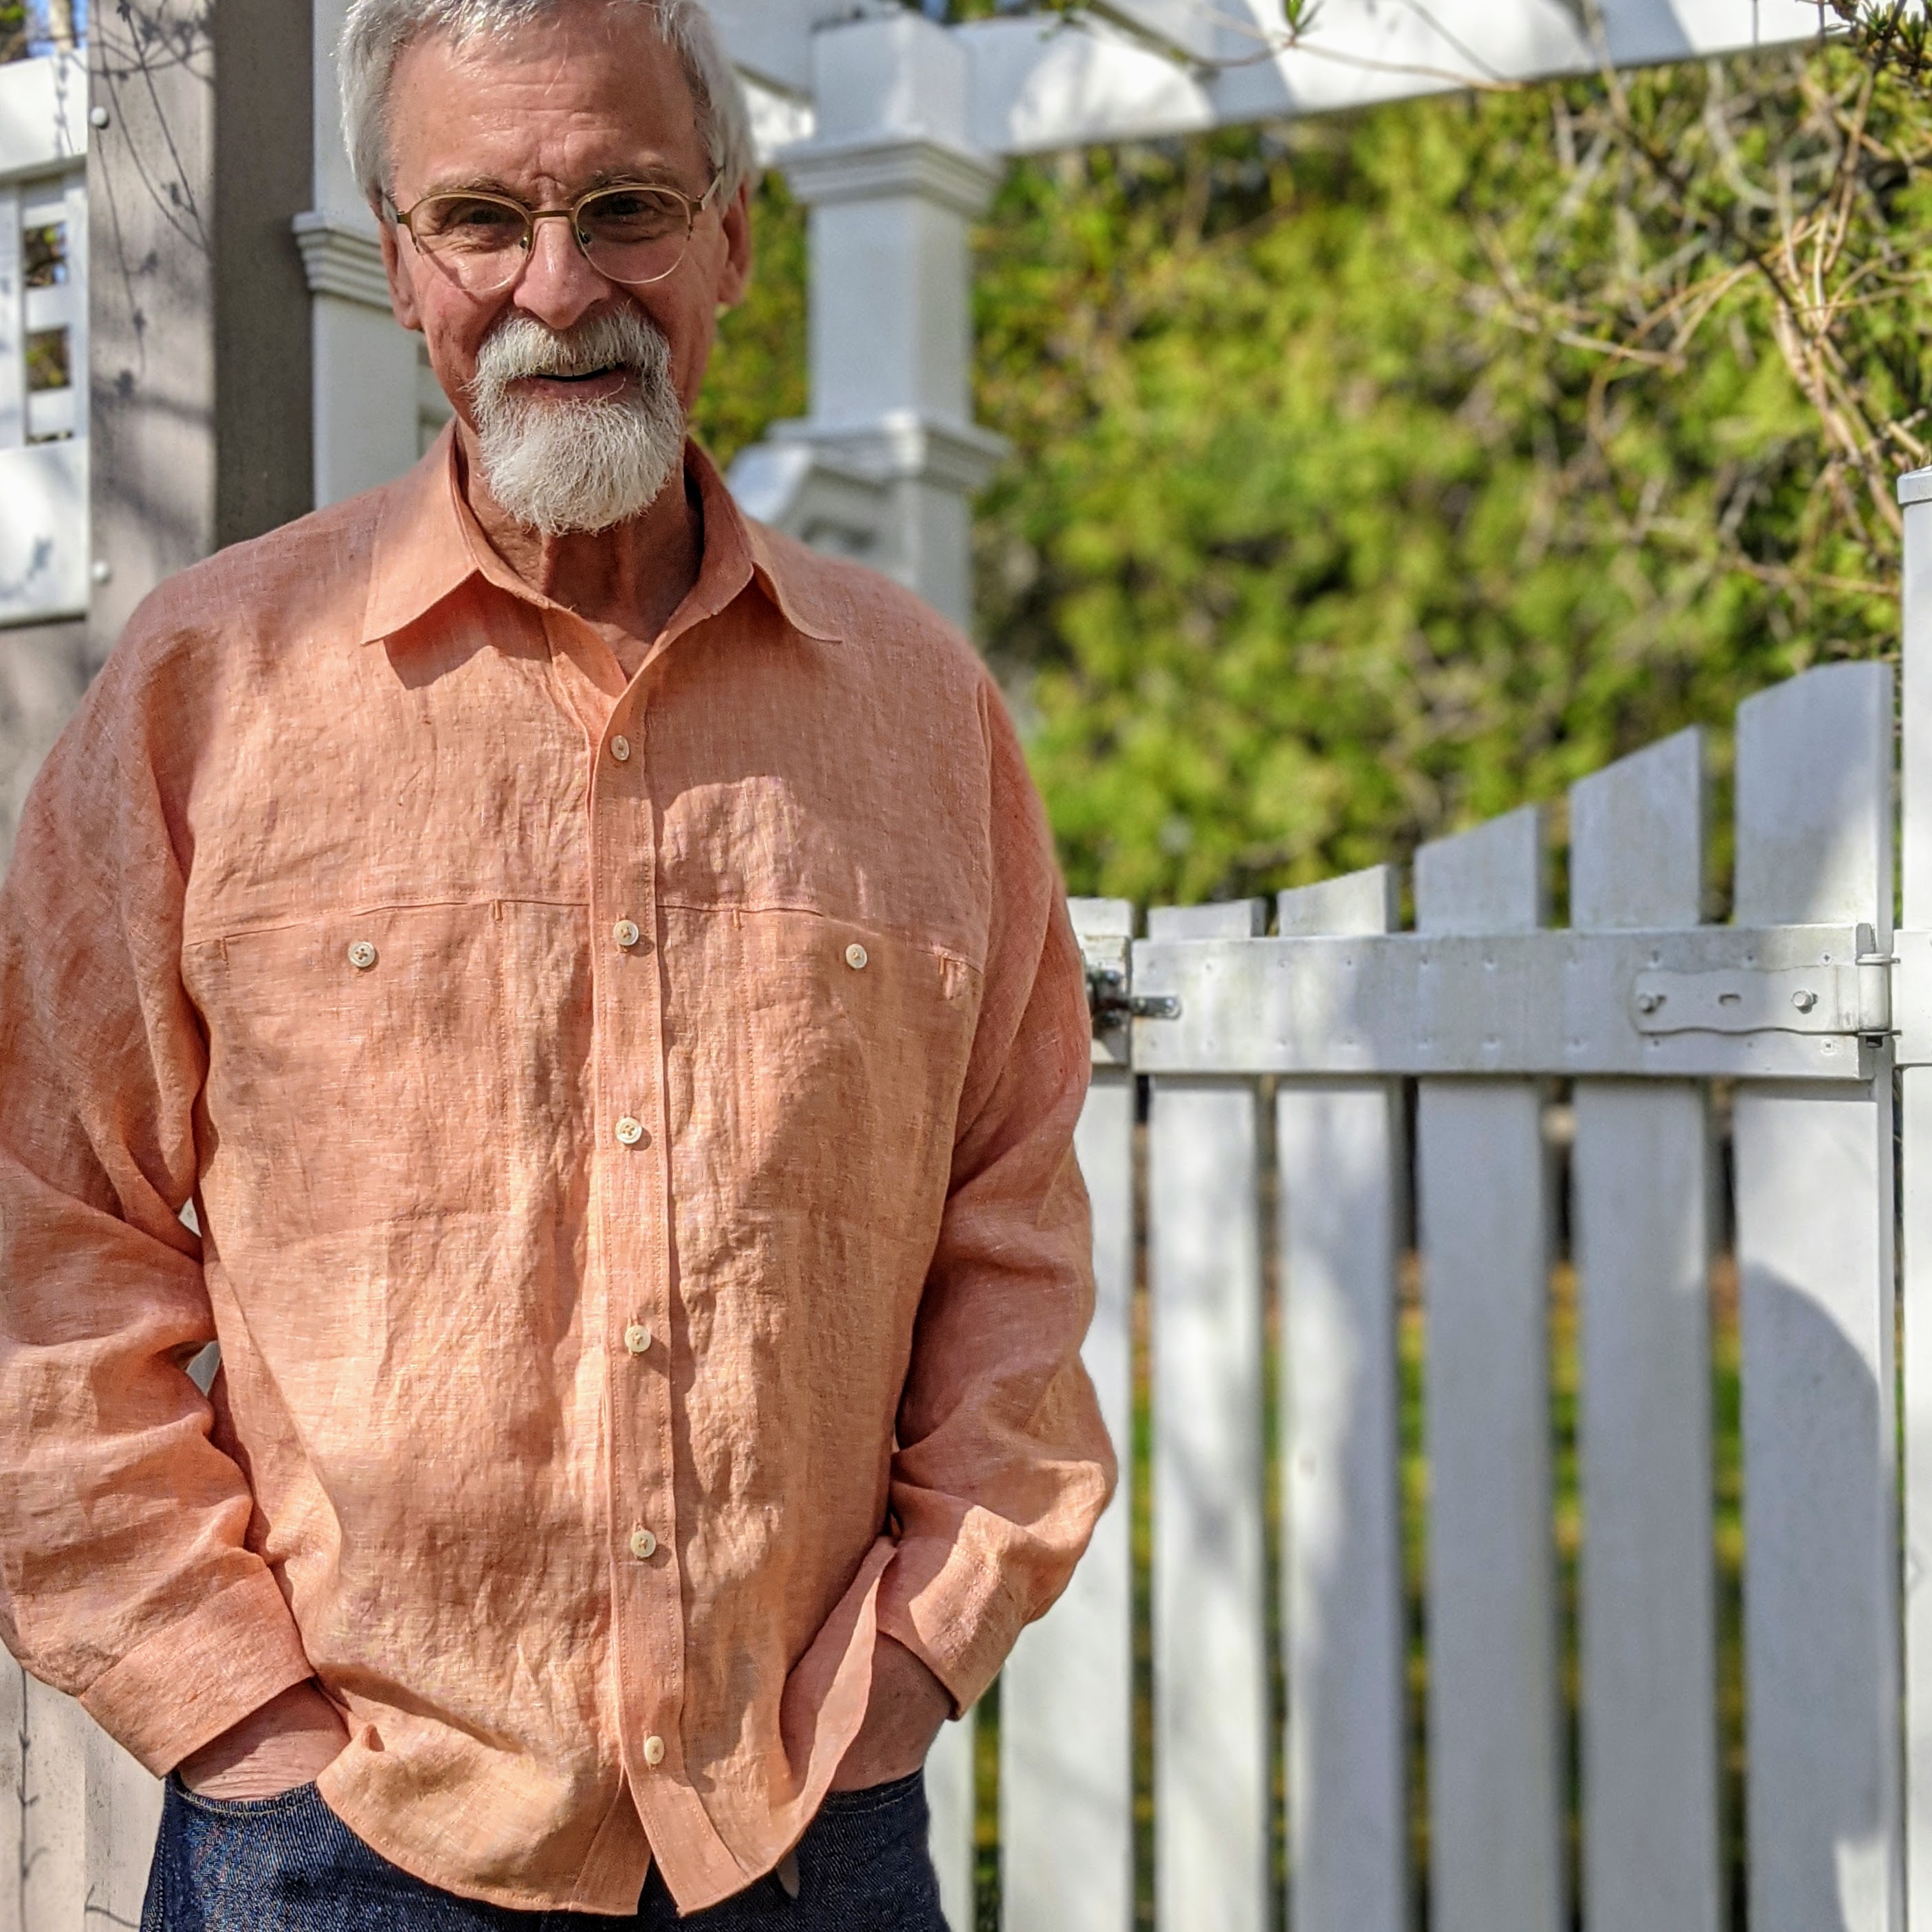
This shirt is exactly how I want to be dressing right now! Thank you Paper Theory for this outstanding design. I’d love to see more men exploring the possibilities of this pattern. Yes, it can be challenging, but the result is so worth it.

I wish you all happy Spring sewing!
CREDITS;
Pattern — Paper Theory
Linen Shirting and Denim Jeans — Gorgeous Fabrics

I *love* that shirt, Duane–design, fabric, & color! You did a great job with the photos, too. And I appreciated hearing the niceties of the construction. Good on you, my friend! Enjoy! Do you expect to be using that pattern with other solid colors or prints?
LikeLiked by 1 person
Barbara, I have another length of lavender linen for shirt #2. I think I’ll stick with solid colors for this style.
LikeLike
Great looking shirt.
LikeLiked by 1 person
I just can’t help the smile I get when you post something as I know it is going to be very interesting and something grand in its nature. Always GREAT results and interesting tips of your experience. The look is excellent!
LikeLiked by 1 person
I predict an Olya trend for men! (Very handsome BTW!)
LikeLiked by 1 person
Great look and shirt! I keep eyeing this pattern, your wonderful garment may have pushed me to get it! 😊
LikeLike
I love the style lines of it. If you want something different, this is it. The instructions are good, the YouTube sew along is even better.
LikeLike
Fabulous shirt. The style really suits the linen fabric you used and so meticulously sewn as always. Great idea to branch out into women’s wear patterns and make it work for you. Have to say I like the look of the green shirt pity it can’t be resurrected – interesting use of stripes.
LikeLike
This is a great garment! Yours might be the motivation to get me past eyeing this pattern to making it! 😊
LikeLike
Just beautiful. I have been eyeing the pattern for myself and had thought that my husband would love it. This encourages me to try it for sure!
LikeLike
Just started following your blog and find it interesting. This shirt pattern is different and it would have been helpful if you had shown the front pattern piece. I’m guessing that piece incorporated both the shirt front and the sleeve.
Carole
LikeLike
You made a great job out of this lovely fabric, well done. I’m about to make my first Olya too.
LikeLike
Totally agree on the wrinkly goodness! It’s such a lovely colour and looks great on you. Love all the details, I don’t even wear shirts and am now tempted to male one…
LikeLike
Damn. This shirt is awesome. Like always. ALWAYS. Do you ever screw up? No, of course not. Your sewing level is what I aspire to. Thanks for always inspiring me.
LikeLike
Beautiful shirt! The colour looks great on you. I’m bookmarking this pattern. Thank you for sharing.
LikeLike
Your pattern choices and fabric choices are impeccable! I’m going to wish I’d copied you when I make this for my husband. Nice job!
LikeLike
Your fabric choices are flawless, project after project.
That pattern is flattering from every angle.
The shirt is magazine worthy (“Threads, if you’re listening…- now flog me, with whatever is close at hand, for even going there).
LikeLike
Fabulous, fabulous, fabulous! You are so meticulous and precise. I love the details on this shirt and I love the finished garment on you. Great color of linen, too. I think I will have to put this shirt on my to do sewing list.
LikeLike
Perfectly done. So beautiful and Springy!
LikeLike
It looks just fantastic, as always. Thank you for sharing this project with us.
LikeLike
This is such a great shirt and your post is one that I have read quite a few times to help me. I made this and used your suggestion of reinforcing the under arm seams. Thanks so much, my linen was in danger of giving way here. As always your blog is my go to source over and over again. Thanks Duane!
LikeLike
I love that rayon seam binding, but how do you manage to get it looking so crisp and neat? I find it really difficult to handle and it usually ends up a mangled mess.
LikeLike
There is a little mini tutorial on an older blog post. Look for the posts about the red pants. It’s in one of those posts.
LikeLike
Thanks for your quick reply. I actually read the mini tutorial a while ago and it’s very helpful, but I’m not a super neat or patient sewer. I probably just need more practice.
LikeLike
Me, too, Lynne.
That shirt looks fabulous! Your pattern choices and fabric choices are impeccable! Love it.
LikeLike
Well done – AGAIN!!! – sir! Love it!
LikeLike
Considering how adjacent this shirt is to historic shirts worn in the American wild west and the Australian outback, I am surprised more men aren’t sewing it, too. Thank you very much for the tips. Your shirt is great!
LikeLike