Do you have one of those patterns that you like, but that you’re not exactly in love with? The Belvedere Waistcoat is one of those patterns for me. It seems that no matter what I throw at it, all the care and attention to detail I can muster, the end result is still slightly disappointing.
Still, I keep coming back for more! Why you might ask? Because I crave both the style and the extra layer of warmth that a waistcoat provides. So here I go again, determined that this time I can make the construction easier, and get a result that I’m truly happy with.
It never occurred to me that I wasn’t alone in my struggle with the Belvedere Waistcoat. I confessed my frustration on Instagram and heard from many other sewists with similar issues; most of which involved the bagged lining. I had never had any experience with bagging a lining until this pattern. In fact, I often referred to myself as “The guy least likely to ever bag a lining”. So this was all new to me. What I always assumed was an easier way to do things was, in my experience, actually harder. Plus, I found the result to be very unsatisfactory.
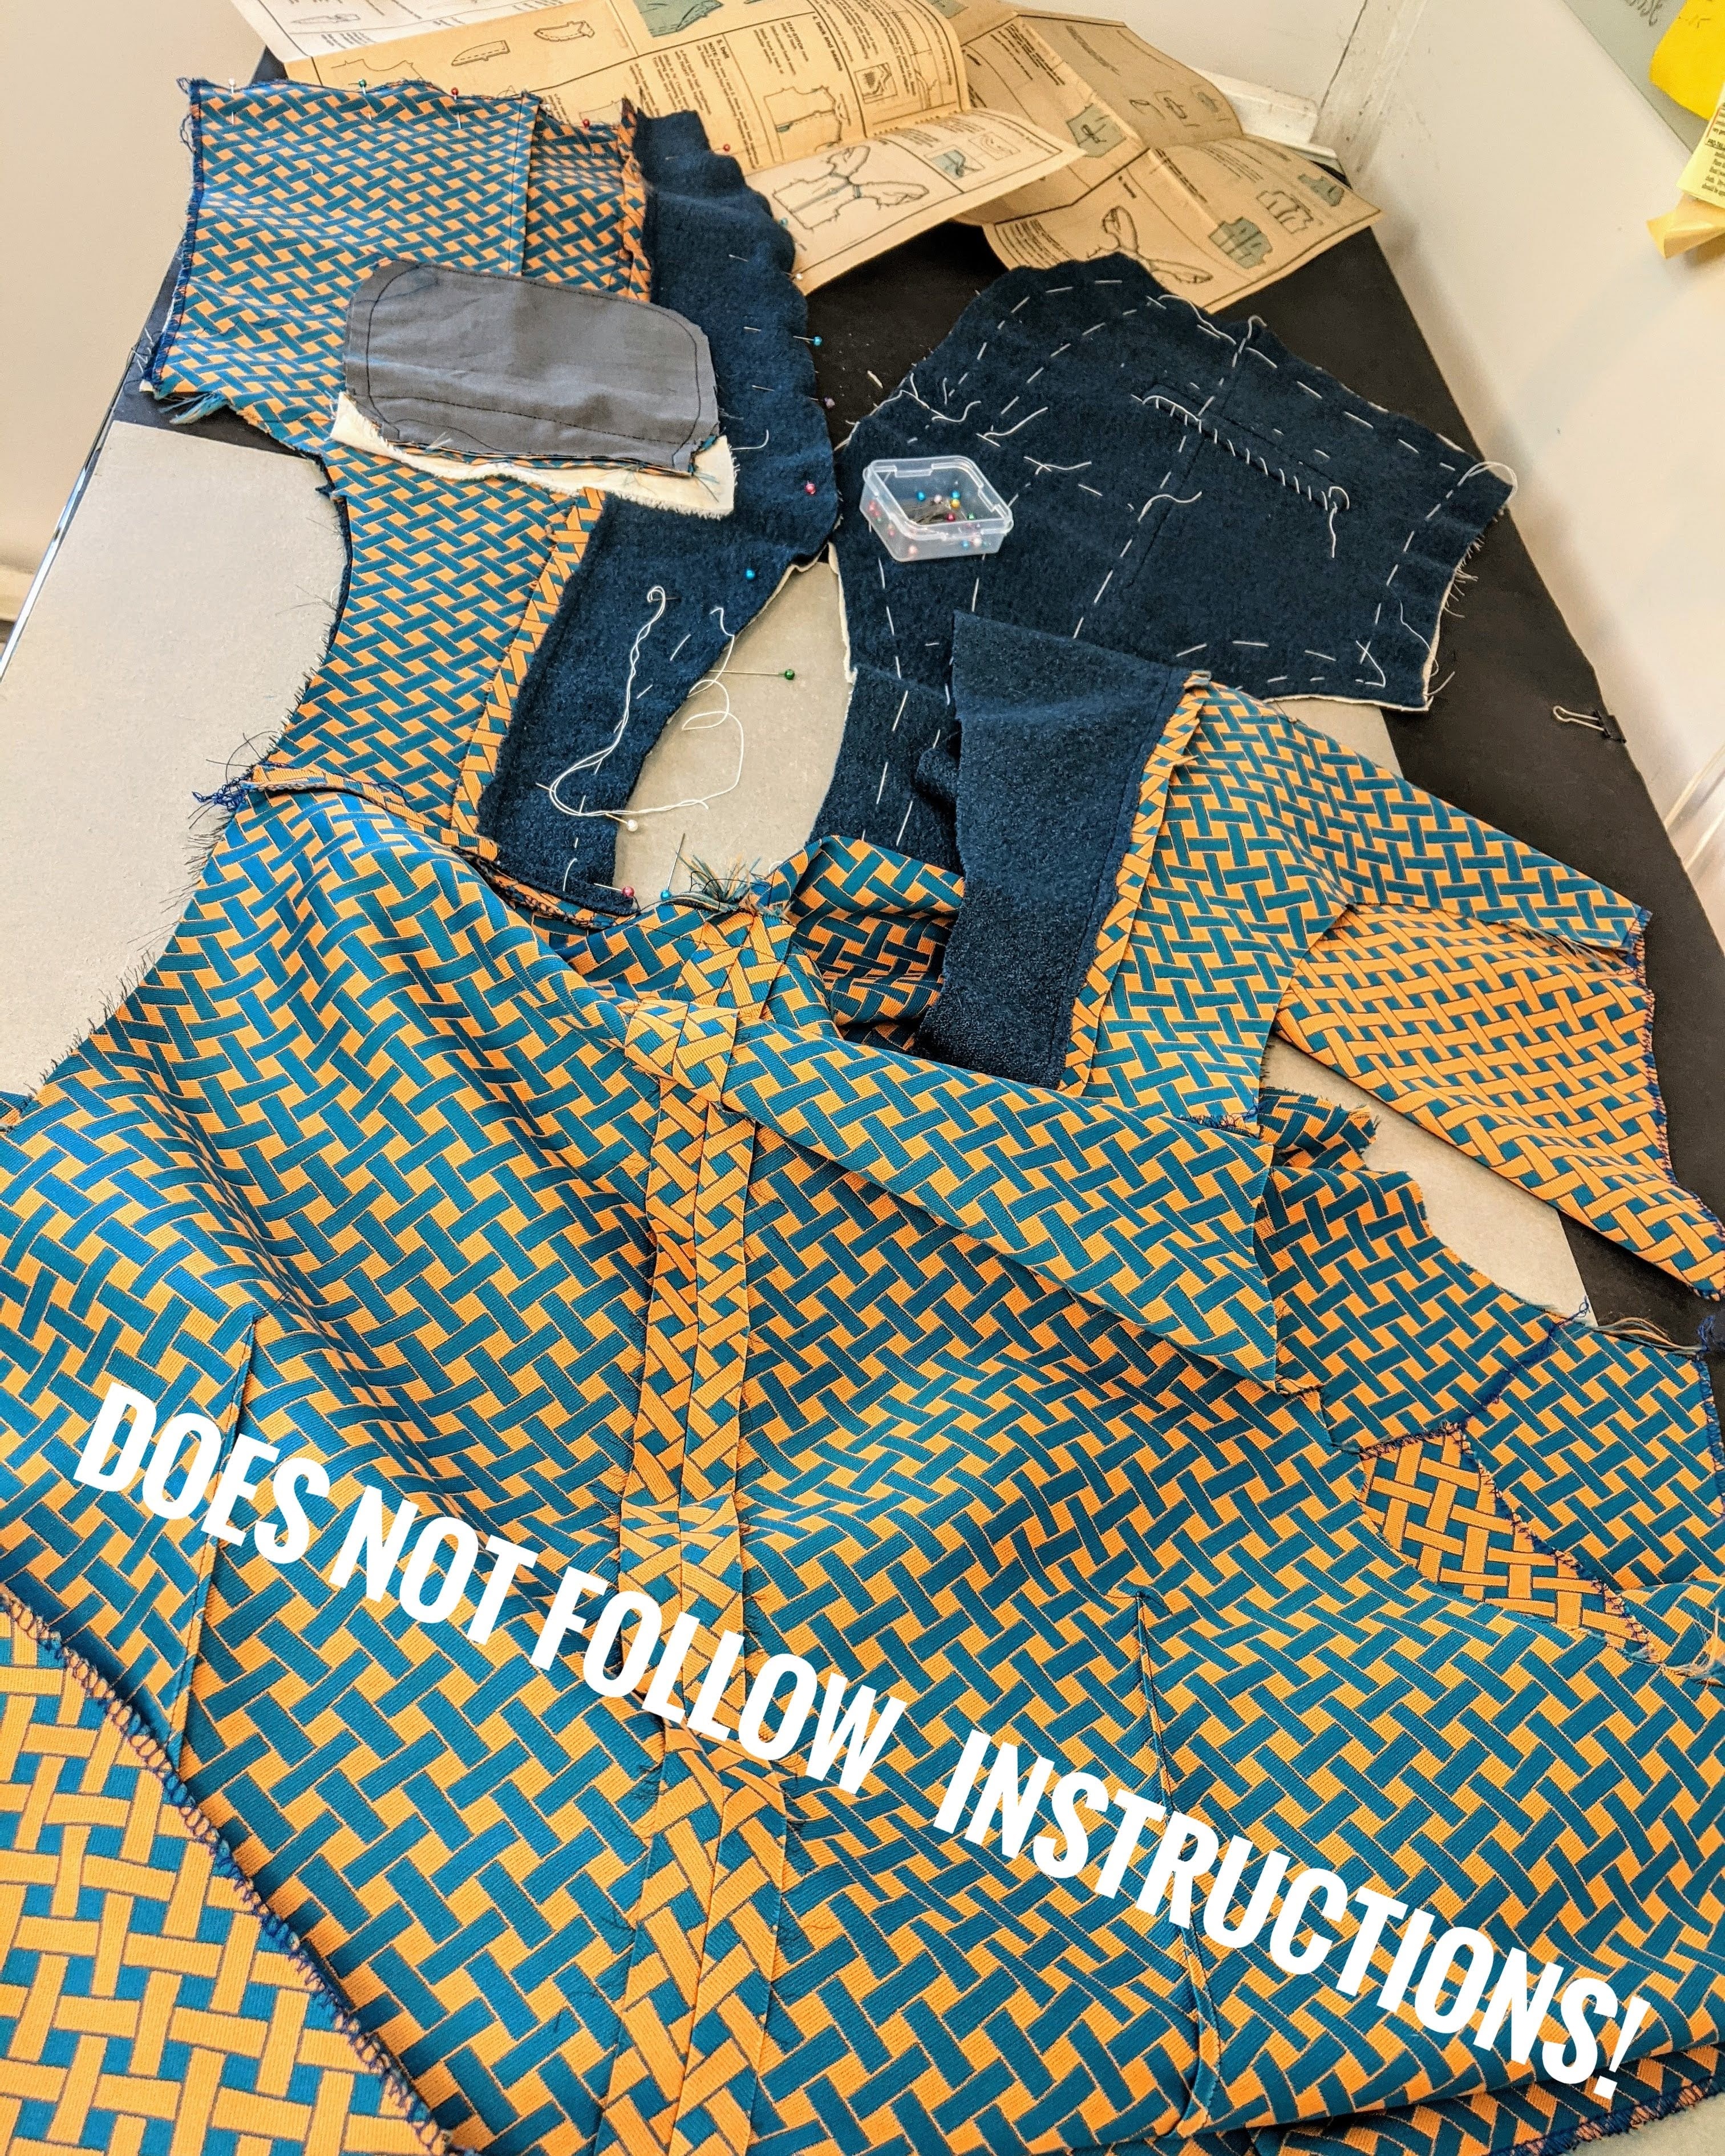
GOAL — Take some leftover boiled wool from last year’s winter coat, add a yard of fancy Italian jacquard, disregard the instructions, and make a better waistcoat.
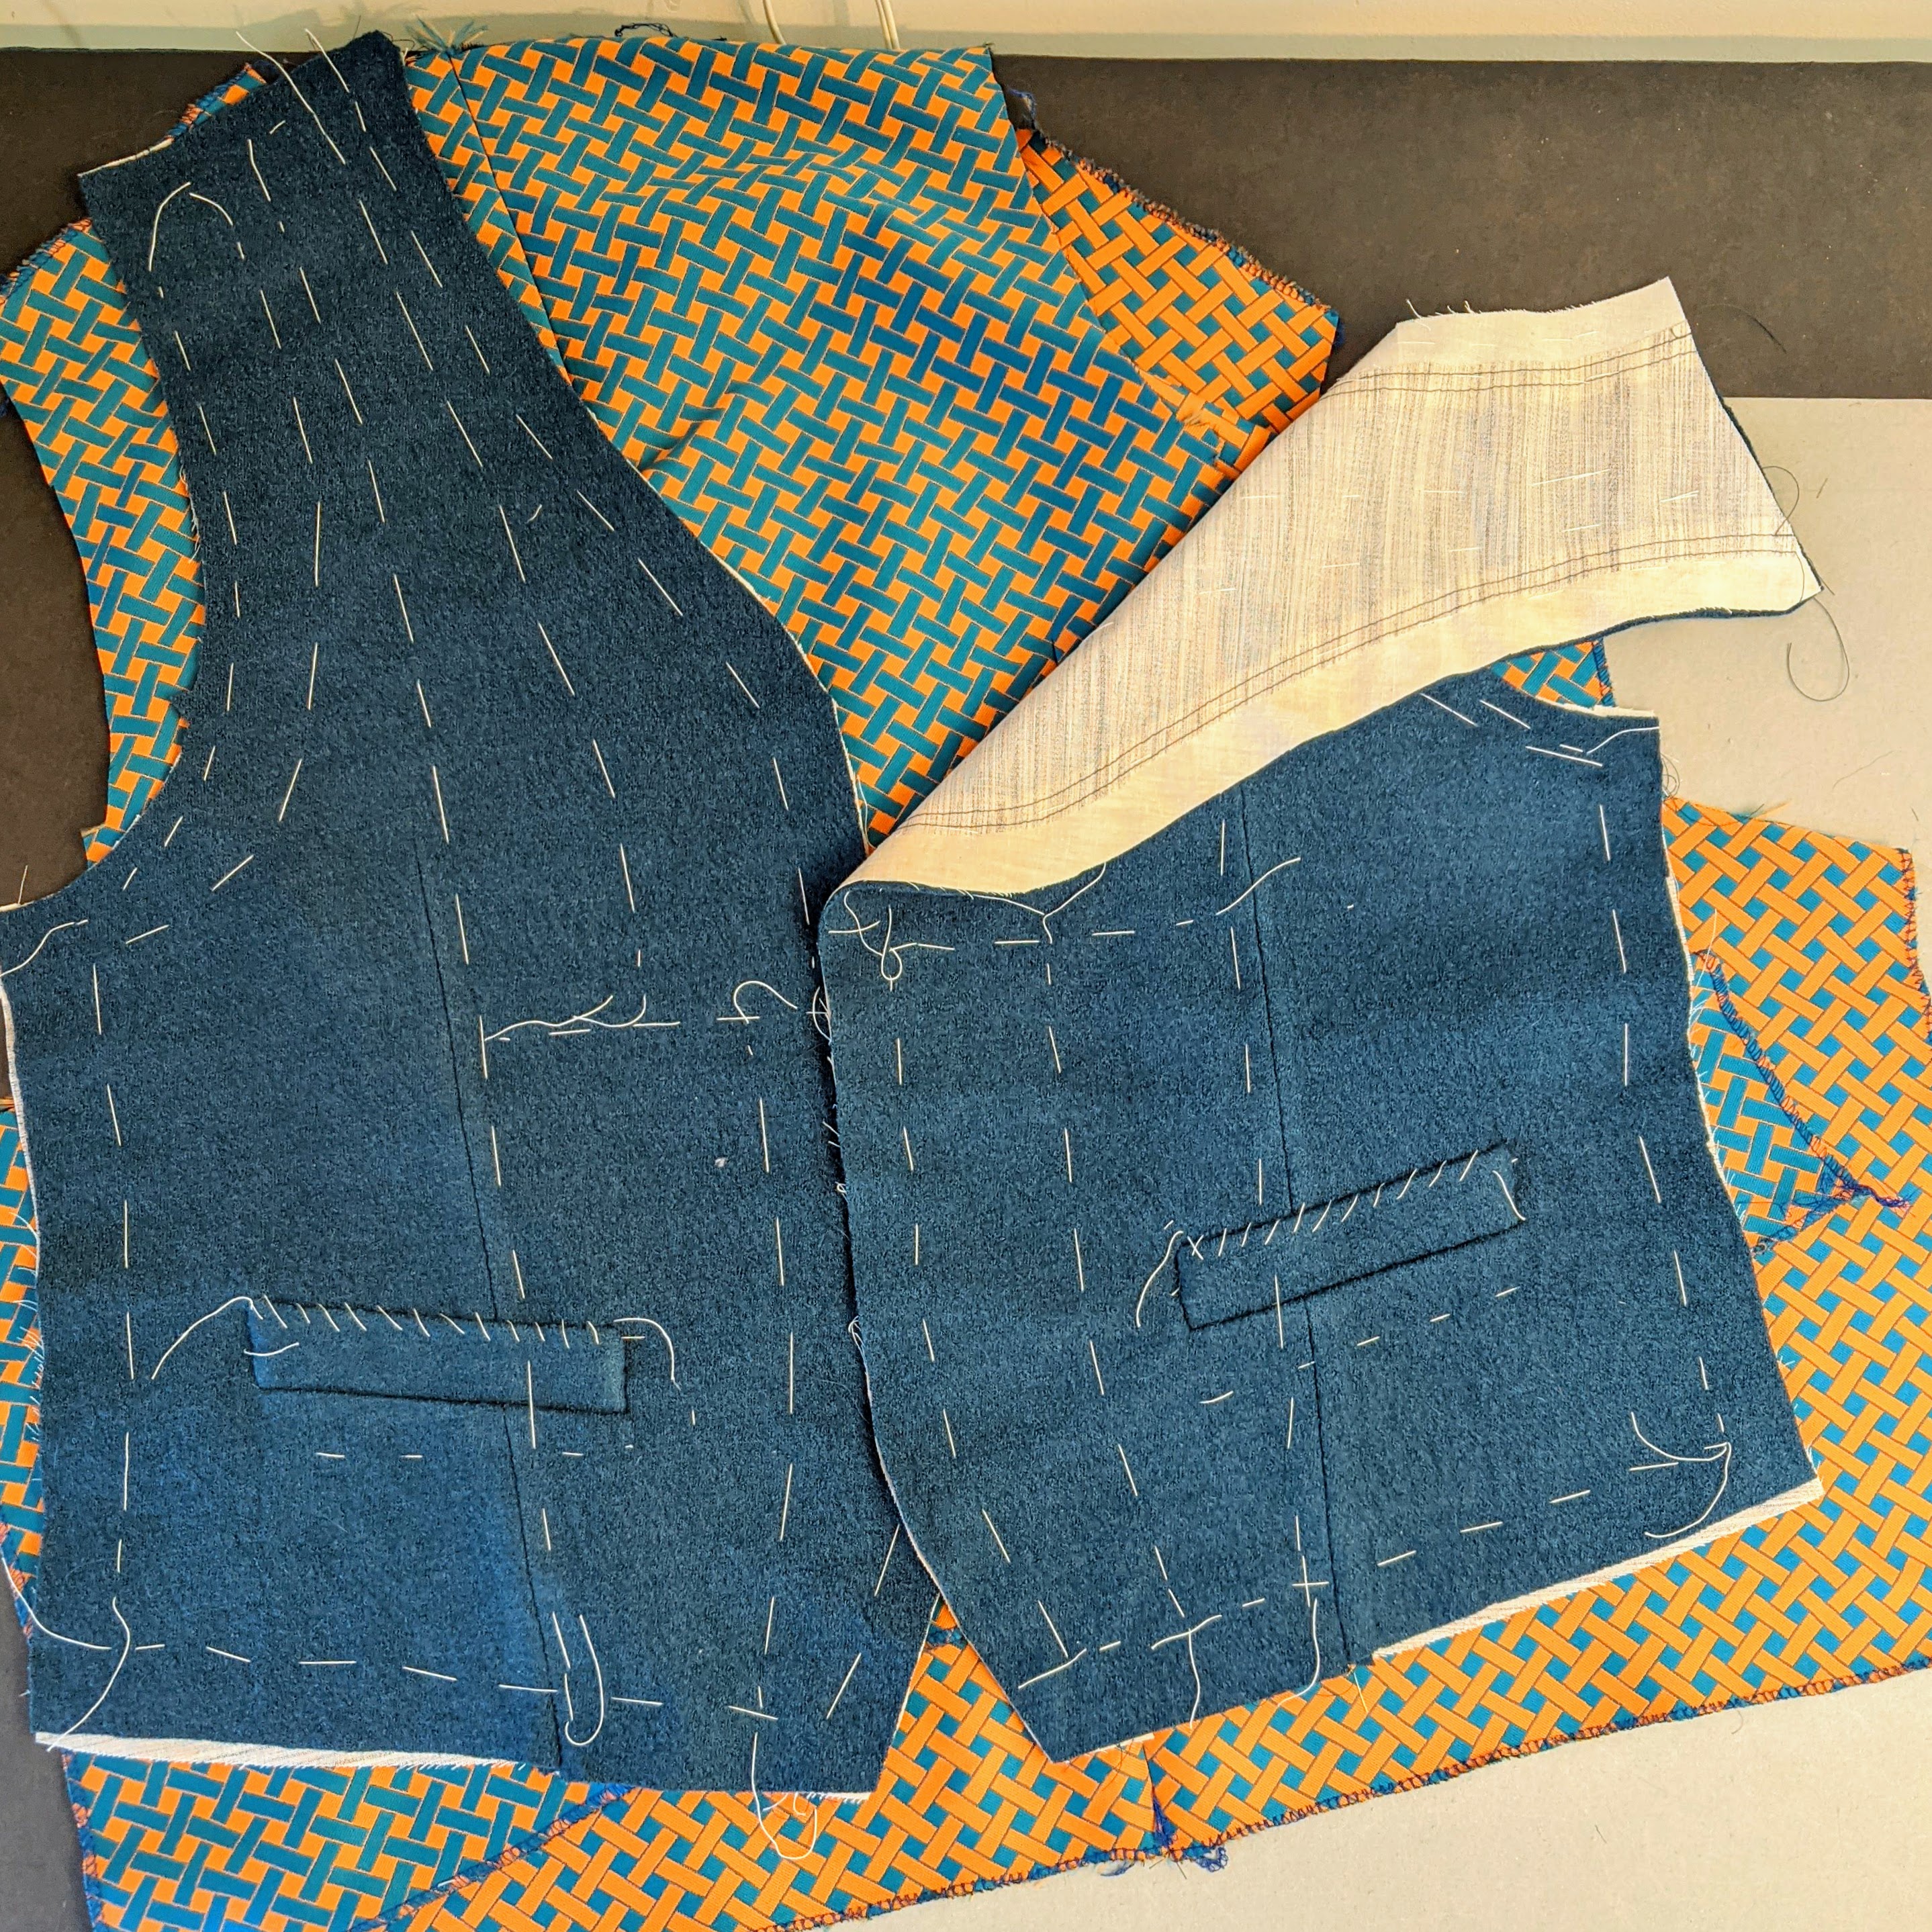
I actually started this project one year ago. At the time I had been asked to do a tailoring presentation for the Couture Club of Chicago. I made a couple of videos for them, and used the Belvedere Waistcoat as the sample garment. So some of the construction was well underway when I picked it back up in March. You’ll notice that I’m using a traditional hair canvas. If that interests you, there are two videos on my YouTube channel that you may enjoy. You can find them here, and here.

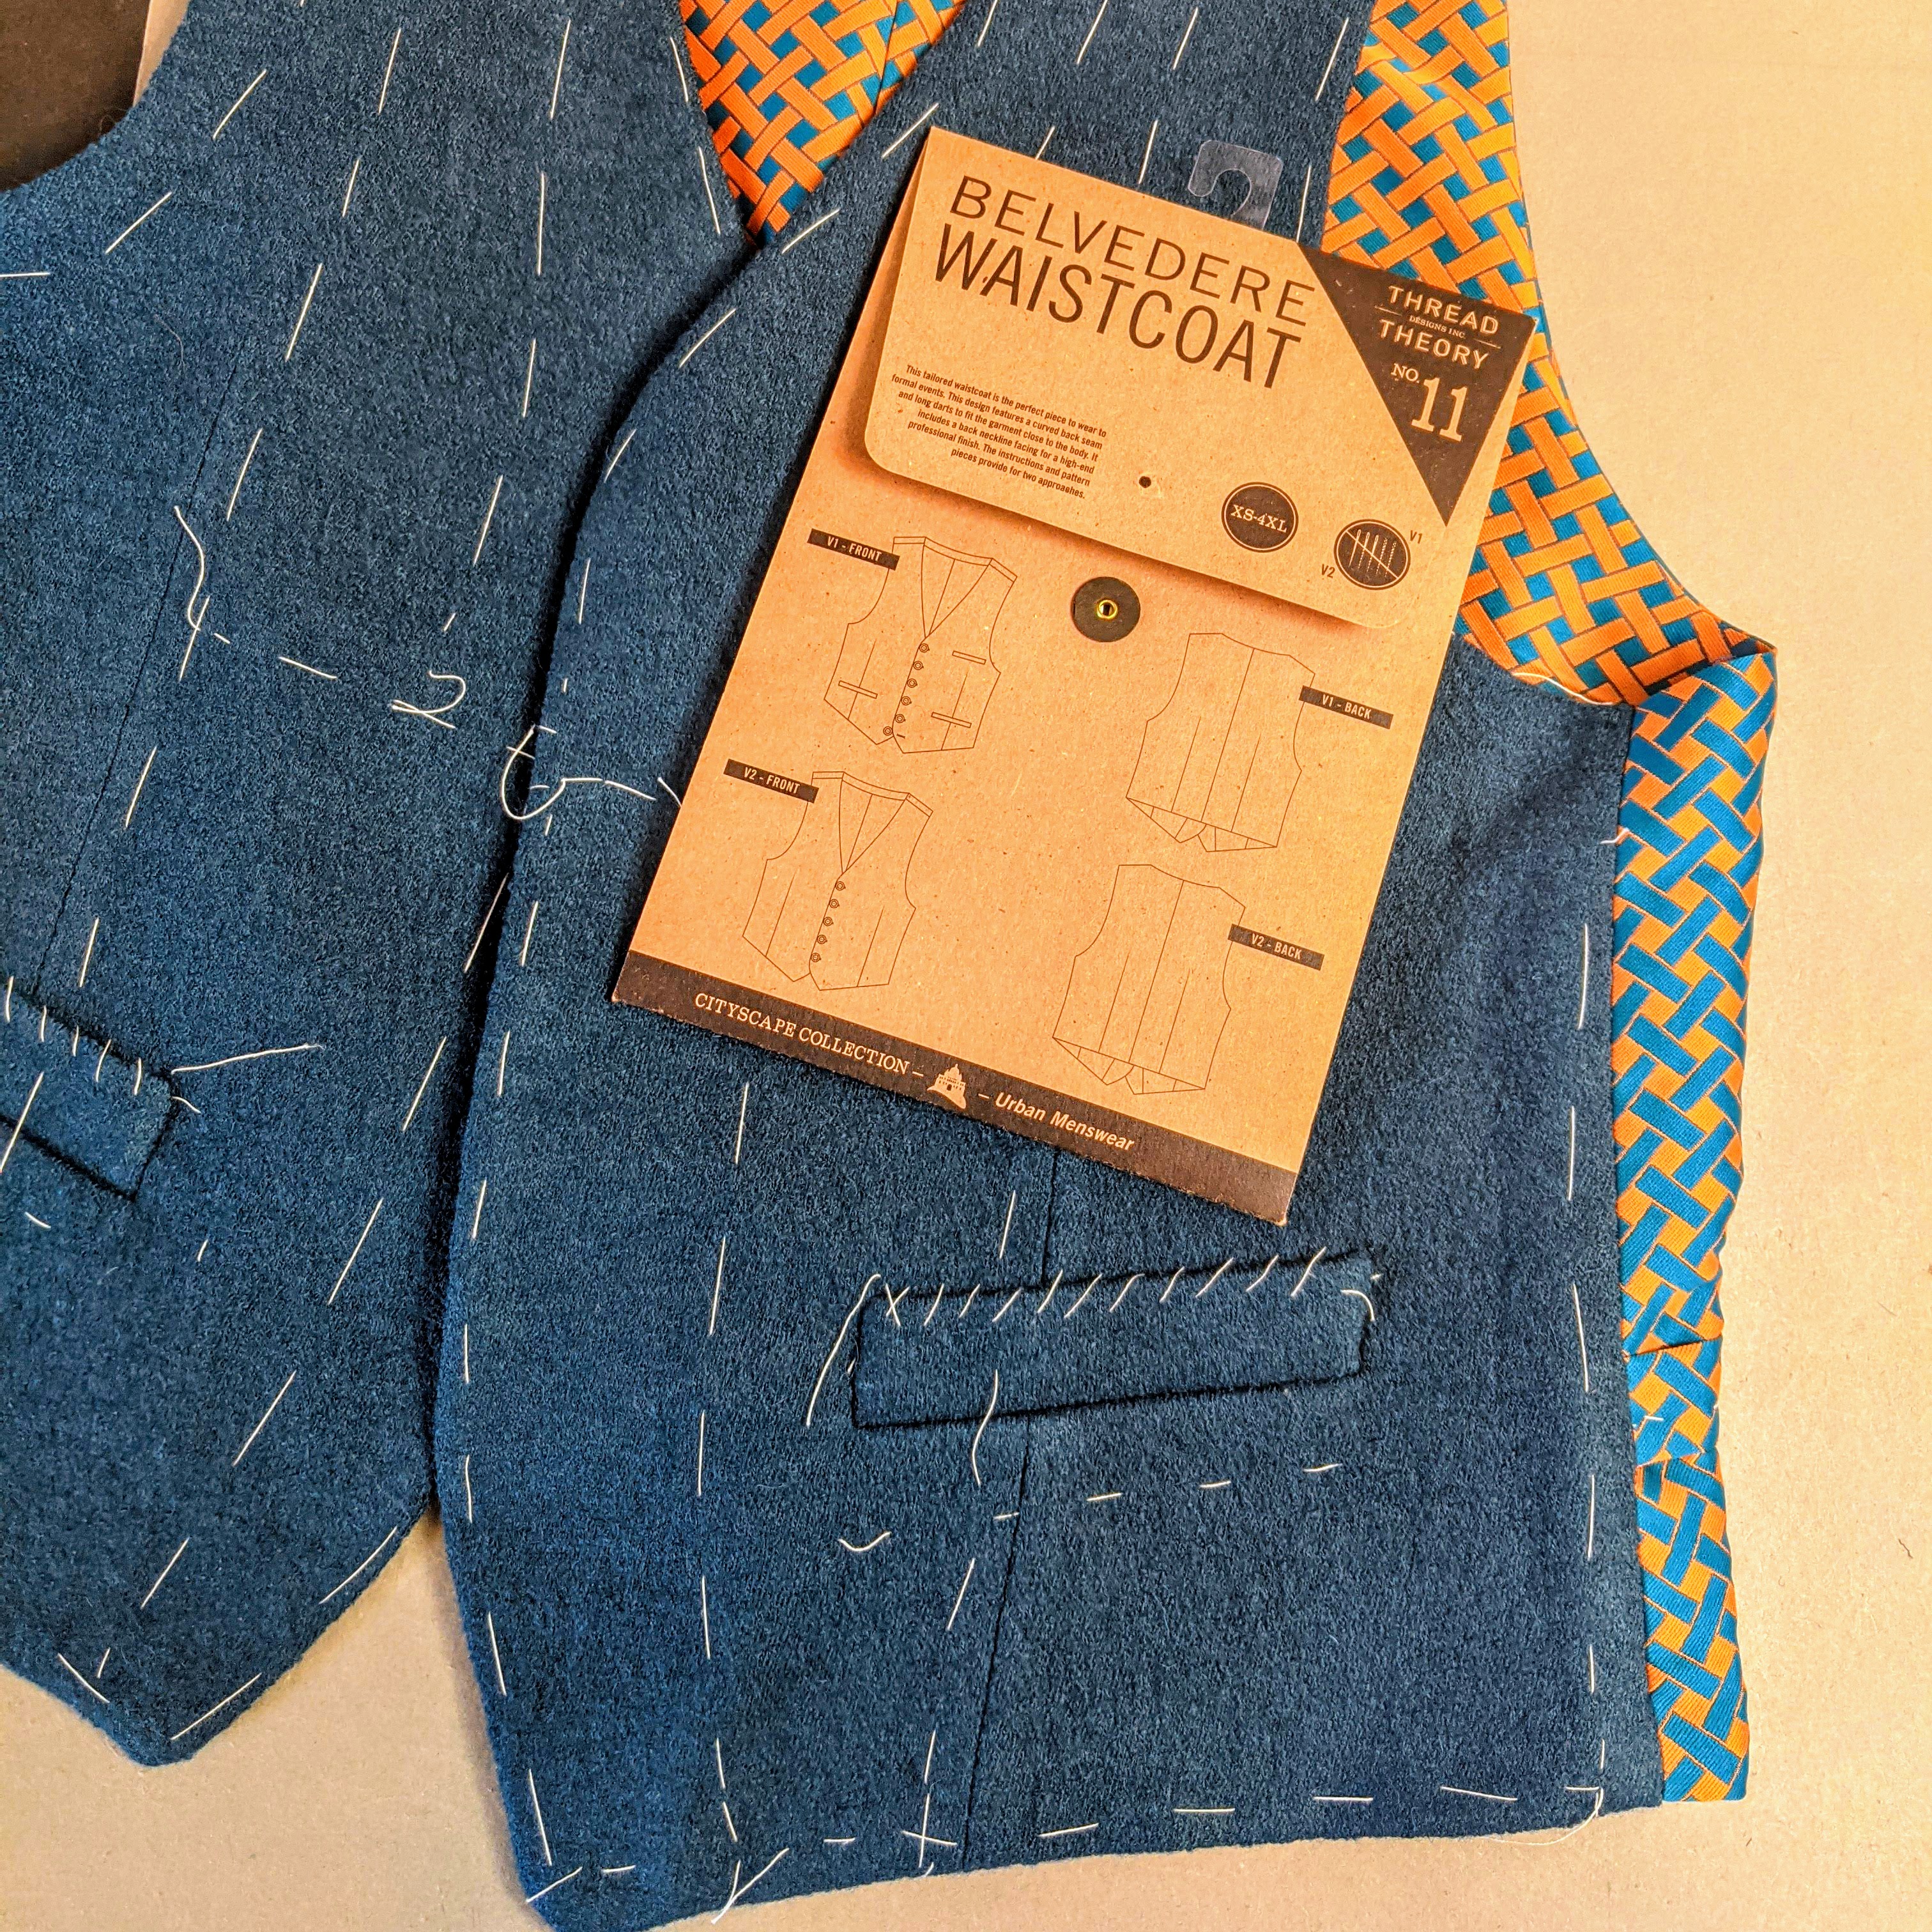
The Thread Theory website has downloadable PDF patterns for patch pockets. I’ve used them on previous makes, mostly because I’m not fond of the welt pockets for this pattern. They’ve always struck me as kind of “clunky” looking, and they invariably gape open. So I set about to rectify that situation. If you’re looking for a more tailored look, here’s a video that will hopefully help you.
How can a garment that takes just a yard of material be so damn complicated???
Determined to simplify this waistcoat, I turned to a vintage pattern in my collection.
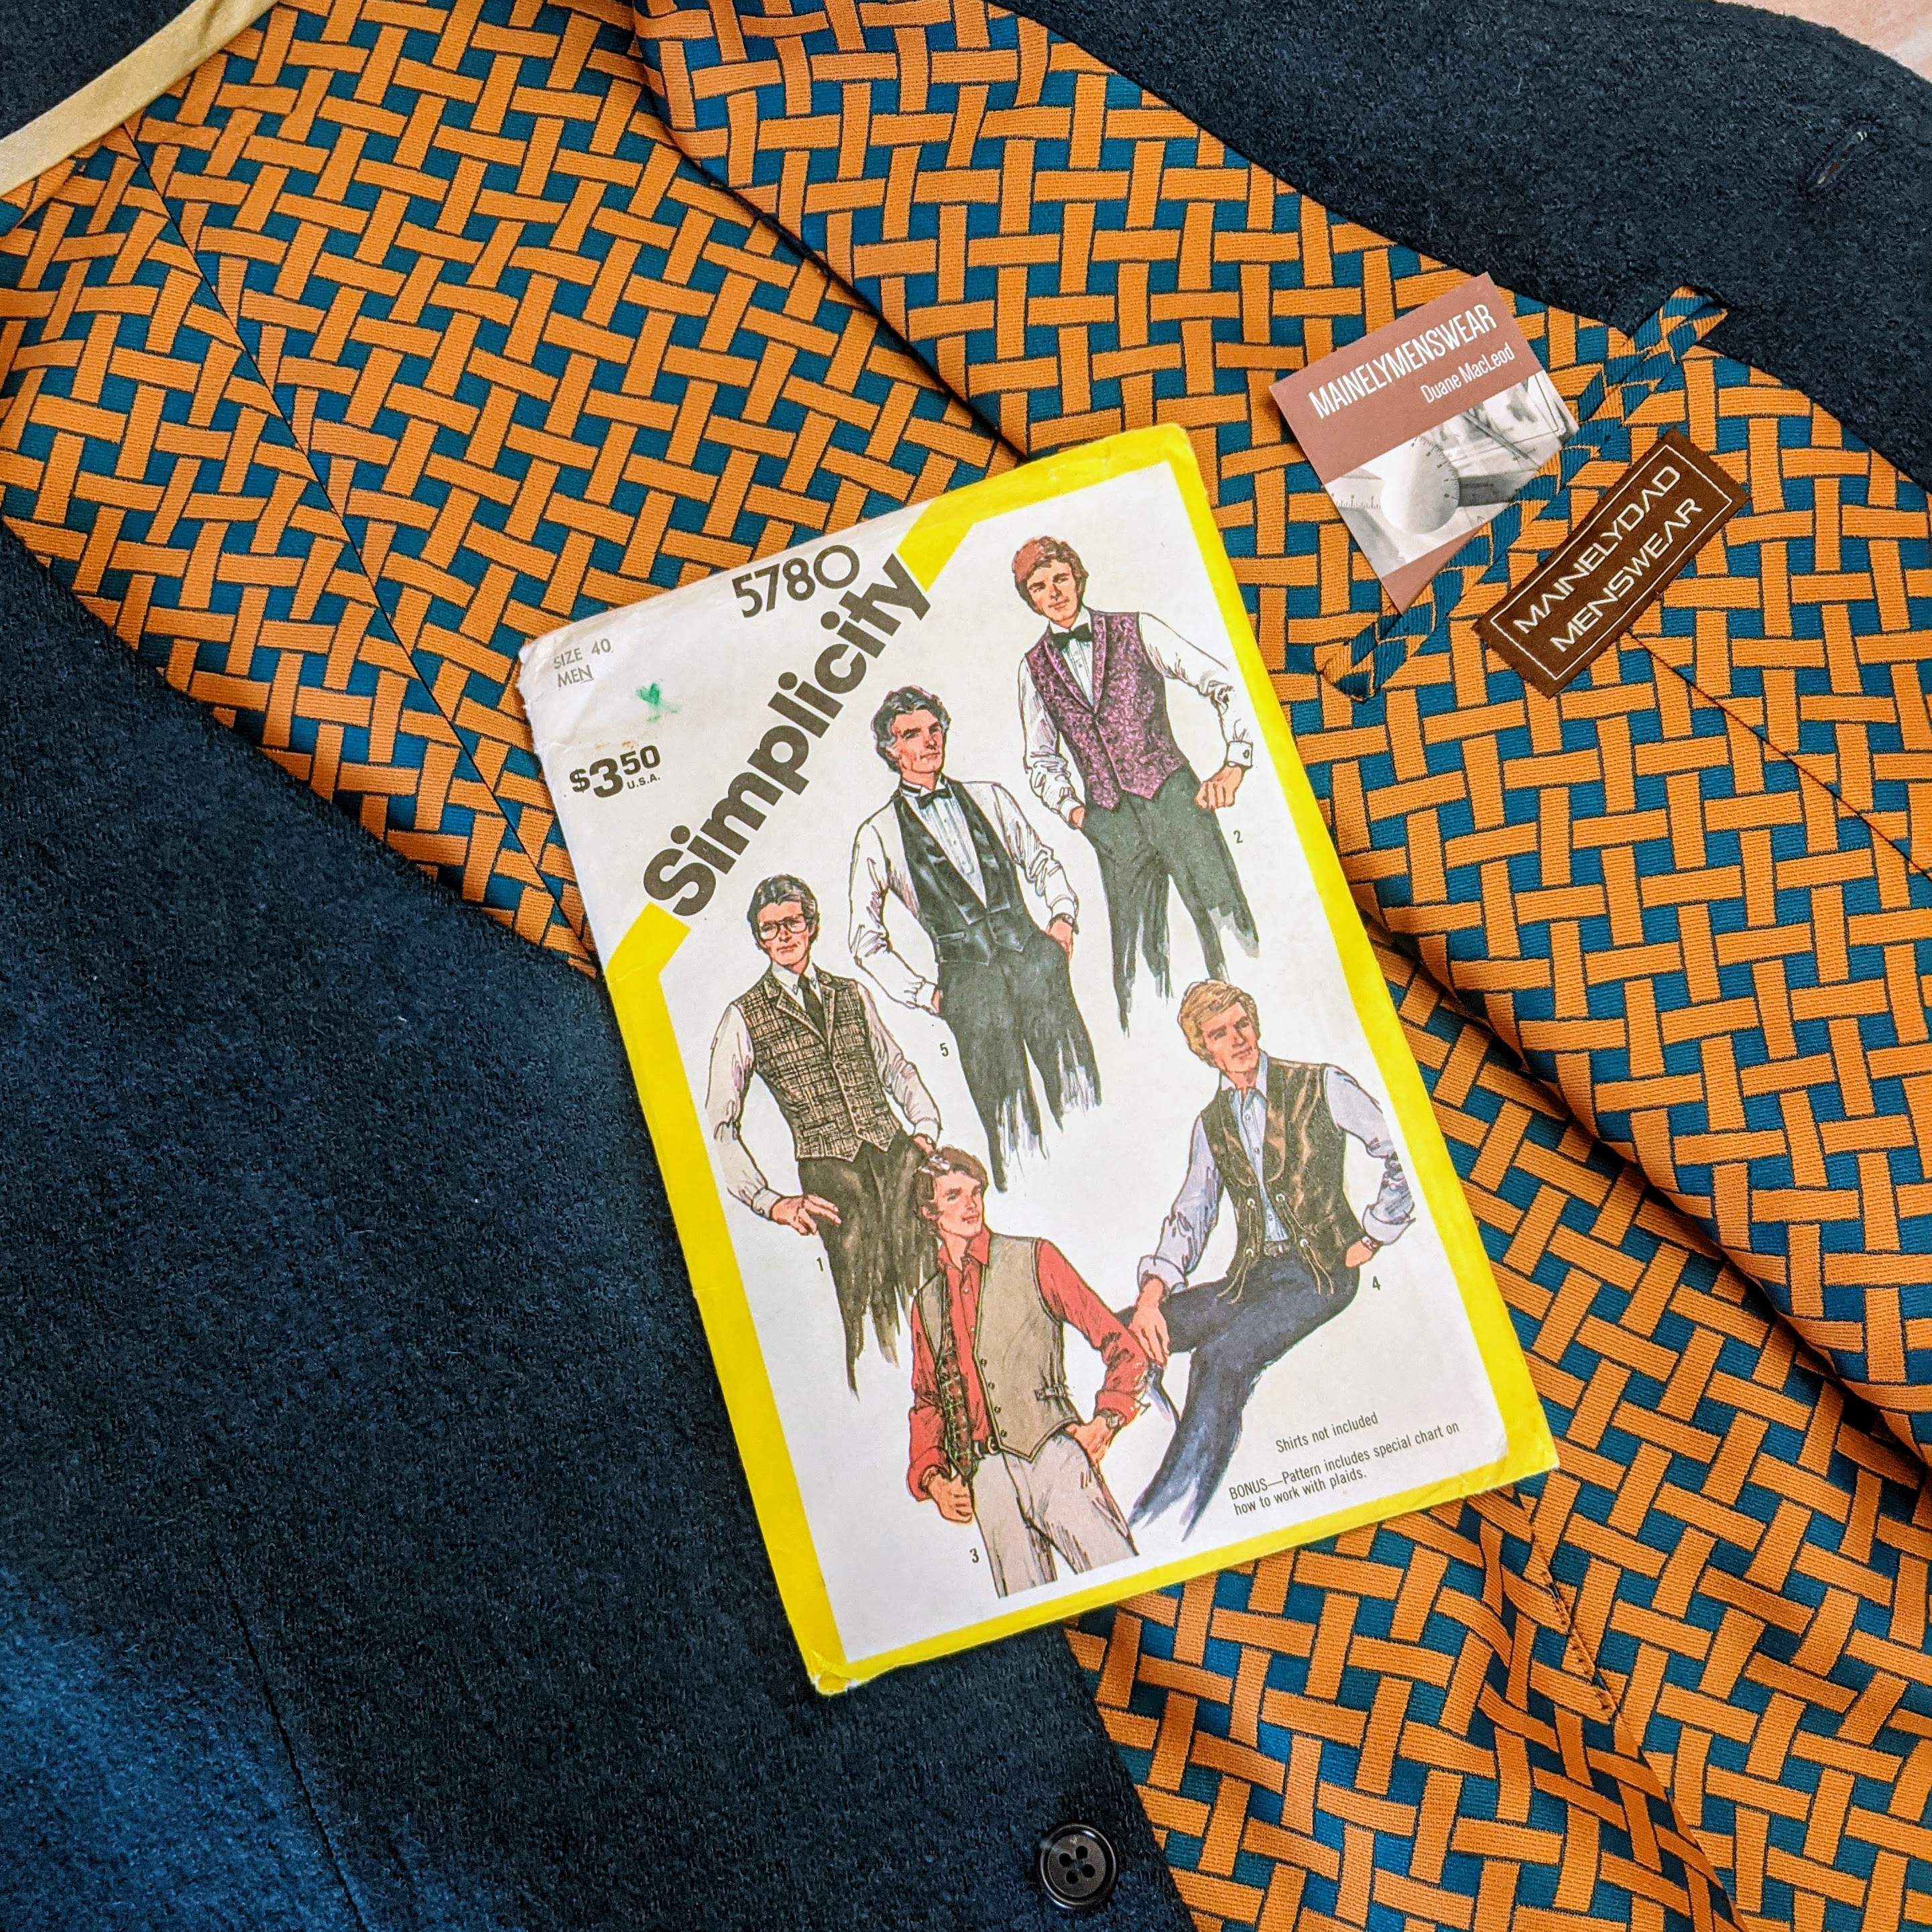
I made a version of this vest for my son’s wedding back in 2017, and it turned out great. I certainly don’t remember any anguish over it, so why not apply its construction to the Belvedere? It turned out to be well worth the try.
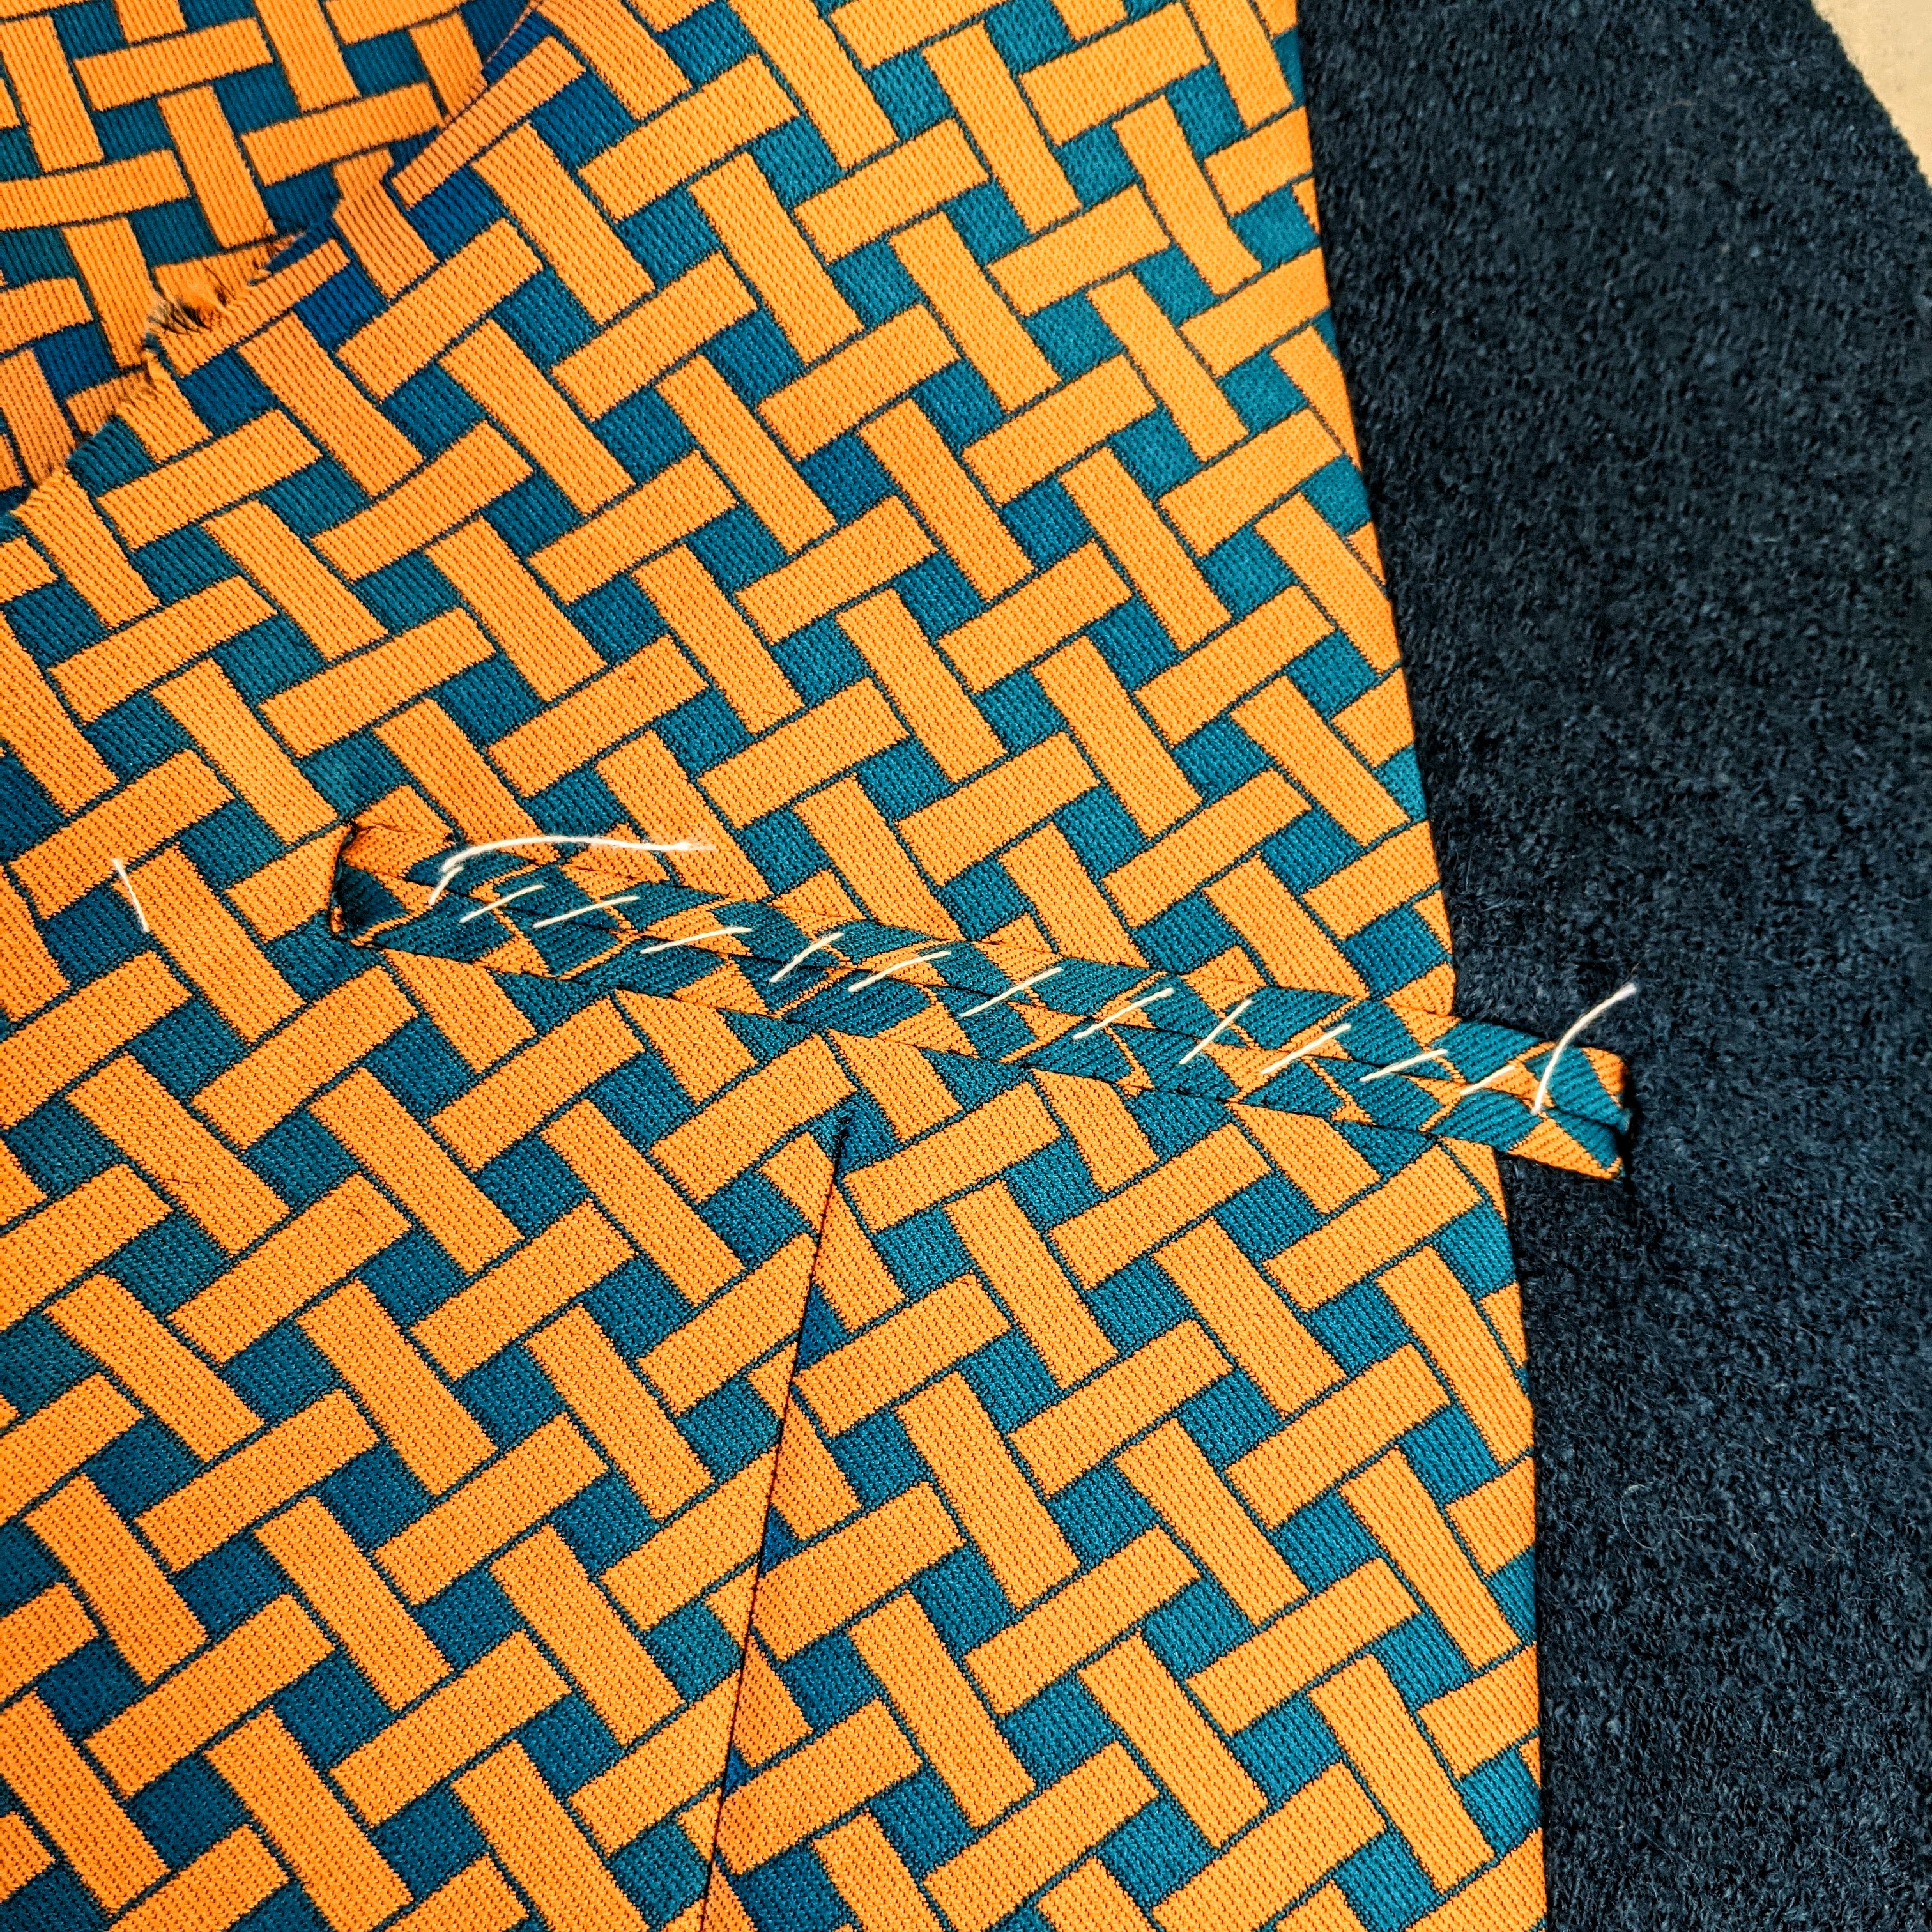
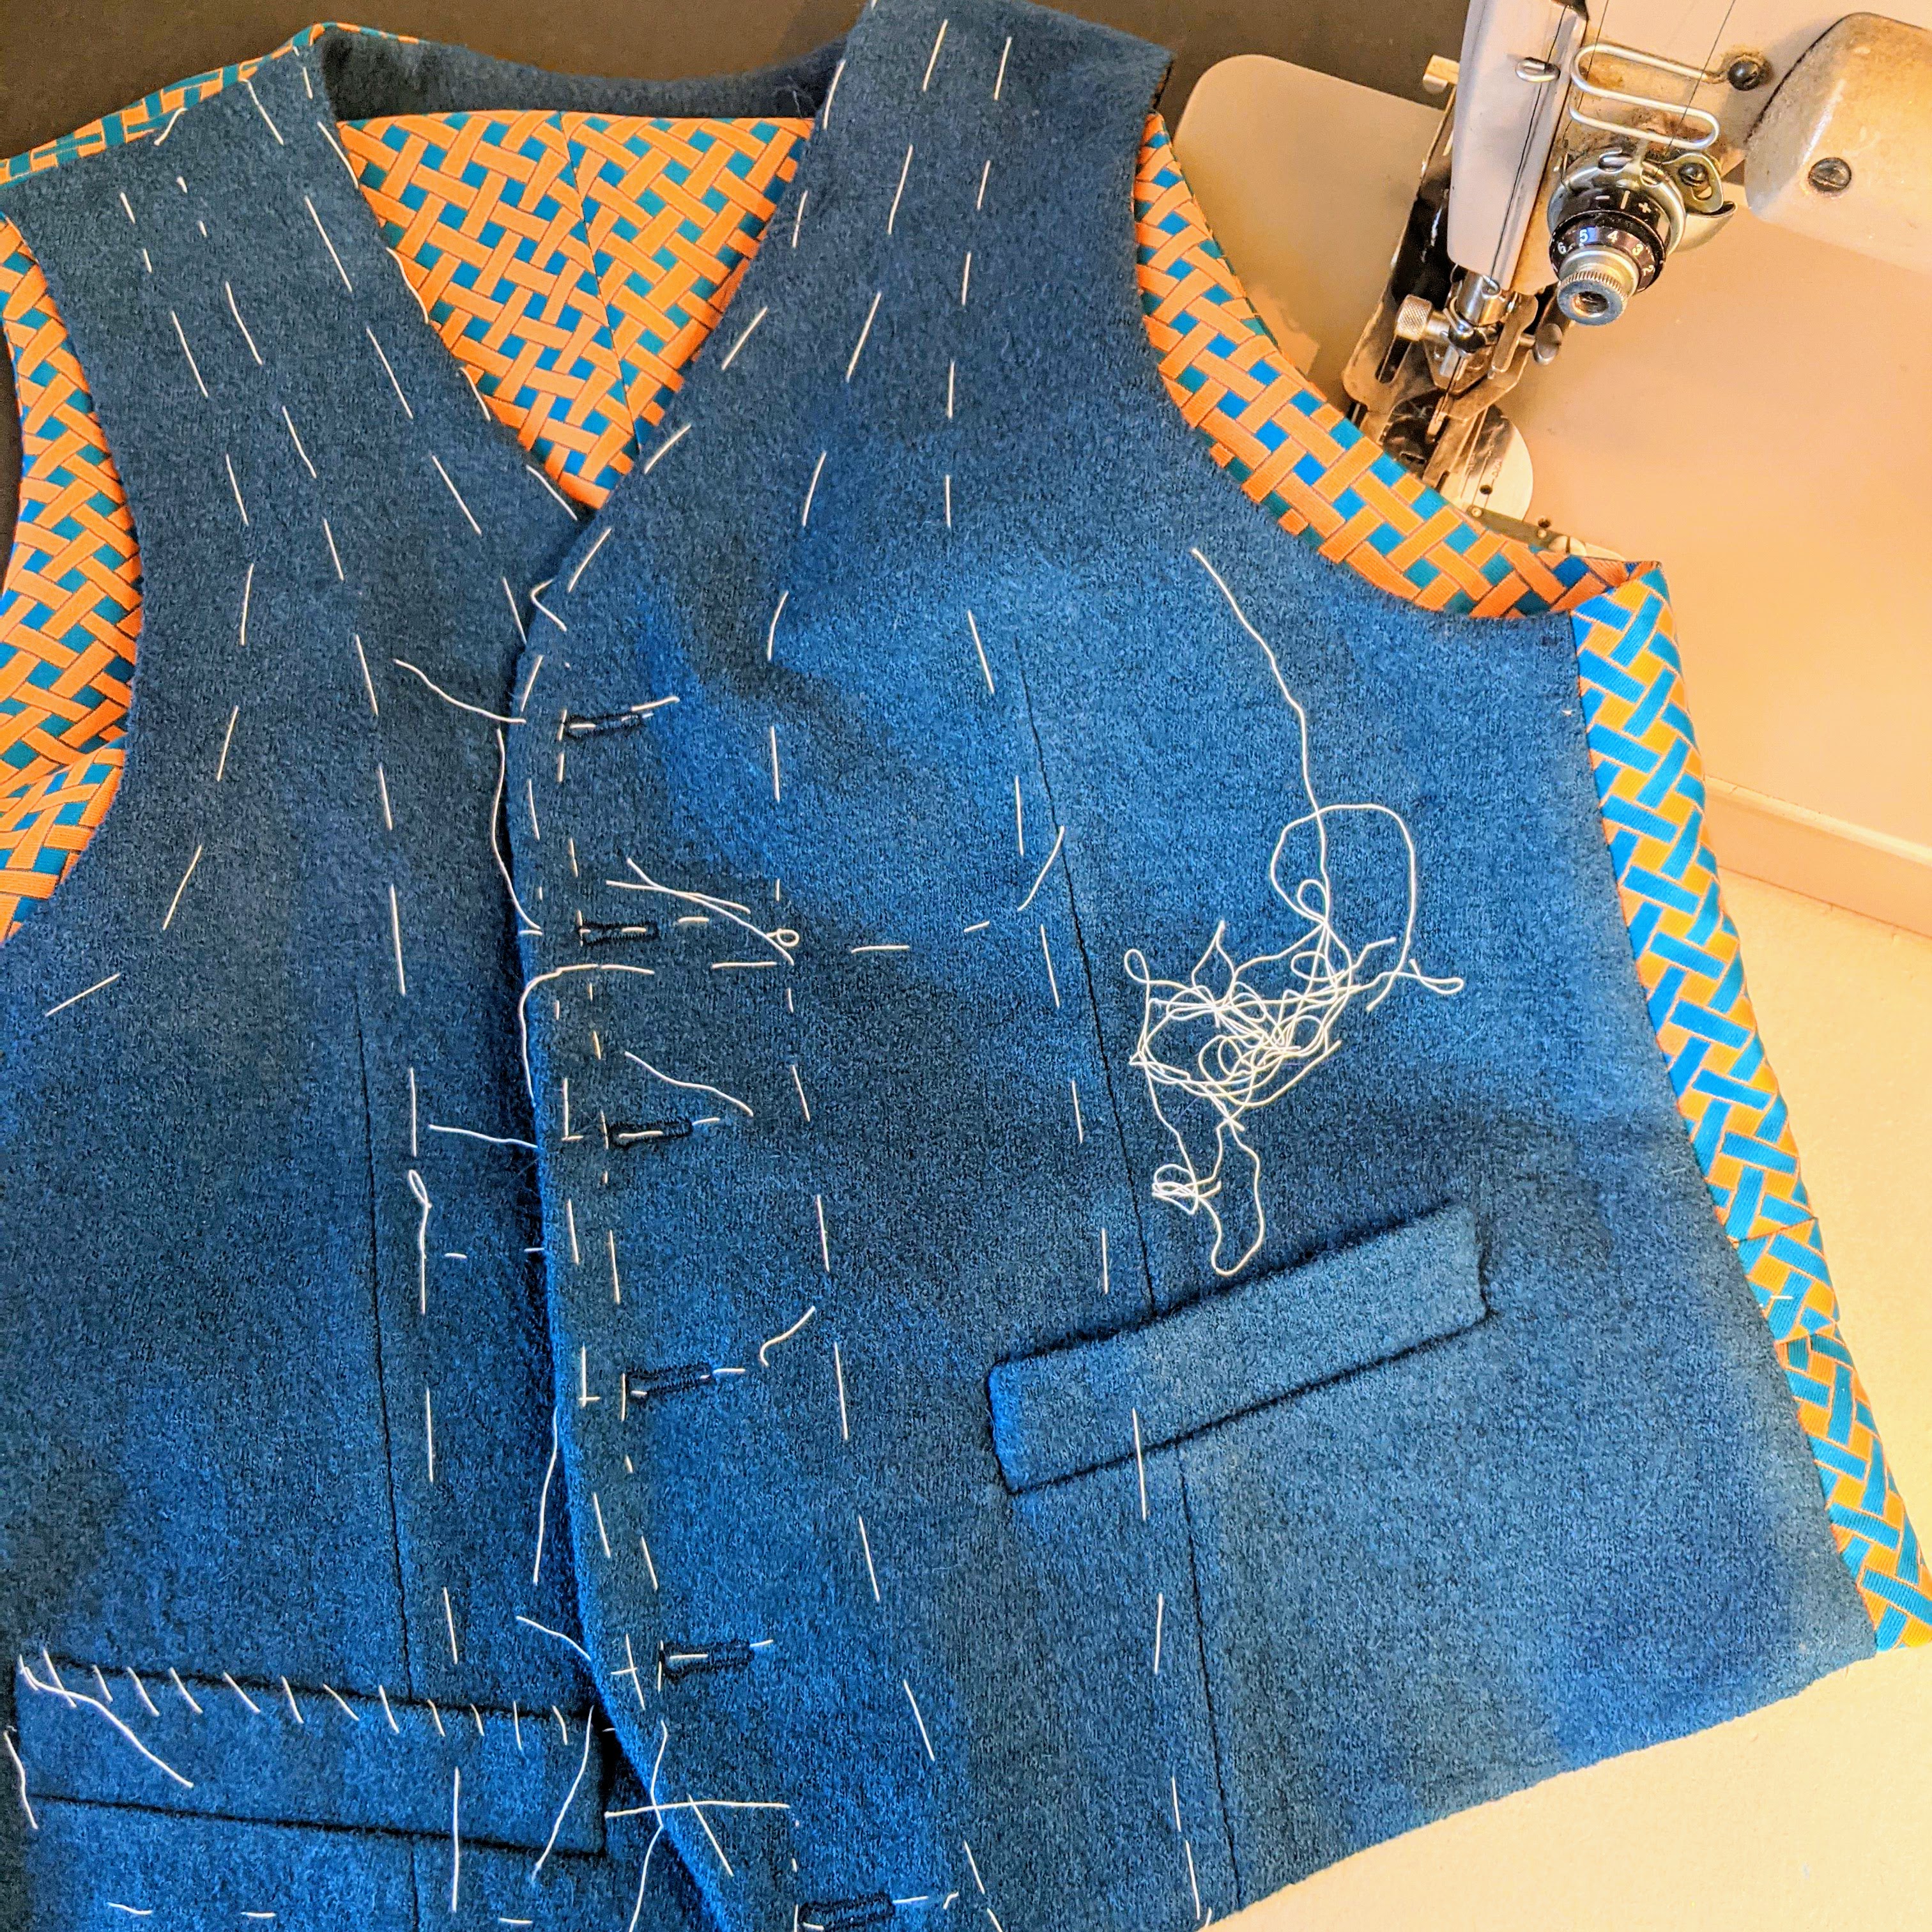
I documented most of the changes in two YouTube videos, which I hope will be helpful to other sewists making this pattern. Admittedly, for such a small garment, it can get pretty unwieldy; so you will want a big workspace to spread it all out. The advantage is, however, that you have more control of the seams, and can trim them to reduce much of the bulk; something I was not able to do well with the bagging technique.
Yes, you will have to do a bit more hand sewing with this construction method, but I think the final result makes it all well worth it.
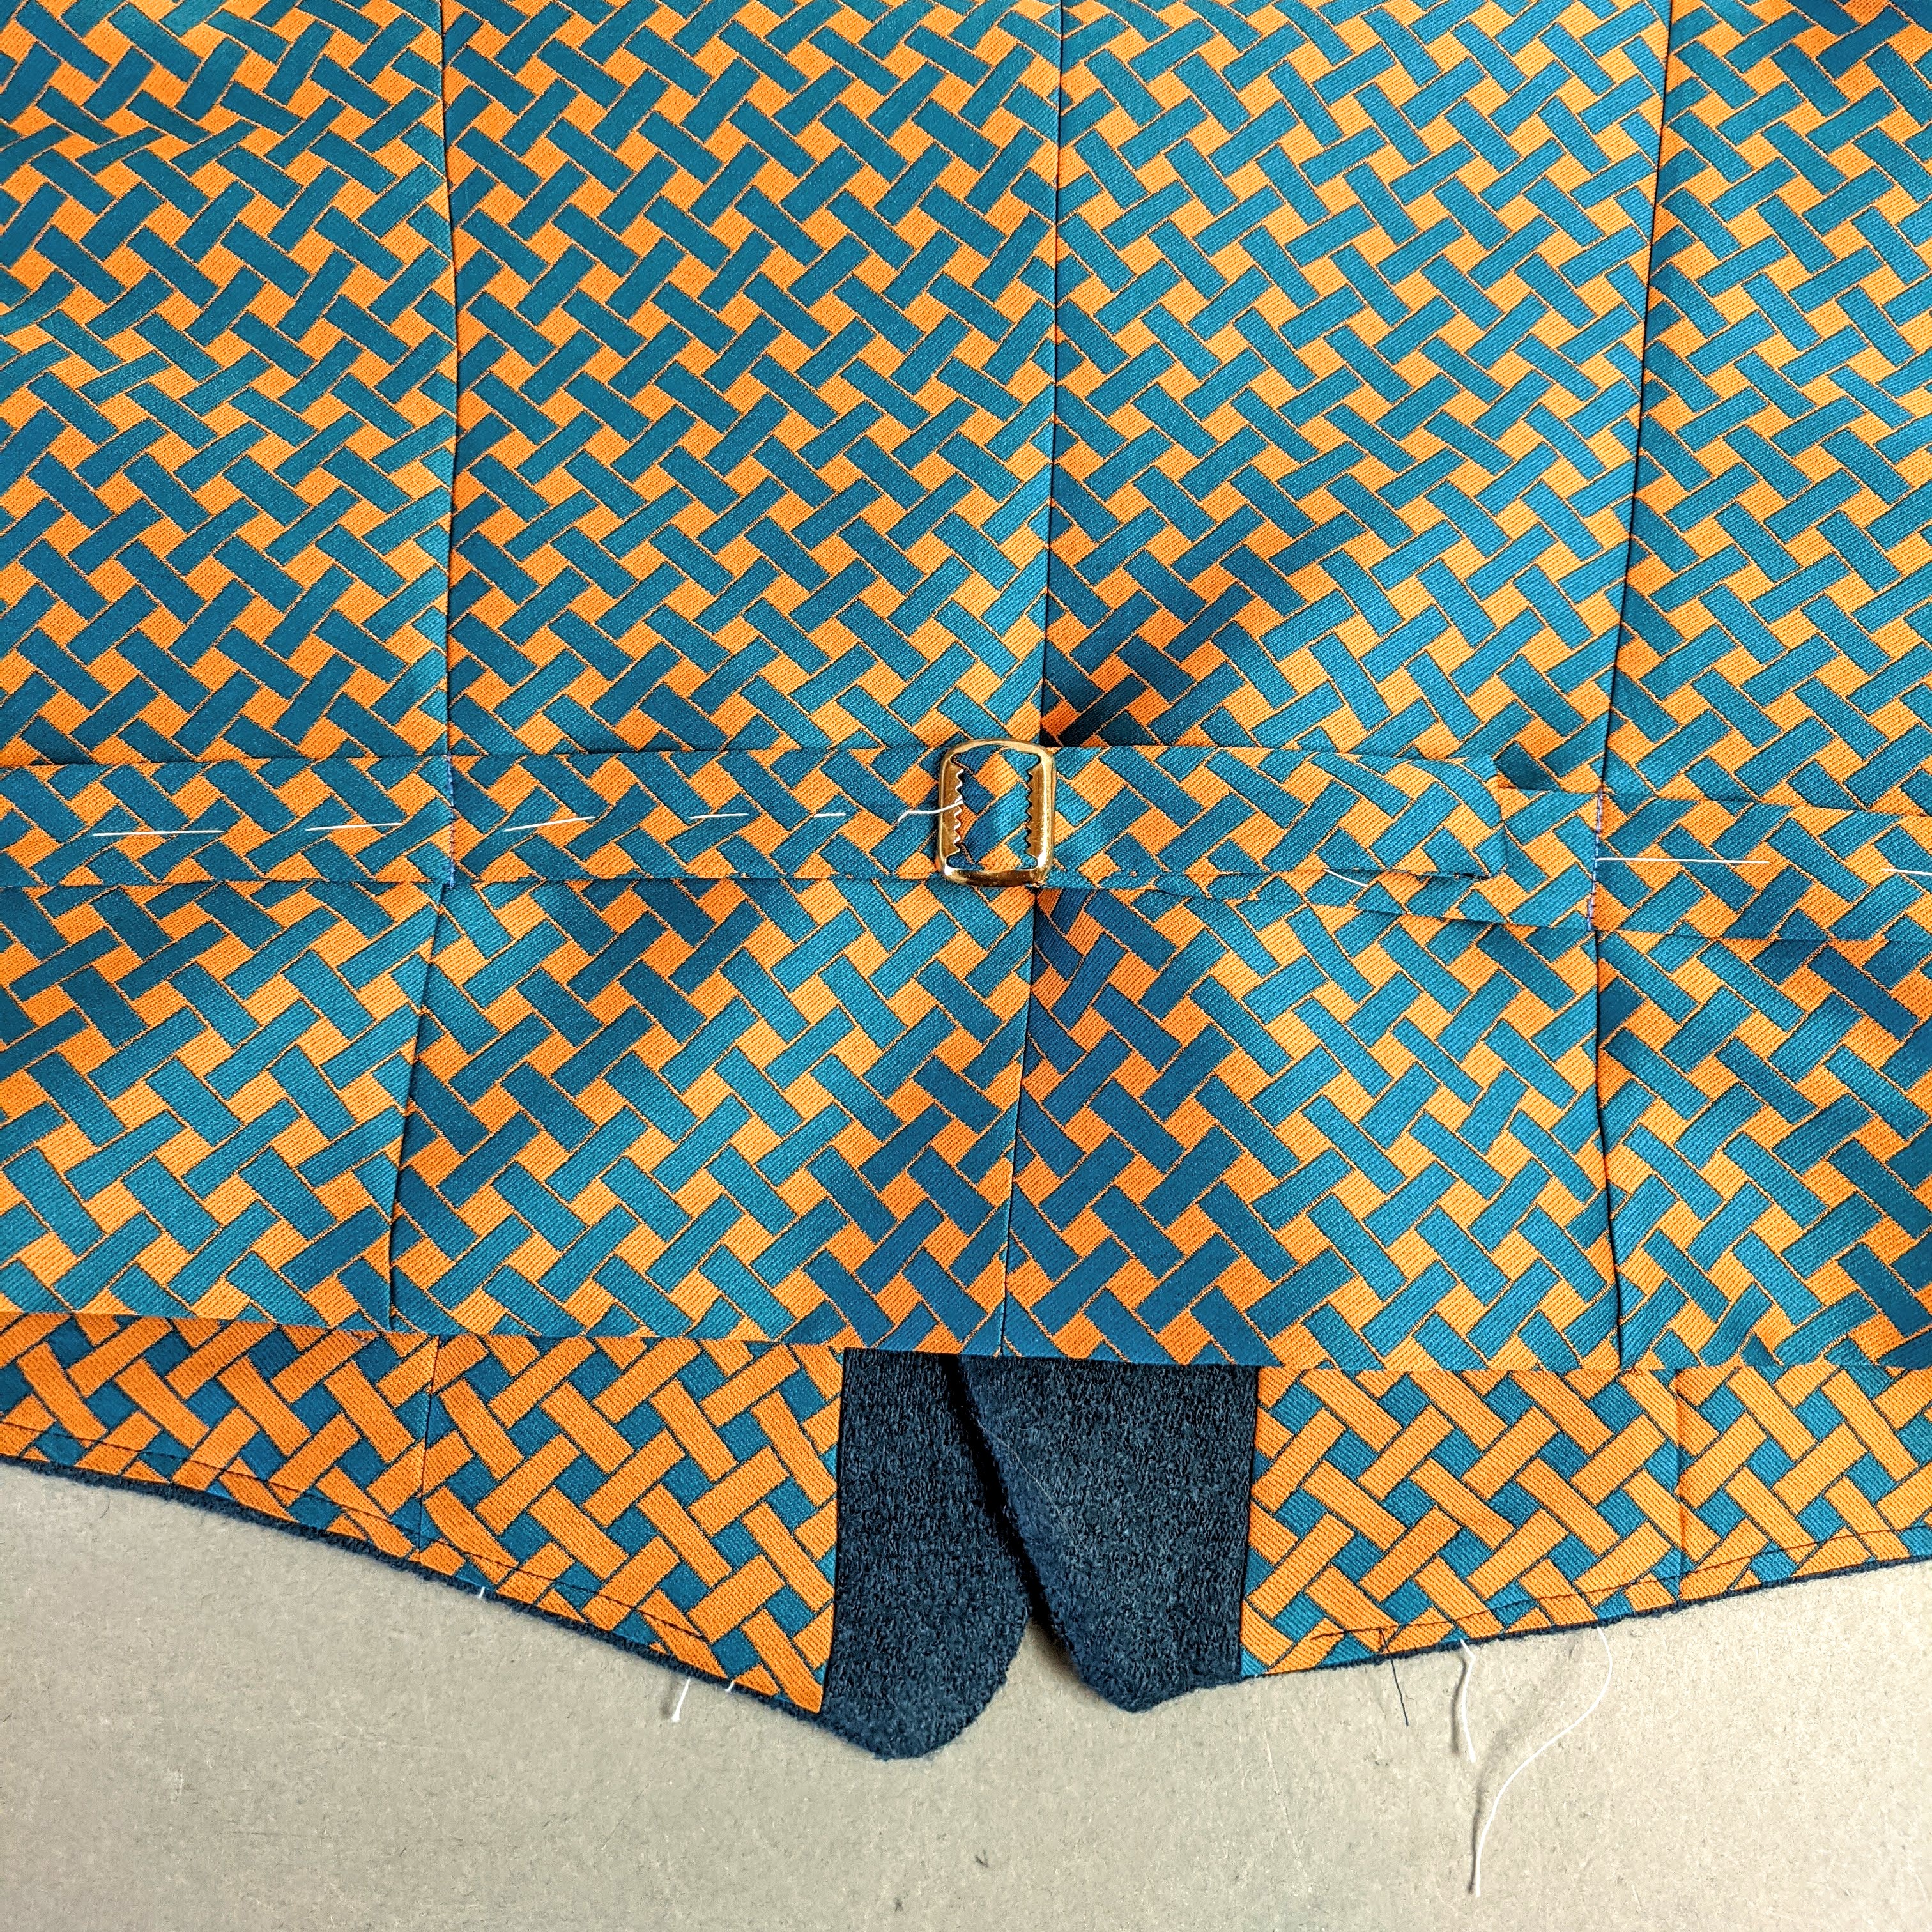
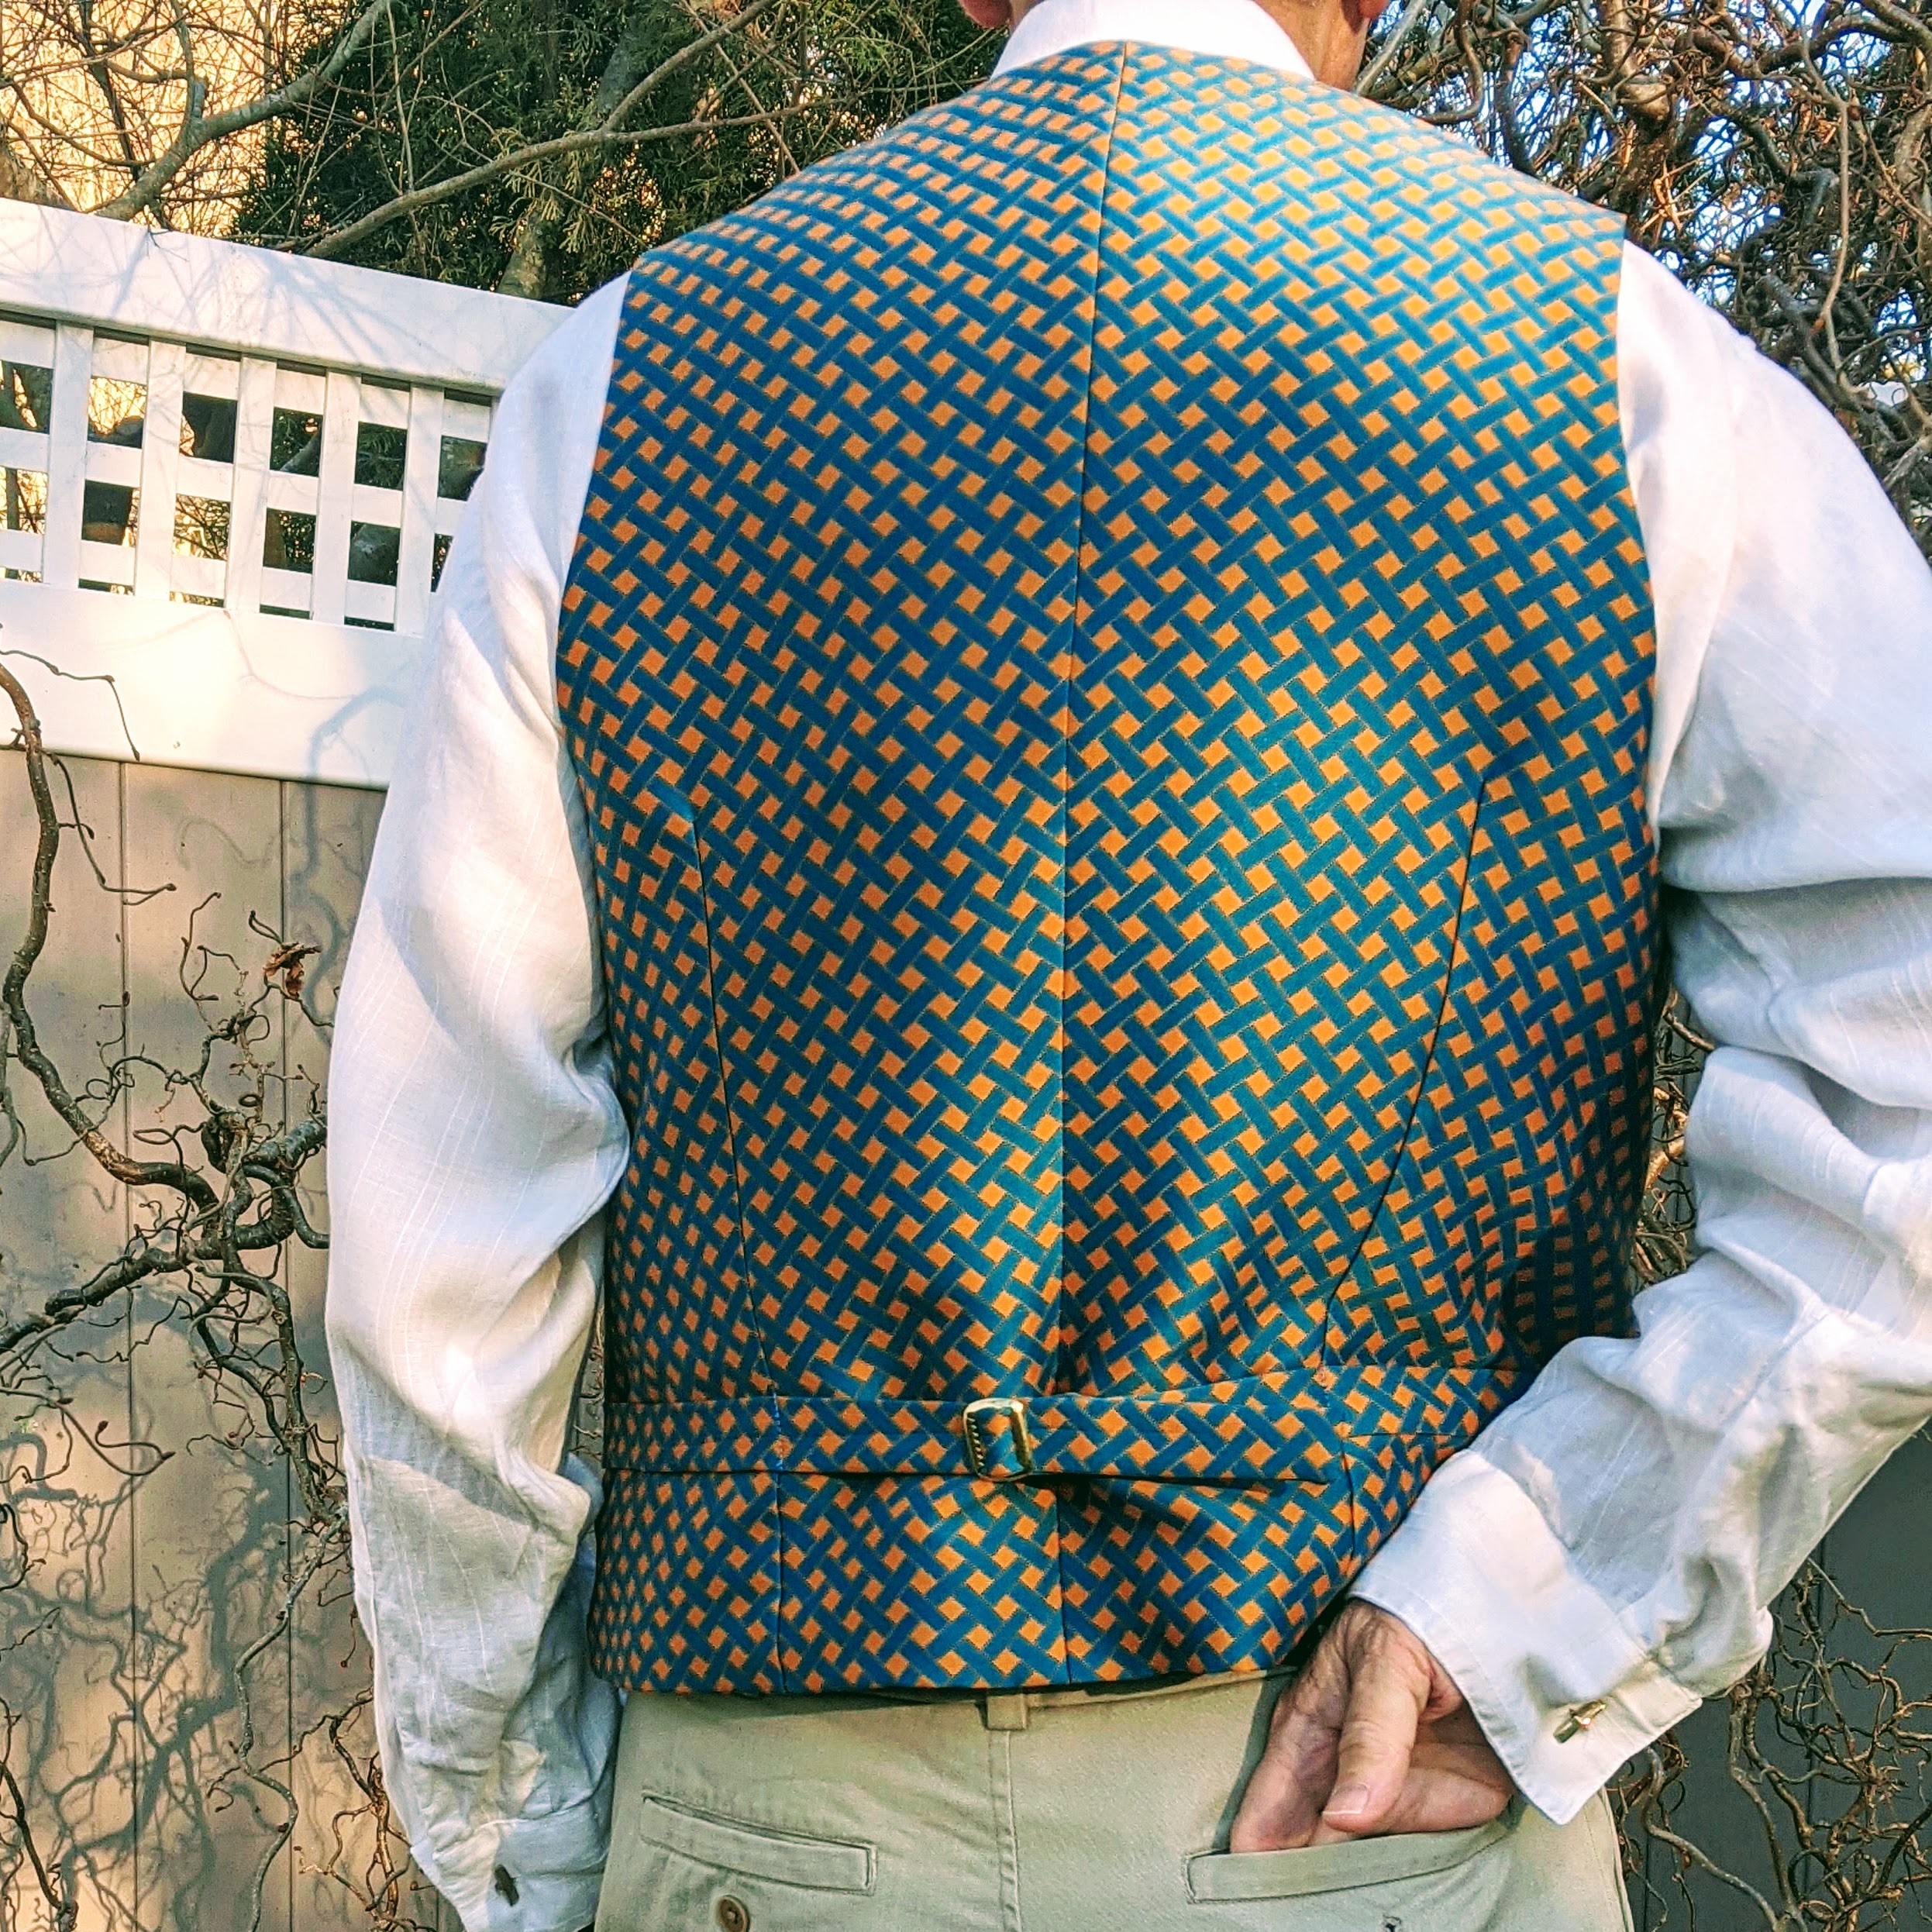
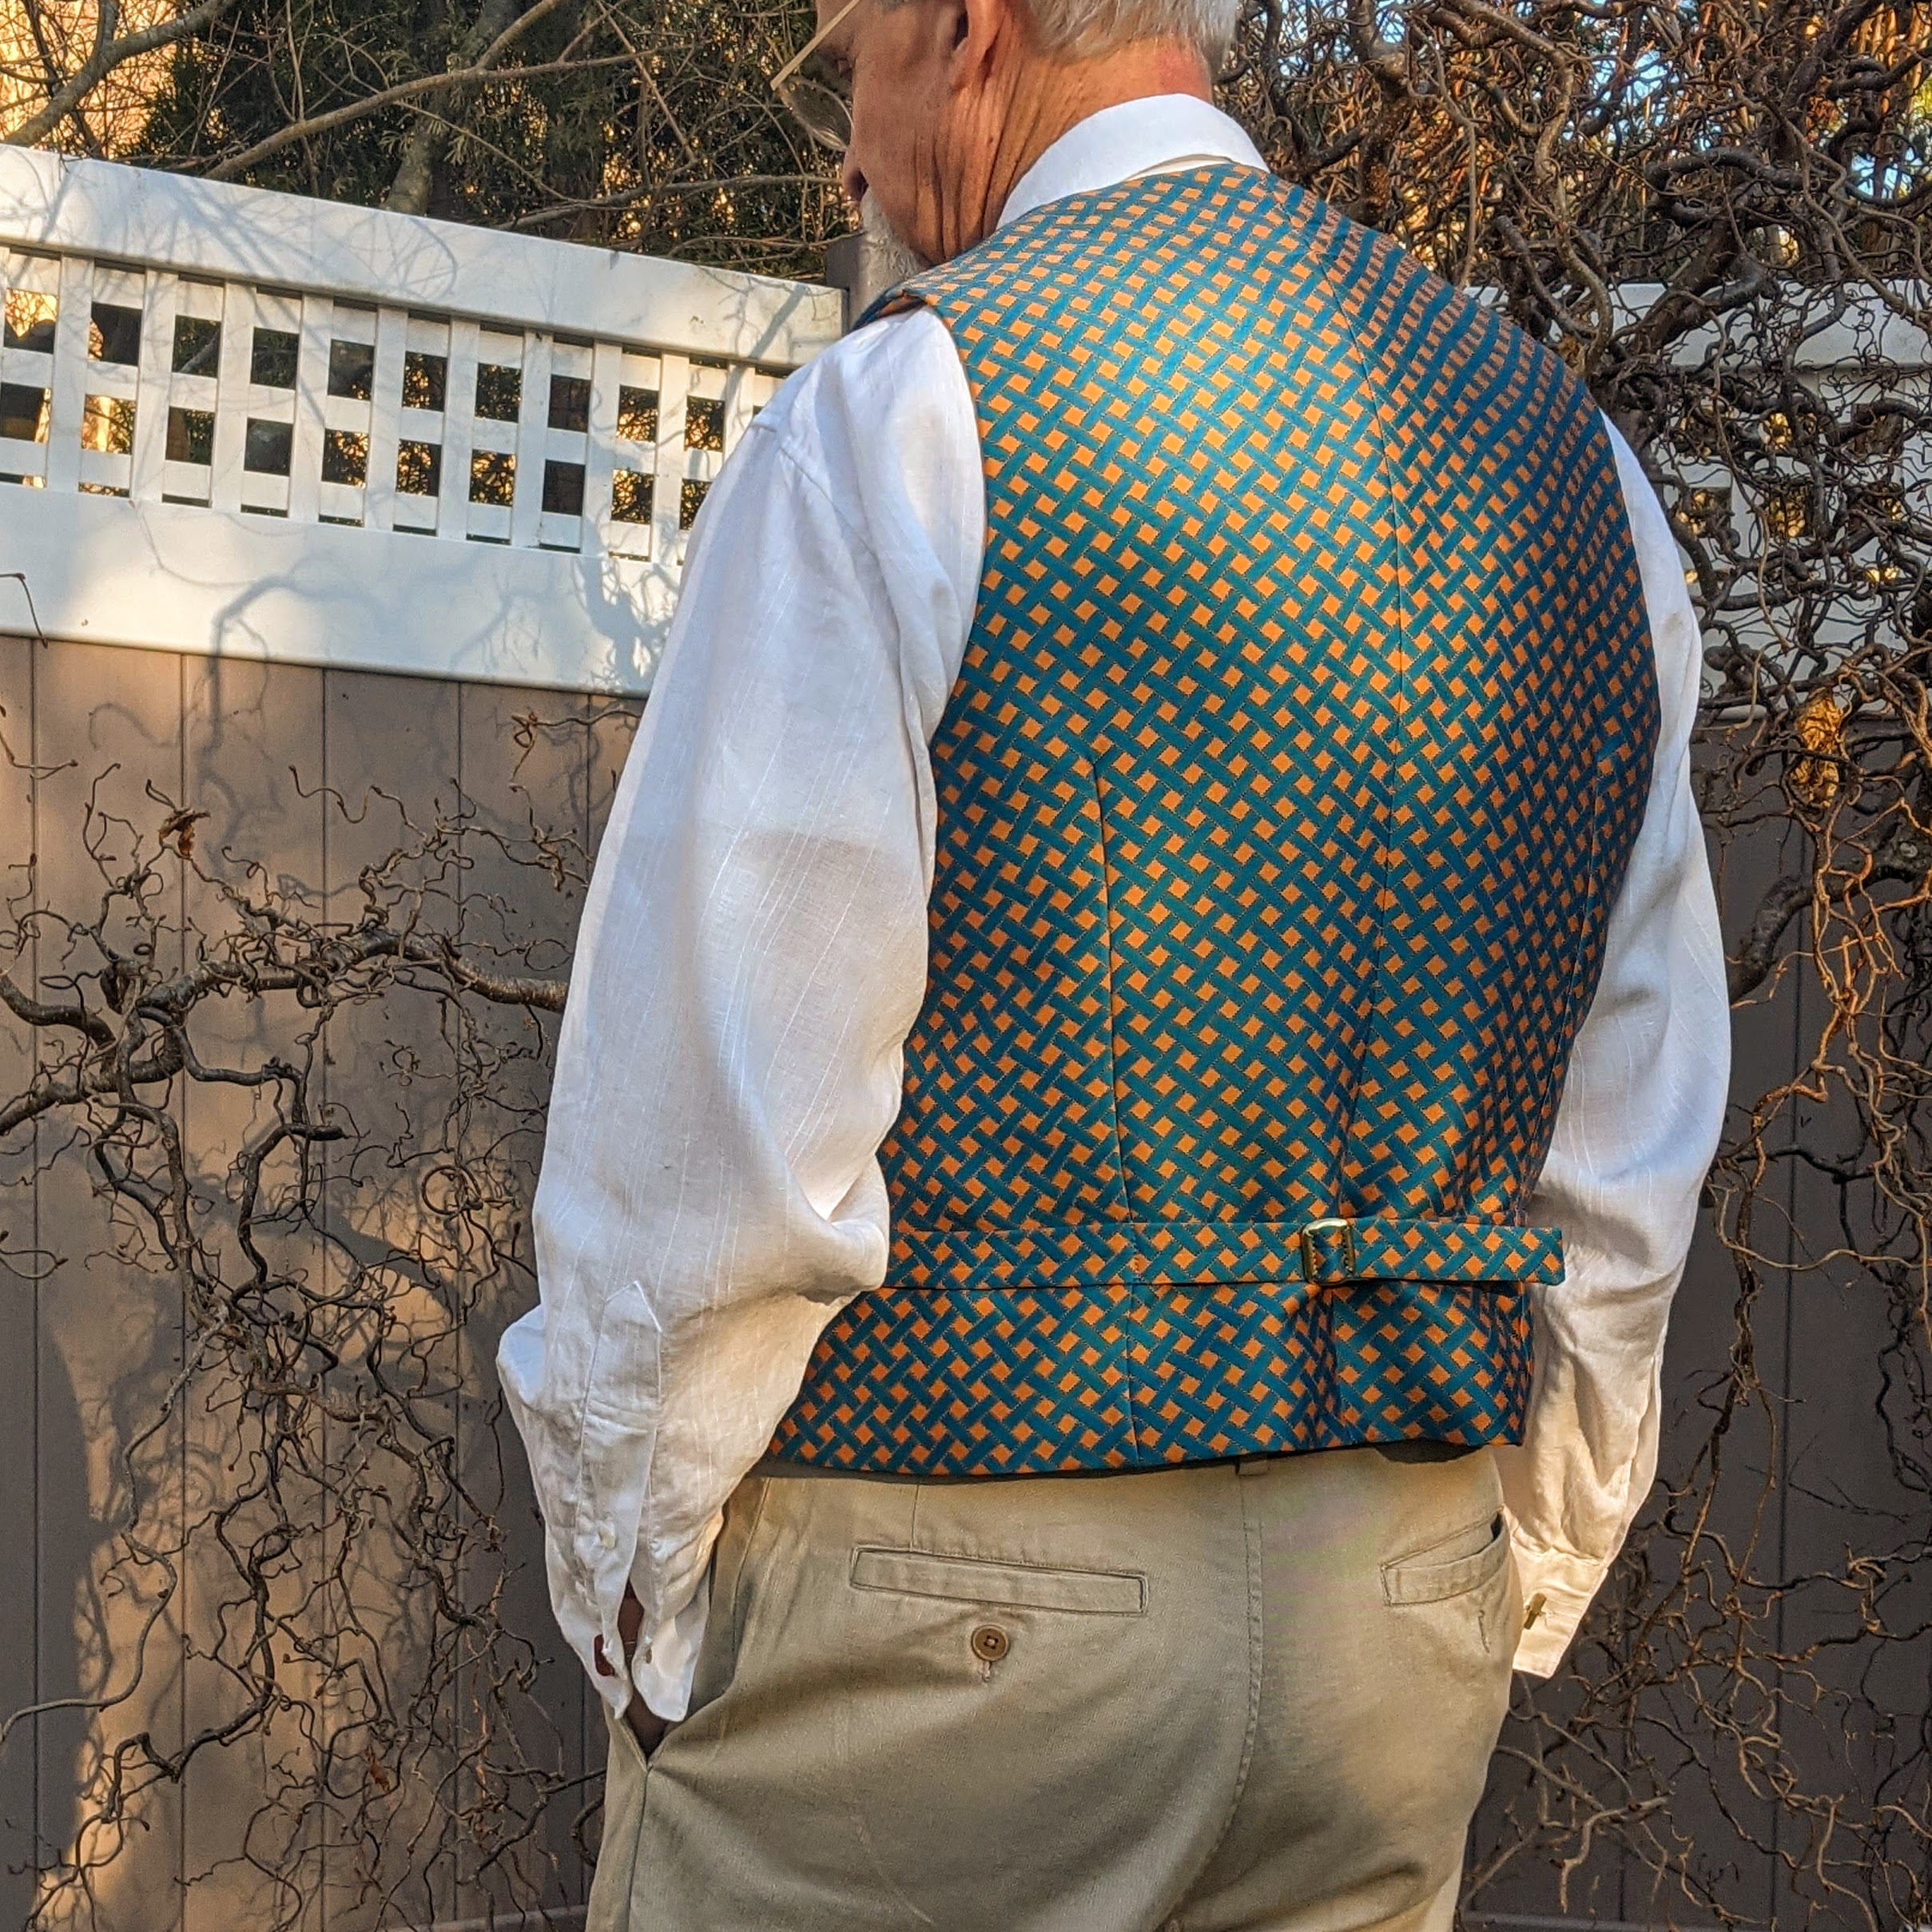
I made a few other changes / additions that aren’t part of the pattern. I added an inside chest pocket for my phone, applied the back neck facing with a Hong Kong finish, and attached a back belt that’s less “fiddly” than the type from Thread Theory’s website. This is all part of what I call the “Superpower” of sewing… We can have exactly the features that we want!


In conclusion, every change I made to this pattern, especially in the basic construction, paid off. Sometimes you just have to “sew off script”. In so doing, I’ve been able to take a pattern that I liked……to love! And for me, that’s huge.
Time to remove all the basting and hit the backyard! Spring comes late to the coast of Maine, so the extra layer was much appreciated for a very chilly photoshoot.


Wishing you all Happy Spring sewing!
Credits
Waistcoat – Boiled wool , Metro Textiles NYC
Teal / copper jacquard, Gorgeous Fabrics
Shirt – Linen, Grayline Linen NYC
Trousers – Thread Theory Jedediah Pants, Cotton twill, Metro Textiles
Navy striped tie – Vintage Rooster
Peach tie – Polo Ralph Lauren
Cufflinks – Baltic amber, Ebay

Looks great, Duane! Congratulations on conquering the pattern!
LikeLike
Very stylish.
LikeLike
Golly, you’re good. Intimidating maybe, but good.
LikeLike
Superb! You are awesome in your construction and instruction.
LikeLike
Beautiful. I’ve always loved a blue and orange combo. Sewing conundrums – go around it, go through it or go over the top of it to get to the end zone. Well done.
LikeLike
Very nice, Duane! Thanks for all the info. My sewing has improved thanks to your graciously shared info. Nice rabbits too, much preferred to my chewing ones.
I’m back to pants fitting challenges, after shoulder surgery and a side jaunt to an experience like yours – a flannel blouse, Norma by Fibre Mood – with changes to make it more what I like. And knowledge I don’t prefer 3/8″ seam allowances! 😊
LikeLike
Looks great on and very stylish. Interesting that you decided to go your own way with the pattern but results speak for themselves.
LikeLike
It really looks great! I’ve enjoyed the videos too!
LikeLike
“Smaller” projects seem to take more time to finesse the details, and you have made a beautiful vest by paying attention to those details (and the fabric choices are gorgeous as always). I haven’t watched the video yet, but I assume you mention why it’s useful to tack those welt openings together while you’re constructing the rest of the vest. It was a really really great moment in my life when I had that pointed out to me, and all of the welts I have made since then look 200% better.
LikeLike
Looking great! As usual 🙂
From what I’ve been told, bagged linings are a production technique, meant to minimize handsewing, which, over hundreds of pieces, will save time therefore $$$. Most efficient does not necessarily mean the easiest, or the most accurate result
LikeLike
I really appreciate all your details and honest reviews of patterns and techniques. I have loved your series on the Belvedere Waistcoat and the posts about the Sienna Makers Jackets. Both patterns are ones that you have helped me decide to make for myself and my family. Thank you Duane, for making these videos and blog posts. I look forward to all your sewing adventures.
LikeLike
I made my father two waistcoats using the Simplicity 5780 pattern (same view as yours), sometime in the 1960s, one in a light camel-coloured wool, the other in olive-green suede. They were a great success. He handed them on to my daughters when he put on a bit of weight…! They wore them a lot during their teenage years (they are in their late 30s now). Dad died some years ago but I still have the waistcoats displayed on my sewing-room wall. The Belvedere sounds horrendously complicated whereas the Simplicity was pretty straightforward; it must have been because I was still at school when I made them. Yours looks spiffing! Love the lining and the little extra touches.
LikeLike
Magnificent waistcoat – not just the level of finish achieved but the fabulous fabric combinations. Sewing is like cooking the recipe is just a guide. When you have been sewing a while you learn techniques that suit you. They aren’t necessarily better techniques just better for you. Congratulations on mastering the pattern and achieving what you envisaged.
LikeLike
Excellent explain
LikeLike
I know I’m commenting a little late, but I finally got around to reading some of your latest blogs.
I too love making “waistcoats,” very British, but I like calling them vests. My fabric of choice is using Japanese silk kimono fabric, especially black ground fabric with metallic stitching. And I always bag the lining, eliminating any neck facing, using Bemberg rayon as the lining. Buttons are covered with the silk fabric. And one other detail I incorporate, no metal buckles for the back belts, those teeth destroy the delicate belt fabric, either the silk kimono or Bemberg. Instead I make the belt straps long enough to tie them, no need for any metal.
Just my two cents on the art of “waistcoat” sewing. And finally keep those blog posts coming, it’s good to see a fellow sewist, sewer (?),(we’re about the same age, just turned 69), put out such great material (pun intended).
LikeLike
Part Two after viewing your videos.
My tips on closing the vest with no handwork. Turn and press just as you did. Close one side seam as usual, reaching through the other side seam. Open a few inches of the back hem seam, long enough to pull the other side seam through and close that side seam. Turn right side out, then edgestitch the entire back hem in order to close that last opening. If the thought of visible stitching abhors you, then feel free to hand stitch the hem opening closed, but that would be cheating, but might look very nice.
Keep on sewing!
LikeLike
Beautifully executed and helpfully taught. Thank you!
How do you attach the hair canvas to the jacket once you have added the dart and muslim strip to the neck edge?
Do you pad stitch it to the fashion fabric front? Do you not need to trim off the seam allowance around the whole hair canvas piece? Otherwise how will it crease for turning at the top sides and bottom of the waistcoat?
Very much appreciate your help, as I am using a thick Harris tweed!
LikeLike