

As promised, I’m finally getting around to posting some of the construction details from my Stylemaker projects. I’ll start with the waistcoat first.
The instruction booklet for the Belvedere Waistcoat emphasizes the importance of interfacing the fronts. The goal is to have it sit smoothly over the chest without buckling. My longtime readers know that I’m not a big fan of fusible interfacings, so I opted to use a lighter weight hair canvas and some tailoring techniques for my waistcoat fronts. Even if you don’t think of yourself as a tailoring geek, you may have an occasion to use some of these techniques in your projects.
(Of course, feel free to skip all of this if it’s not your jam)
First up is a technique from Edna Bishop’s text The Bishop Method of Clothing Construction. It’s an effective way of removing bulk from the edge of a jacket, coat, vest. Keep in mind that this is for sewn-in interfacings. The horizontal fibers in the hair canvas are springy, well suited for a waistcoat. The springy nature contributes to the smooth look we’re looking for, BUT that same quality also makes the fabric very resistant to pressing. By replacing the edge of the canvas with muslin, both bulk and pressing problems are eliminated.

Note that the grain of the muslin and the canvas should be identical. This is important.
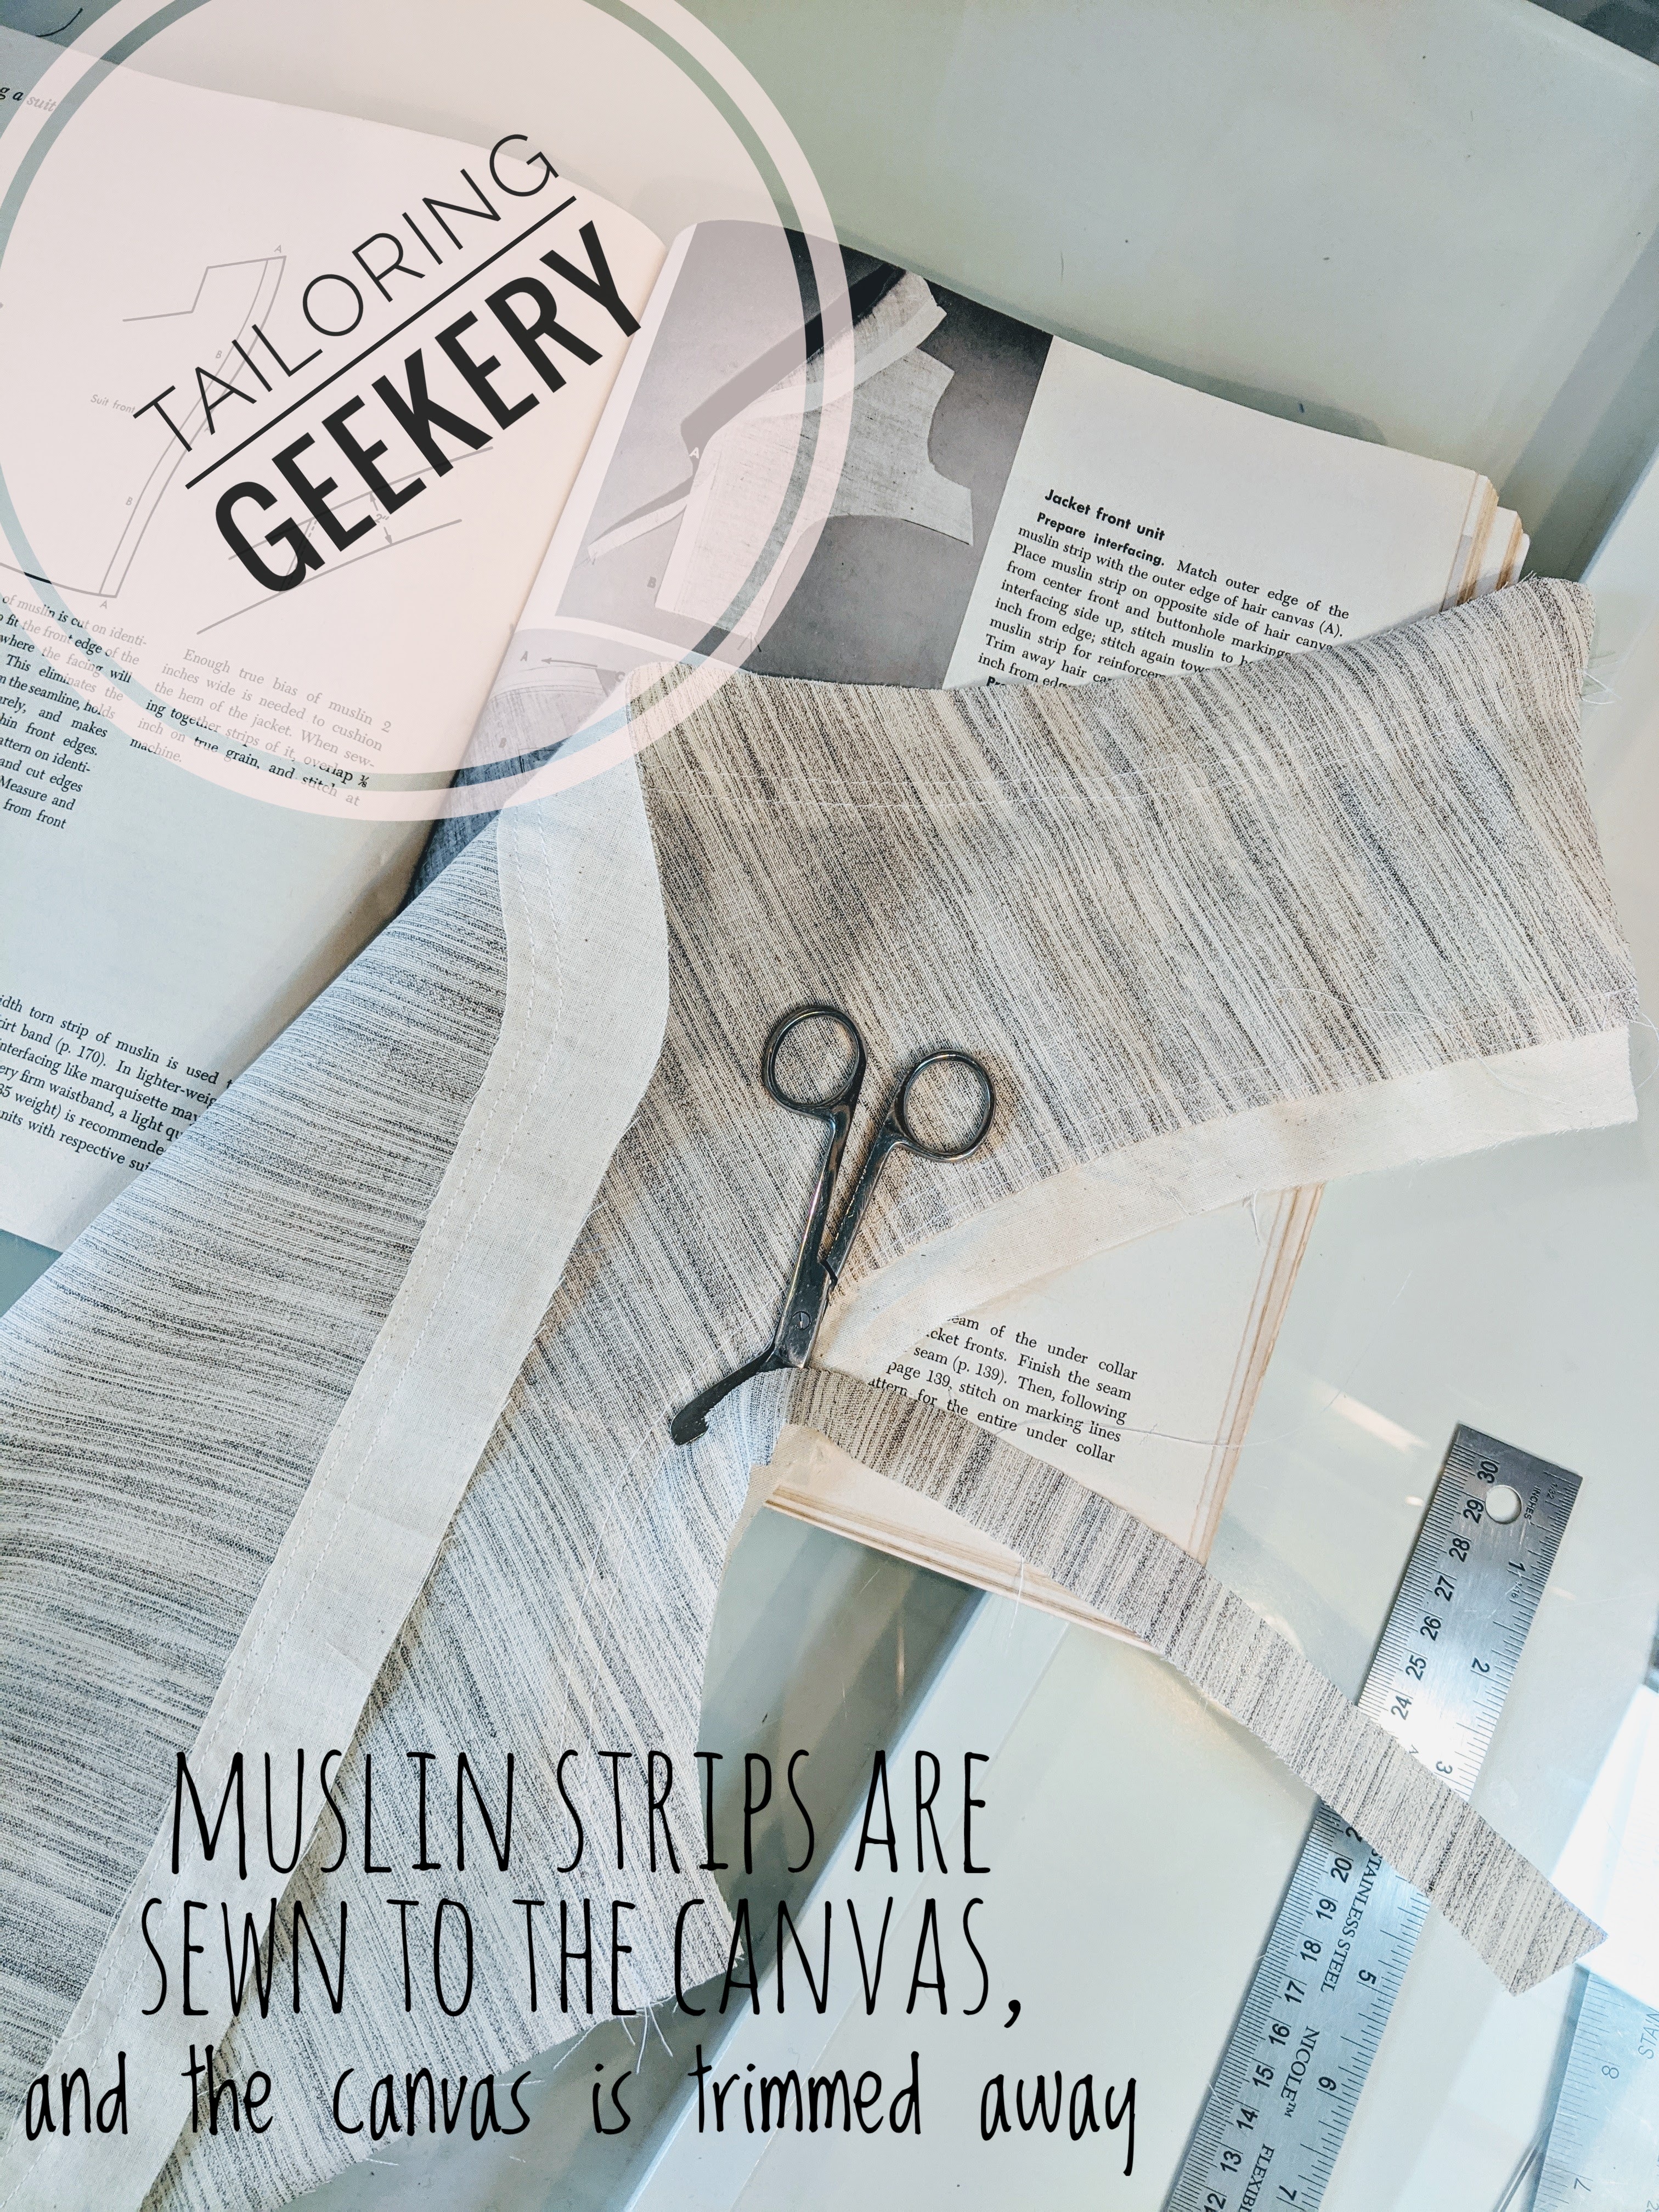
The muslin strip is sewn on with a 7/8″ seam allowance. A second line of stitching is placed 1/4″ away for reinforcement. Then the canvas is trimmed away. This technique will give a much crisper edge on the finished garment. If you’re adding a piping or a bias binding, this is the way to go.
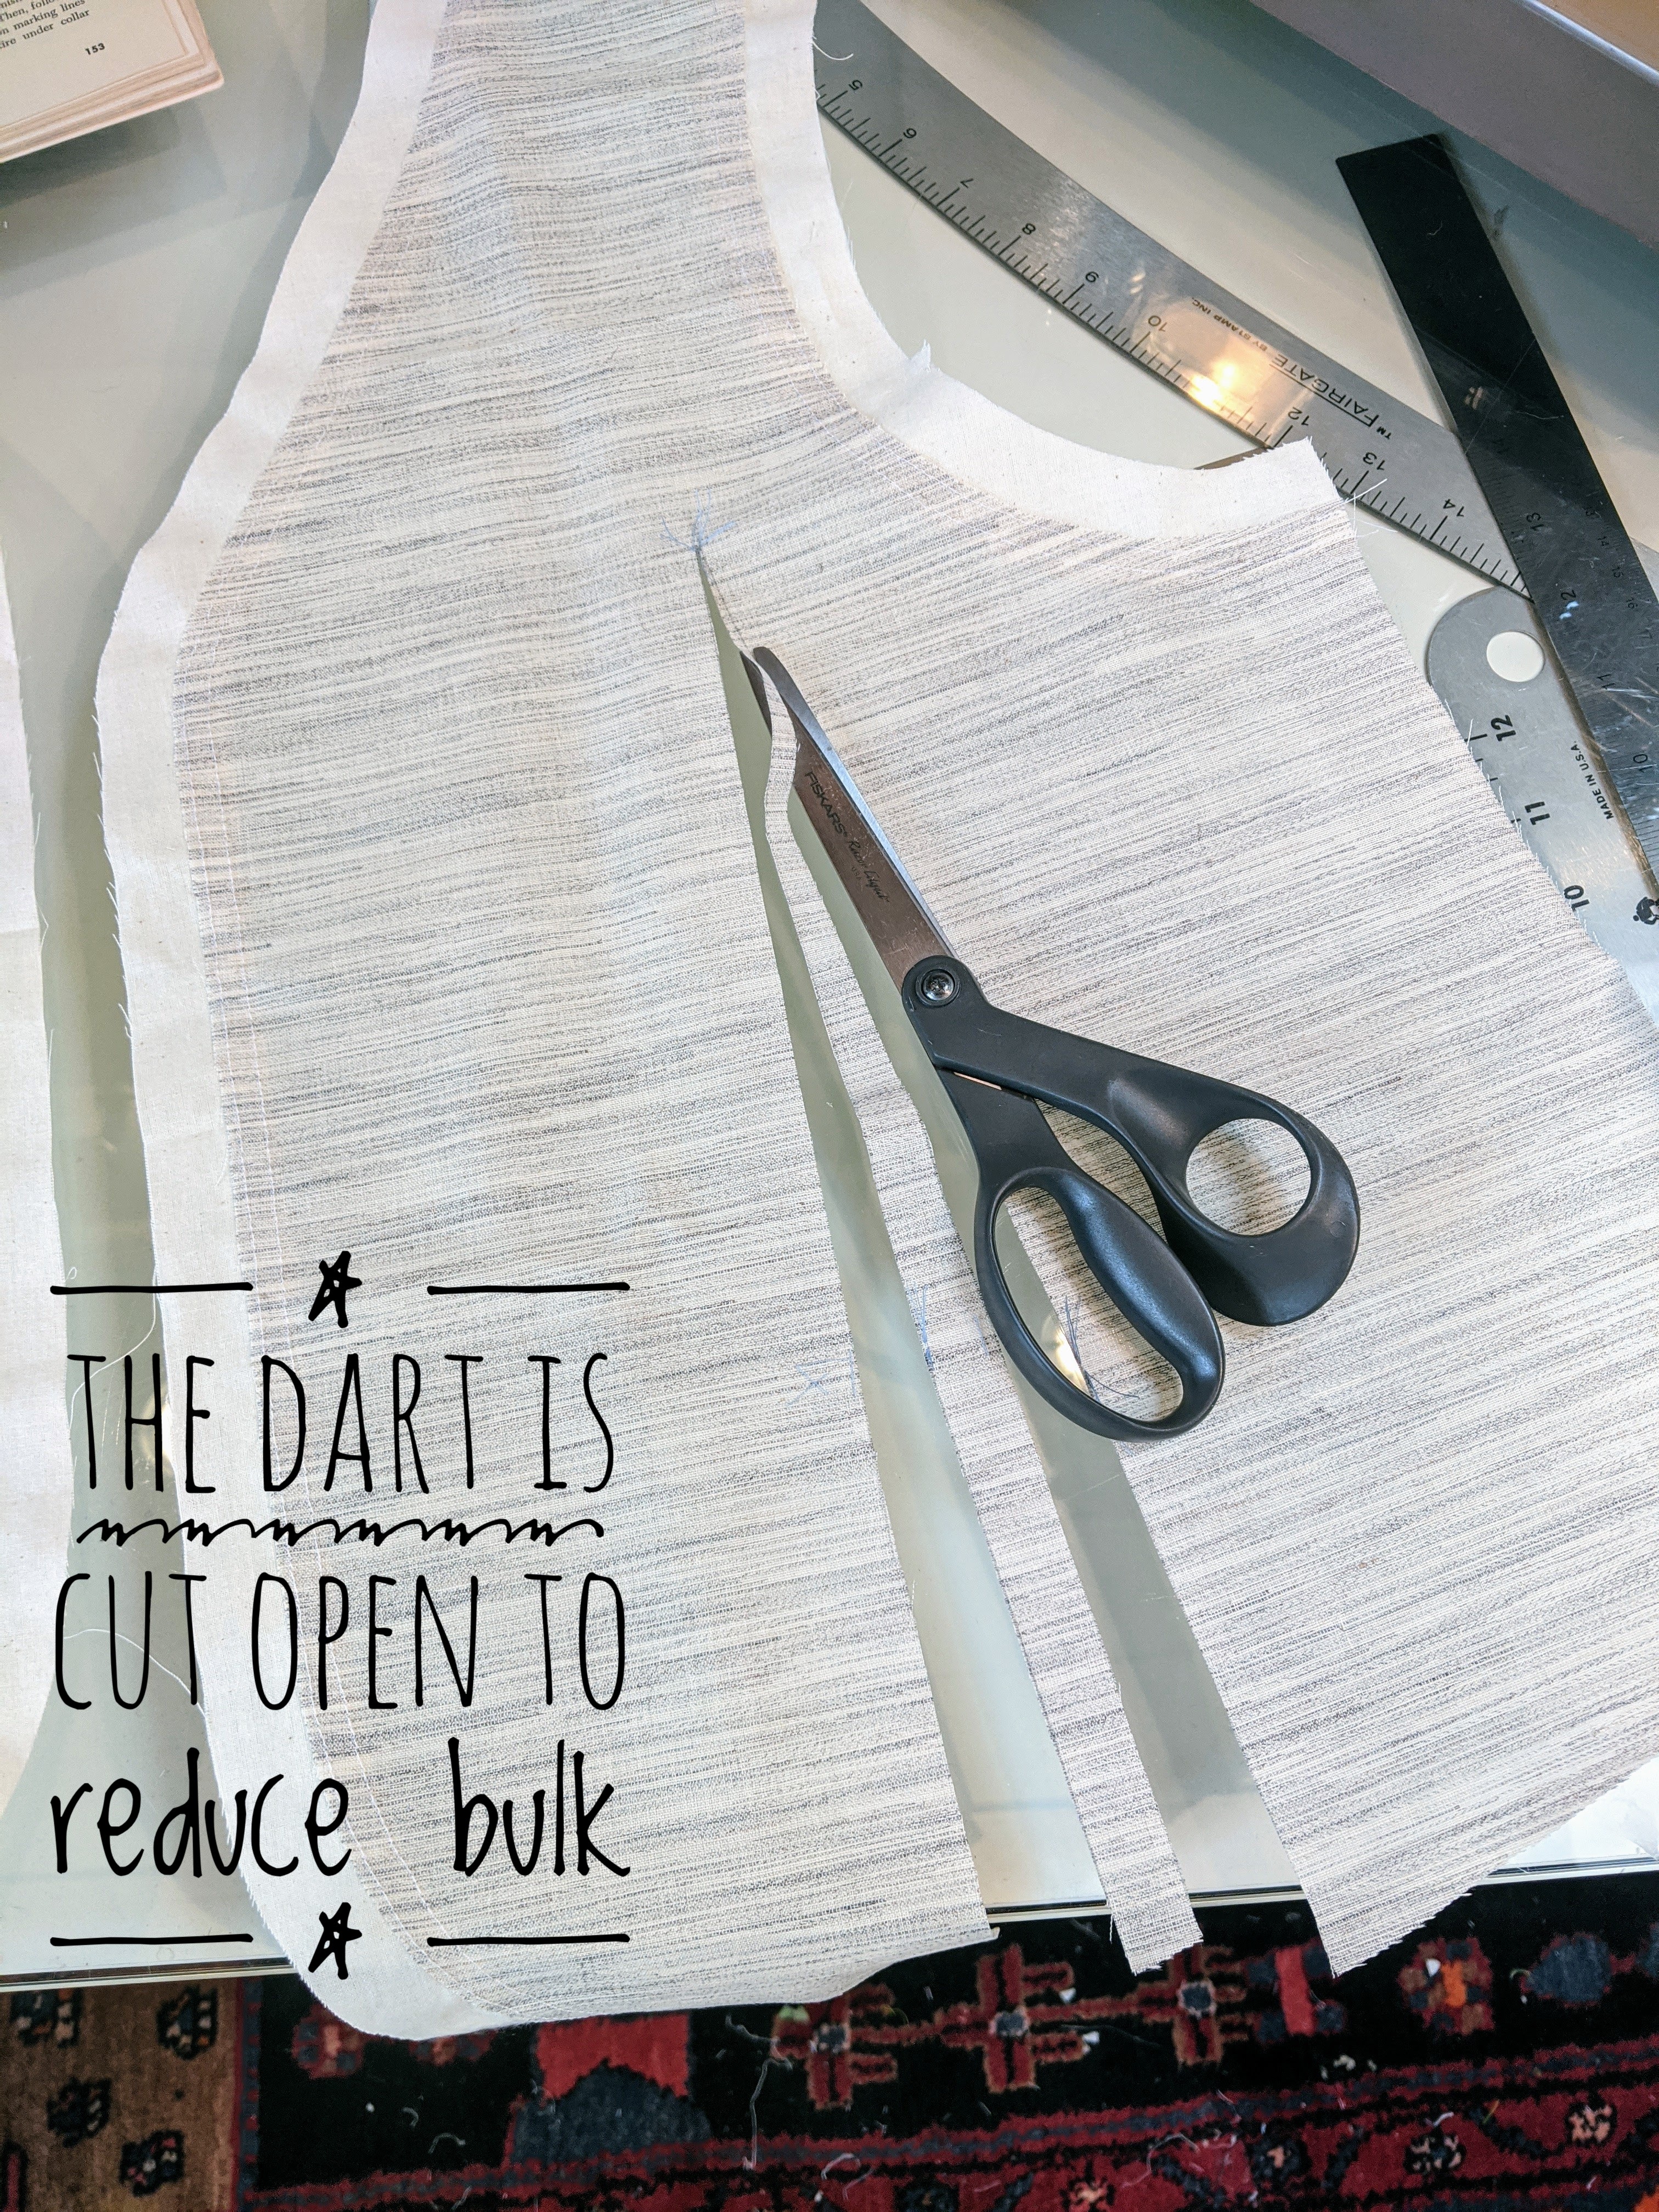
The front darts. Because the canvas is resistant to pressing, you will not be able to stitch them in the usual way and press them to one side. The dart must be cut out. I extend the point of the dart 1″ . That way the points of the darts are offset a bit.

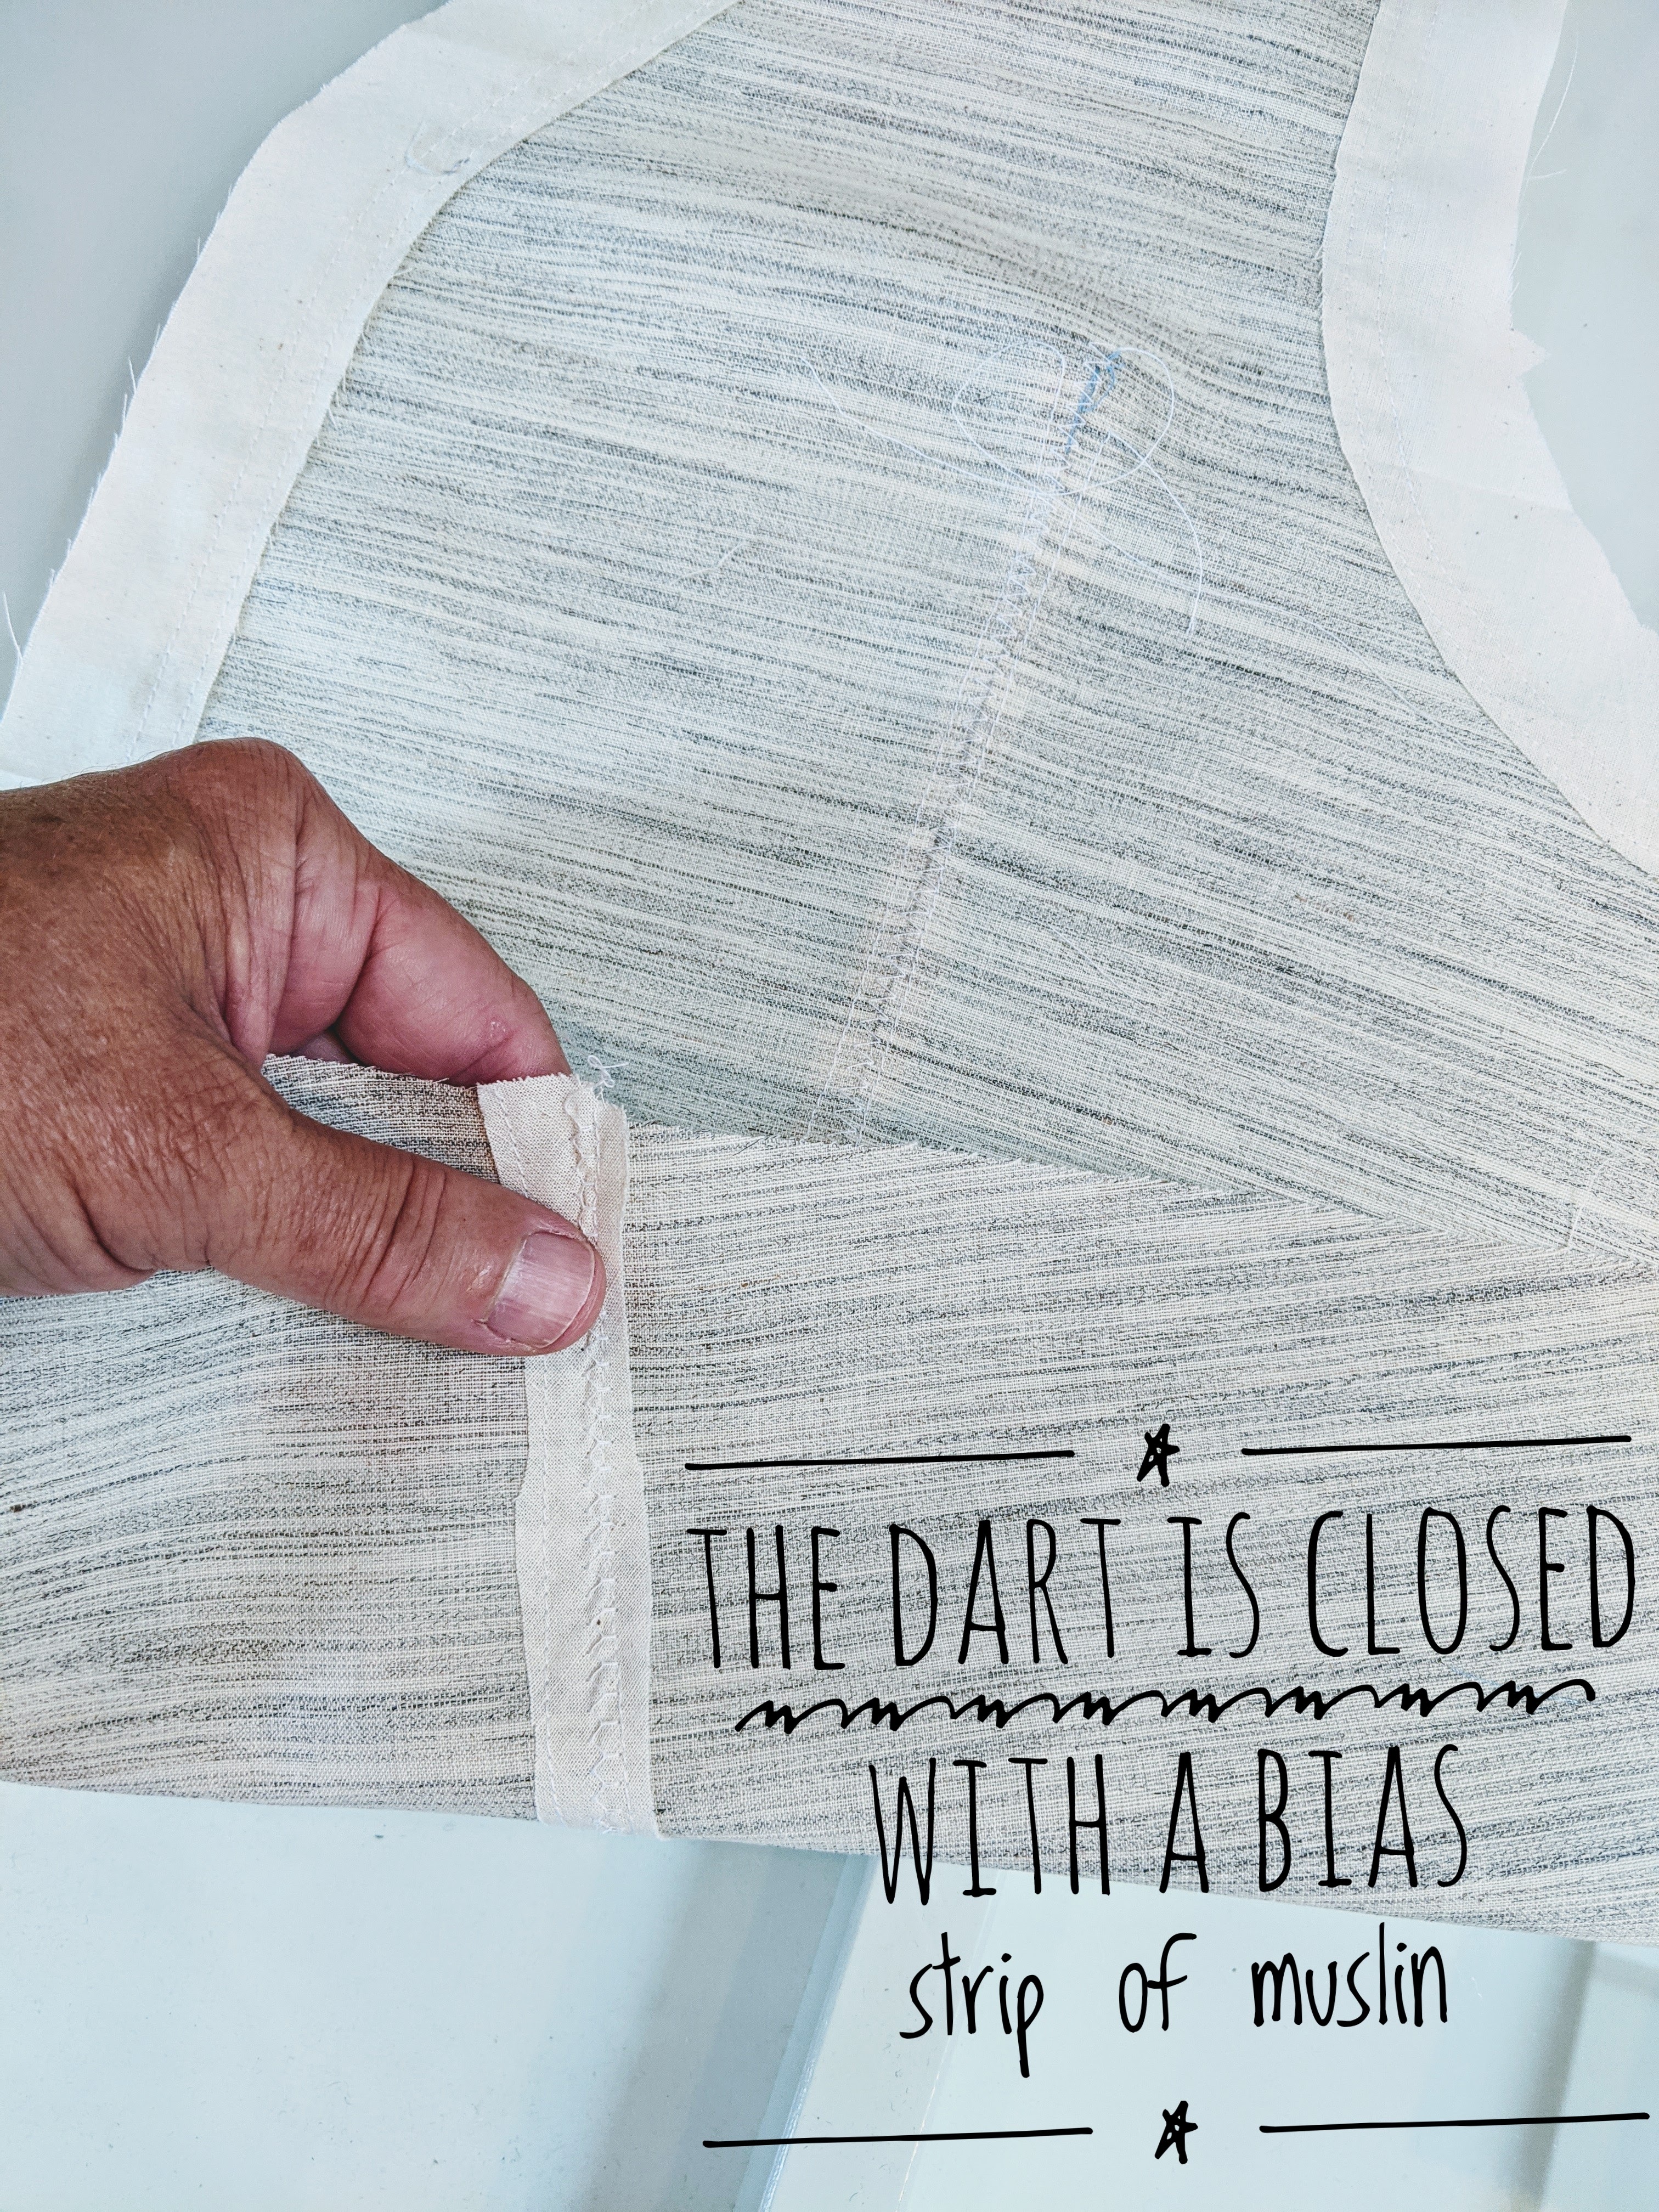
The darts are closed with a bias strip of muslin sewn to the edges of the opening. A zig zag stitch down the center finishes it off, and any excess muslin can be trimmed away. Now the canvas and vest fronts can be basted together and treated as one for the rest of the construction
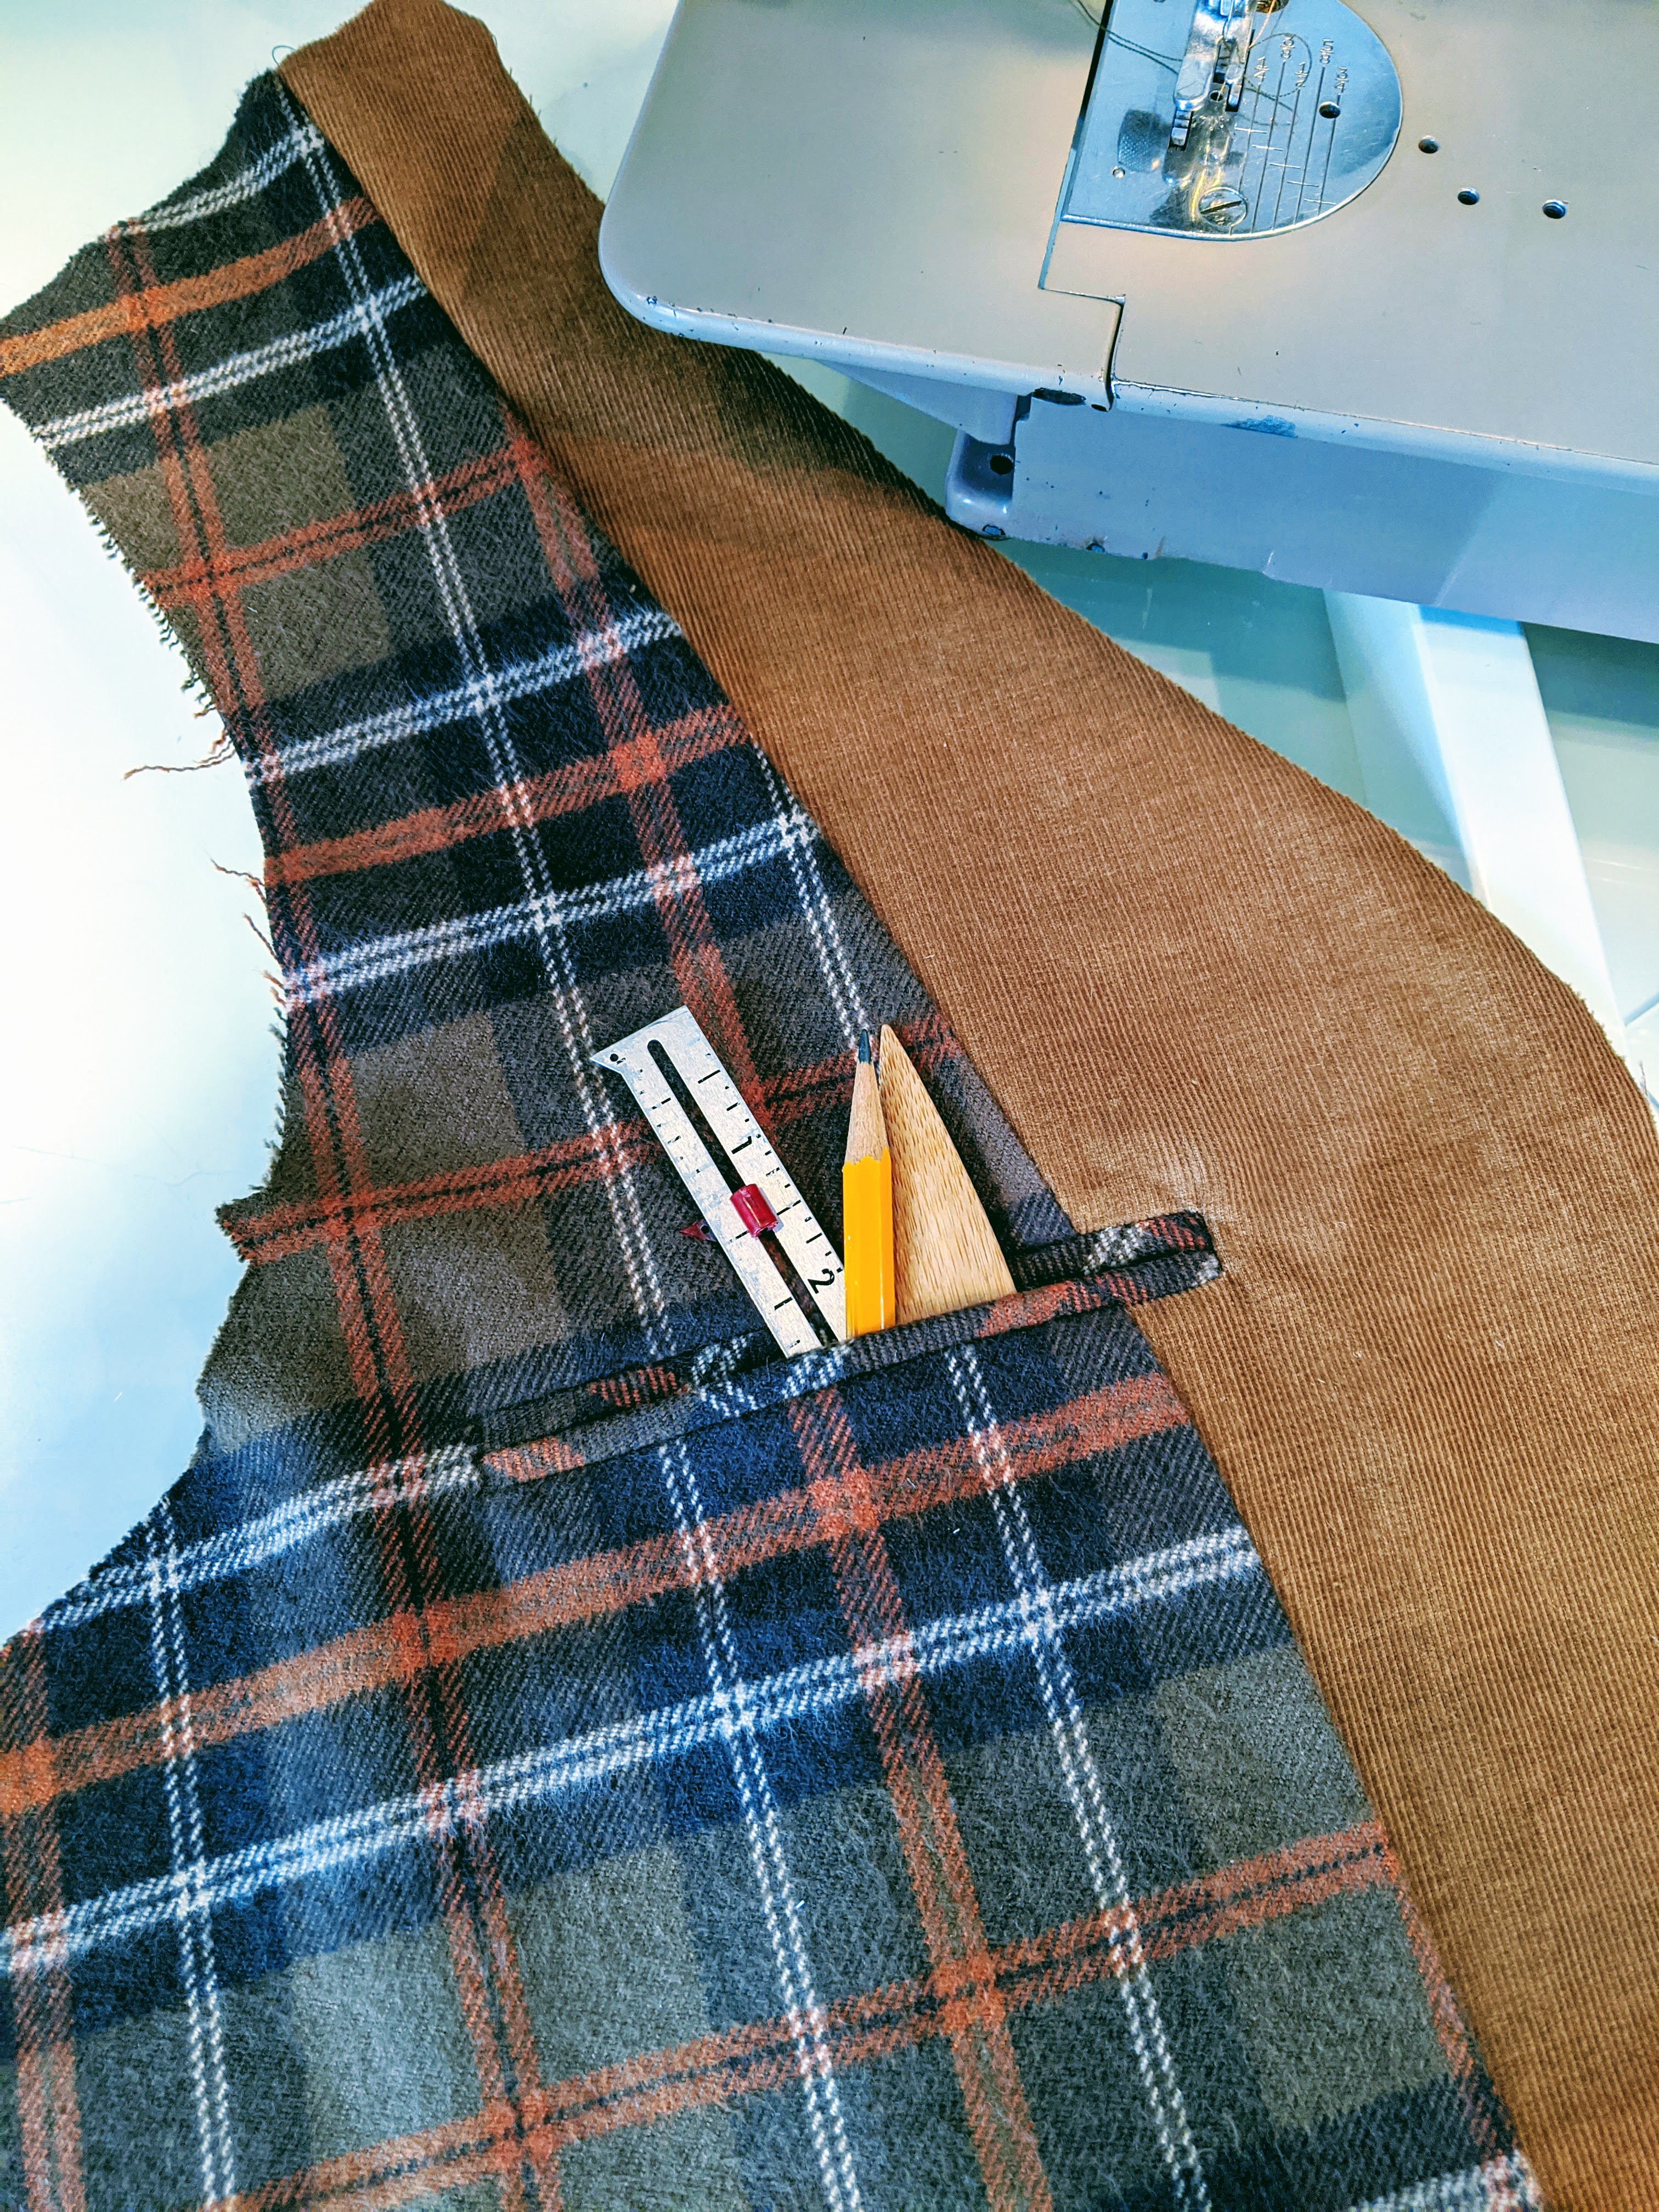
We’re all carrying a device of some sort these days. An inside pocket has become a “must have”. This double piping pocket is from the Roberto Cabrera text on menswear tailoring. I turn to it time and time again. Having a welt pocket that works for you is a great “tool” to have in your sewing “tool box of skills”. There are so many resources — text books, blogs, YouTube. Find some directions that seem clear to you, practice with some muslin until you get it down, and you’ll be adding them to your projects all the time. One of the powers of making our own clothes is that we get to have the features that we really want.
Speaking of wants, the flat piping that I wanted for this waistcoat turned out to be the “hack from hell”. It complicated the construction in ways that I never anticipated, so I cannot recommend it. I’m sure there’s an easy way to do it, but I failed to find it.
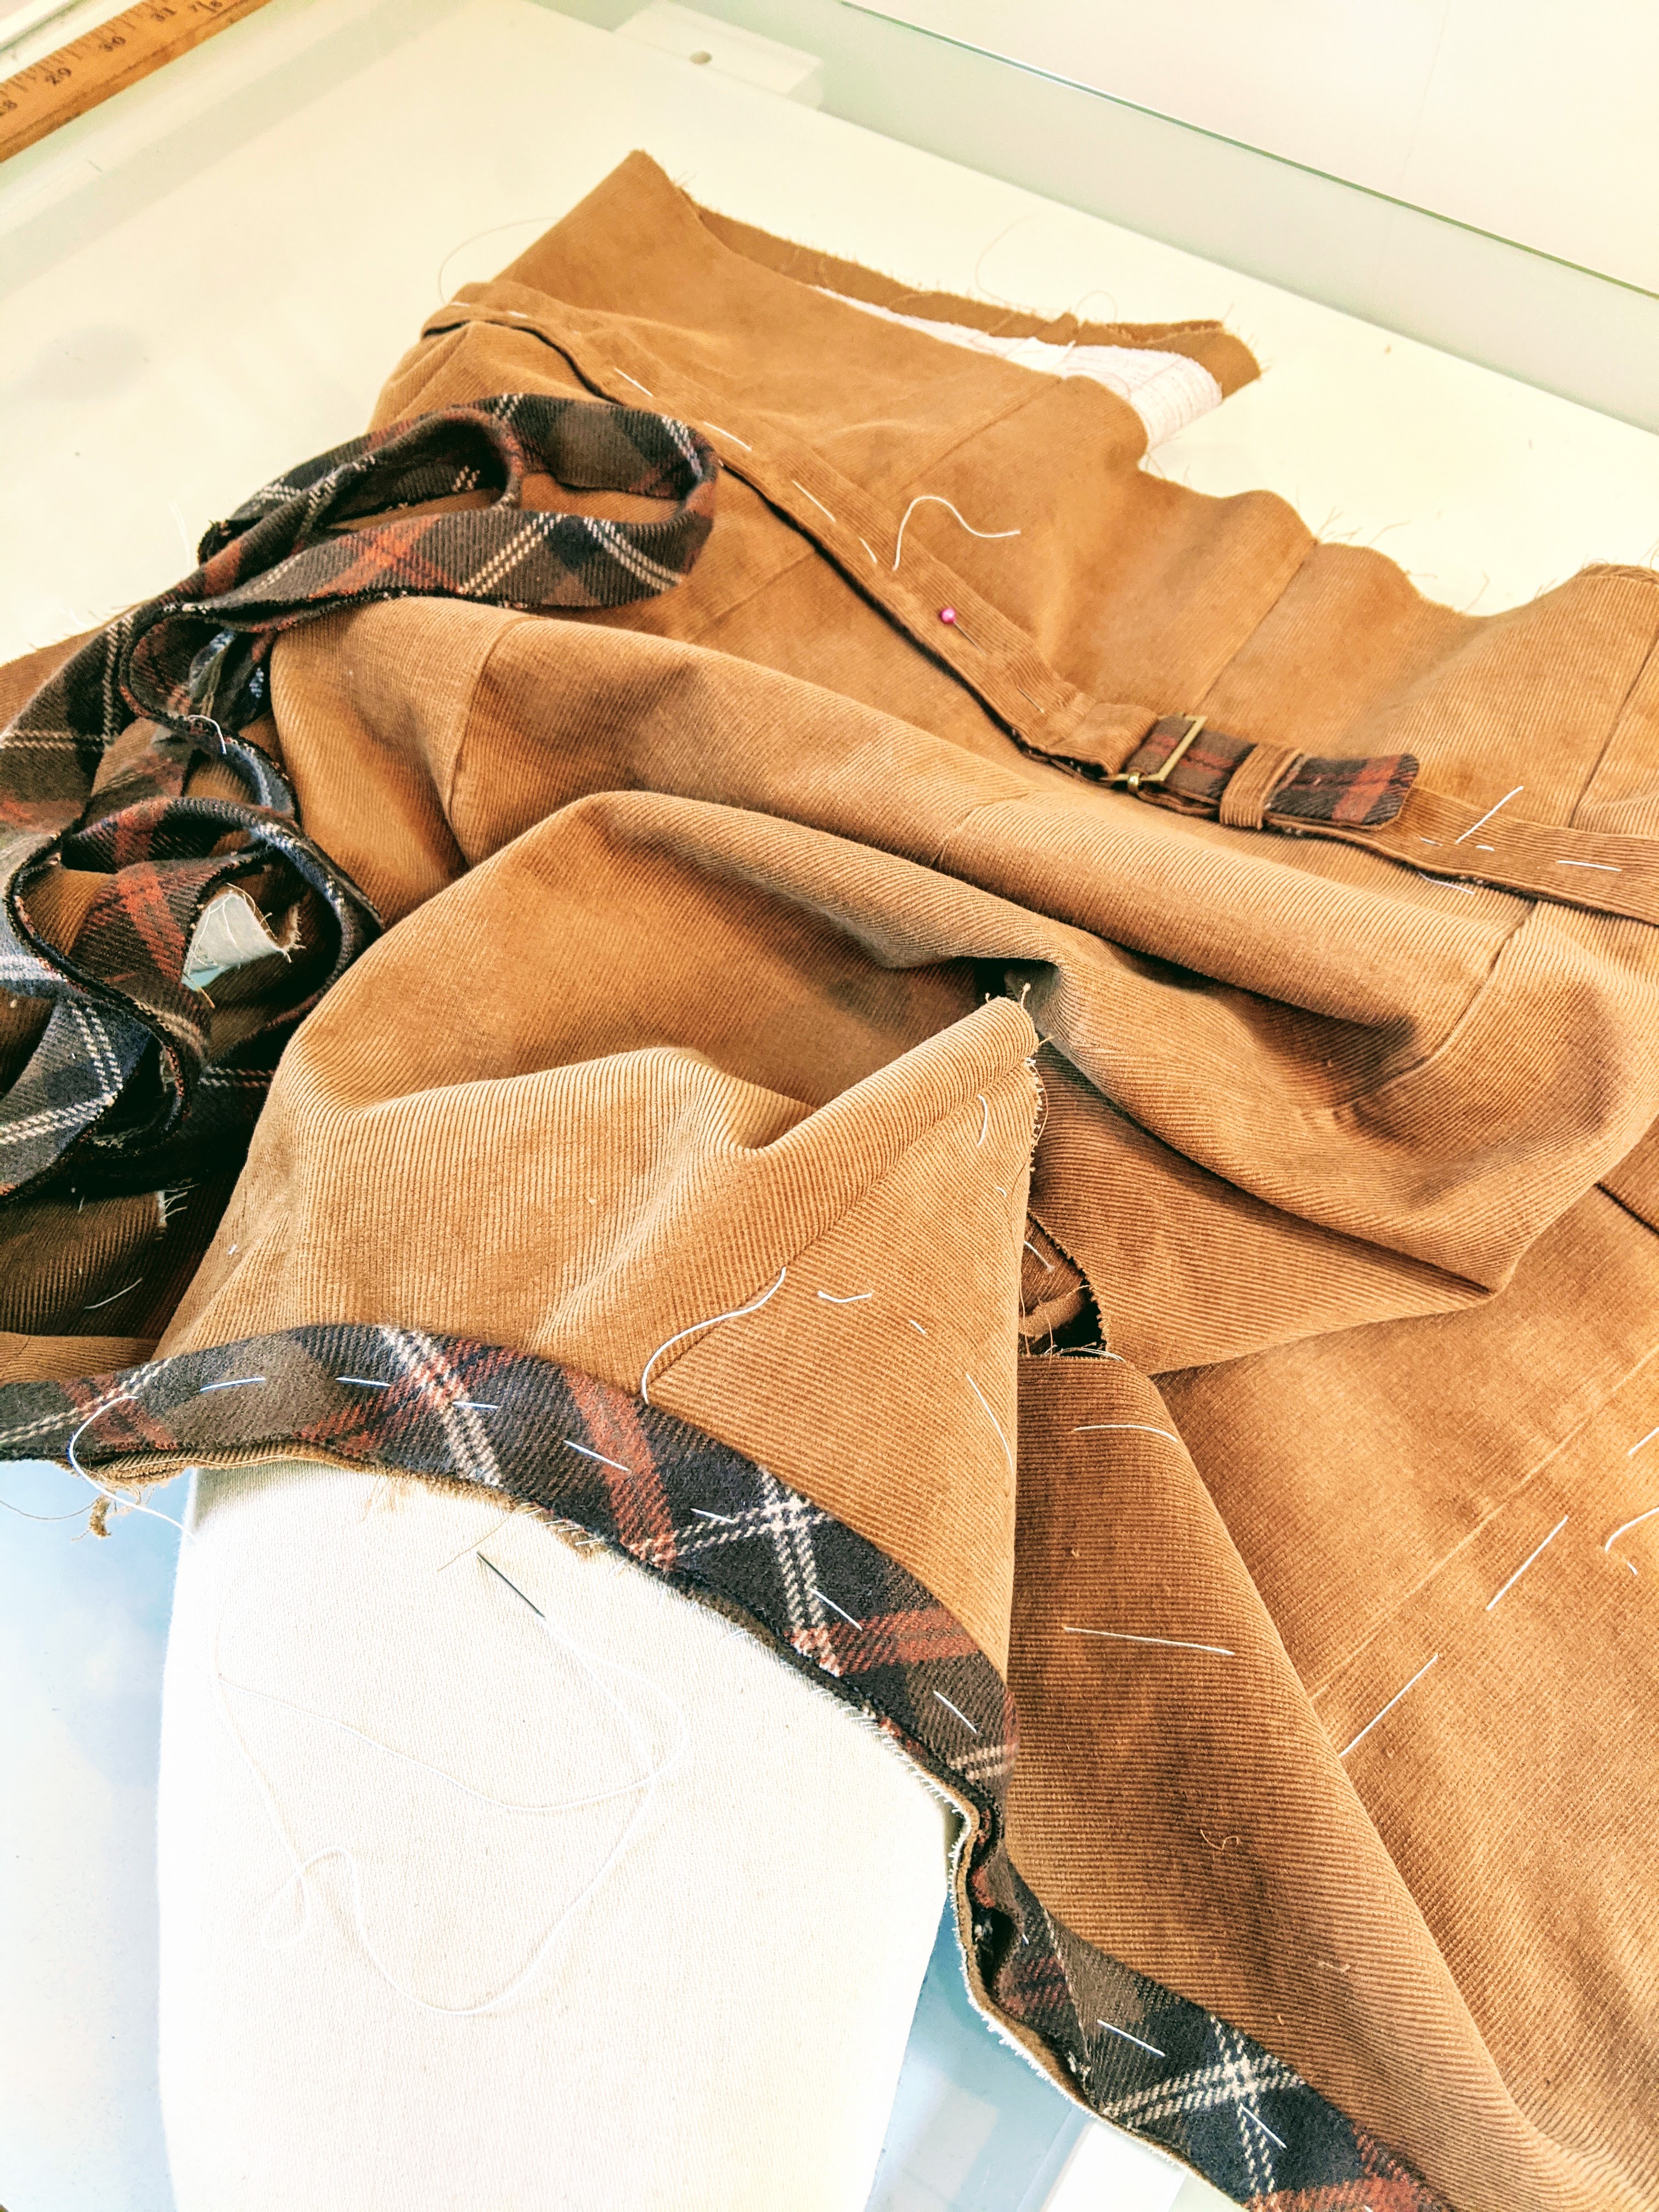
I ended up veering way off the directions (to the point of no return). I wanted a continuous strip of bias all around the vest. Here you see it being basted into place before “sandwiching” it between the lining. But once I sewed on the lining I couldn’t turn it rightside out from an opening I’d left along the bottom edge. I opened up a side seam of the lining, and it was still a “no go”. In fact, things went from bad to worse. It was a twisted mess and I had to “walk away” for a day or two.
I gave up on my idea of a continuous piping and eventually opened up the shoulder seams, cut the piping and pulled the vest through an opening along the bottom. I ripped, clipped, jimmied, hand sewed and swore my way to completion. In hindsight it would have been much easier to add a bias binding. I could have handsewn on a binding all around this vest in less time than I spent fiddling with the twisted mess that I’d created.
I foresee making this waistcoat again, but next time I’ll just stick to the script! I’m sure someone out there knows how this is done, so please chime in.

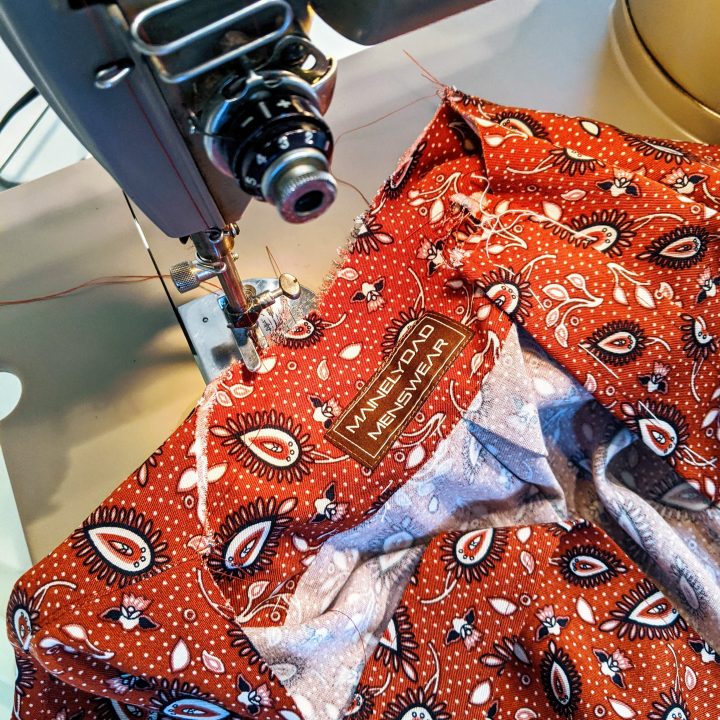
When Michelle posted the swatches of the new fabrics (all grouped in color families), I was immediately drawn to the little paisley rayon twill in the rust / red grouping. I love little print shirts. I also love rayon shirts, and feel that every guy should have the experience of wearing one. They’re soft, drapey and downright luxurious to wear. This is the third rayon shirt I’ve made, and I’ve learned a bit of how to work with it. Rayon is very fluid and can be distorted easily. It’s nothing to be feared. It just takes a little extra care in the handling. So here are some of the things I’ve learned that might help if you’re hesitant to work with it.
When cutting out rayon (I do it on an IKEA desk, not ideal, but we work with what we’ve got, right?) make sure all your yardage is up on the cutting surface. If fabric is falling off the edges of the table the grain will be skewed. You will probably spend more time than usual smoothing and arranging the fabric during the cutting phase, but it will be worth it.

The same handling technique applies during the construction phase as well.
Make sure your whole garment is up on your work surface. I find it helpful to push my sewing machine WAY back on my work table. You don’t want fabric falling off the edge or sitting in your lap.
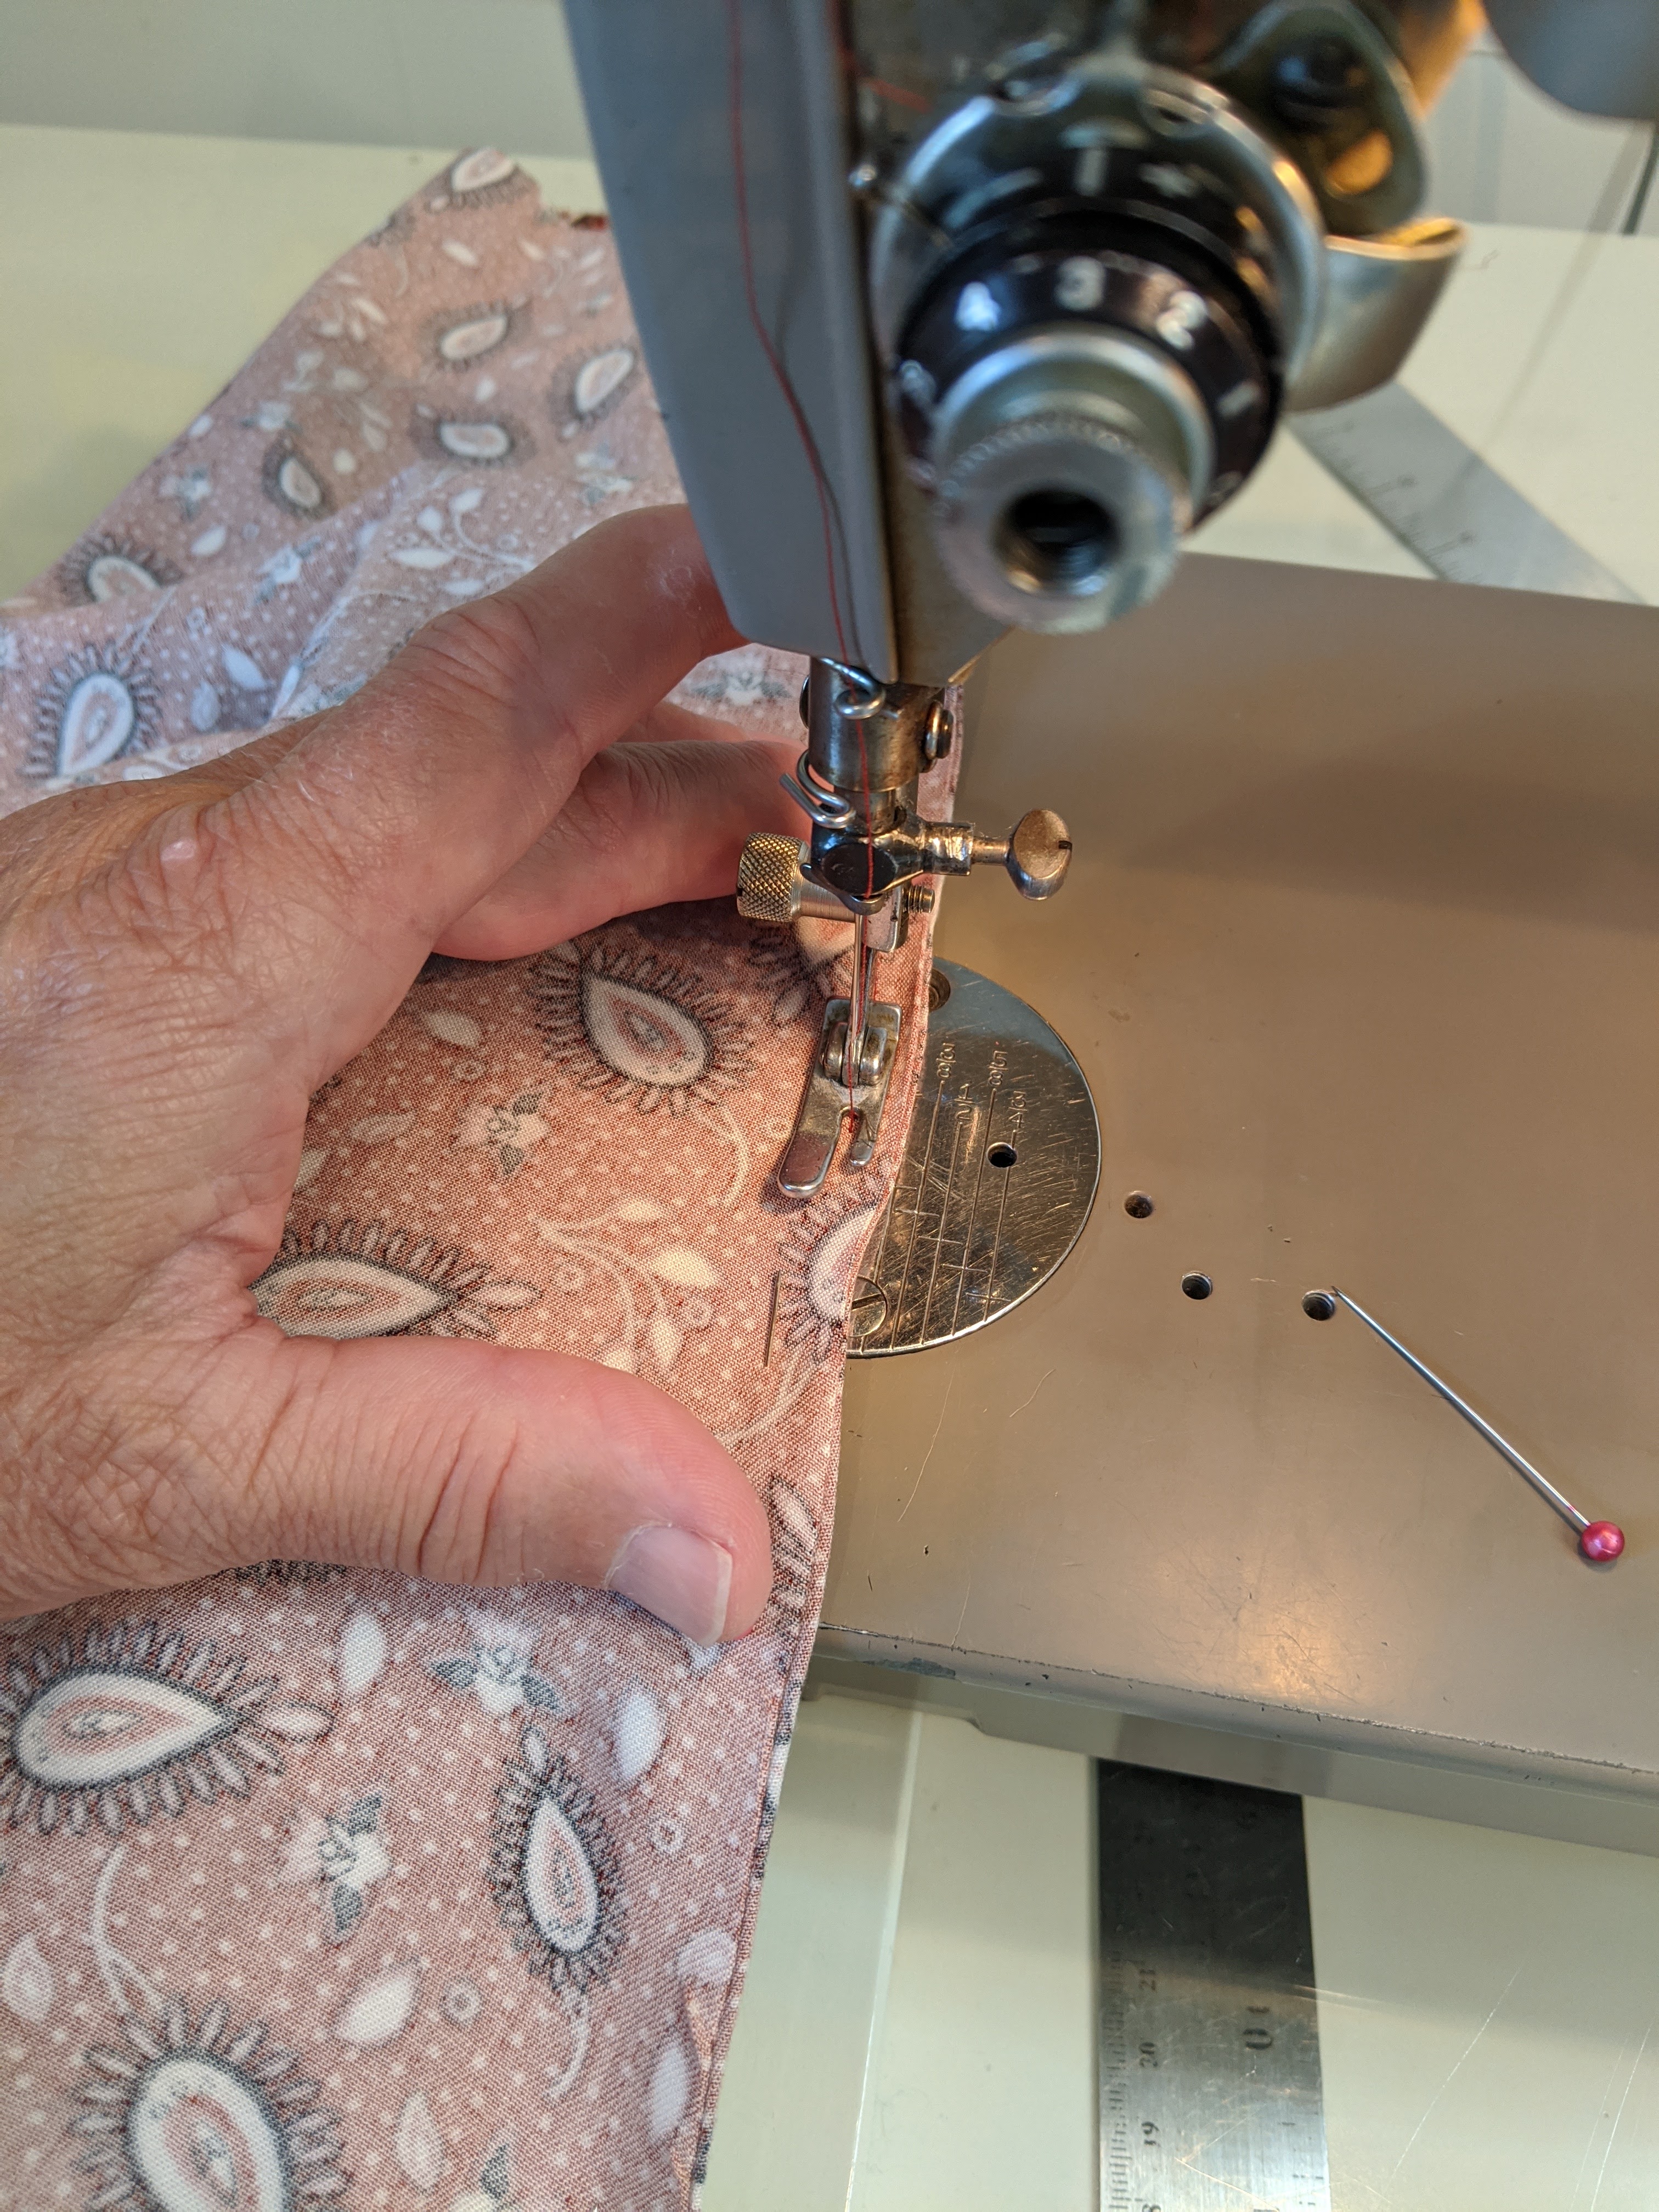
My sewing machine is not built into a table, so the fabric can be distorted by falling off the deck of the machine. To counteract this, I keep my hand in close to the needle, smoothing both in front and in back. The heel of my hand is also keeping the fabric aligned. It becomes sort of intuitive, and you will sense when the fabric is “right”. In this picture I’m making the “second pass” on a French seam. By controlling the fabric this way your rayon garment will come together beautifully.
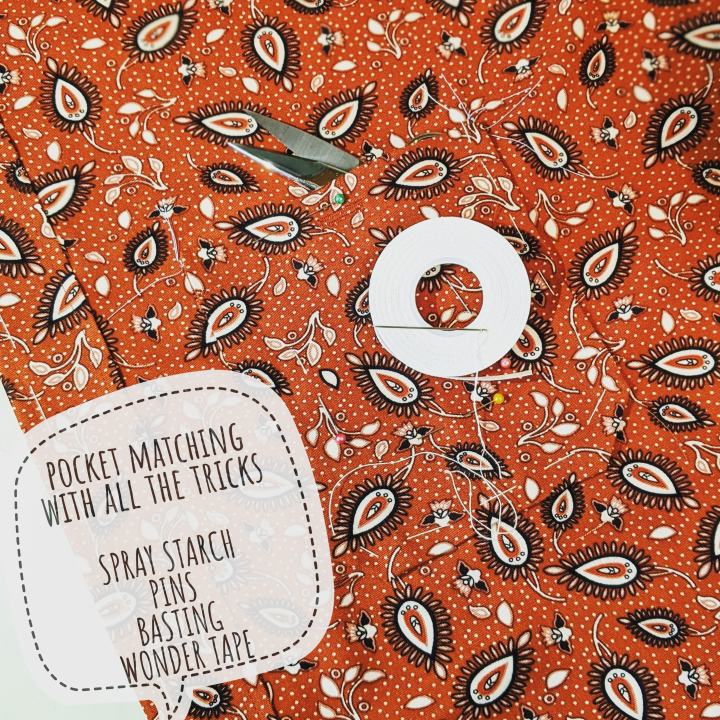
Sometimes you need a little extra help, especially with fiddly bits like pockets and sleeve plackets. A squirt of spray starch can work wonders. I’m also a big fan of Wonder Tape when it comes to matching pockets.
Both the shirt and waistcoat coordinate well with a pair of Jedediah pants that I’ve made recently. I know I’m not the only guy who loves this pattern. It’s my “go to”.

I won’t go into too much detail here. I just want to show how you can “gussy up” a pair of Jeds for about $5.
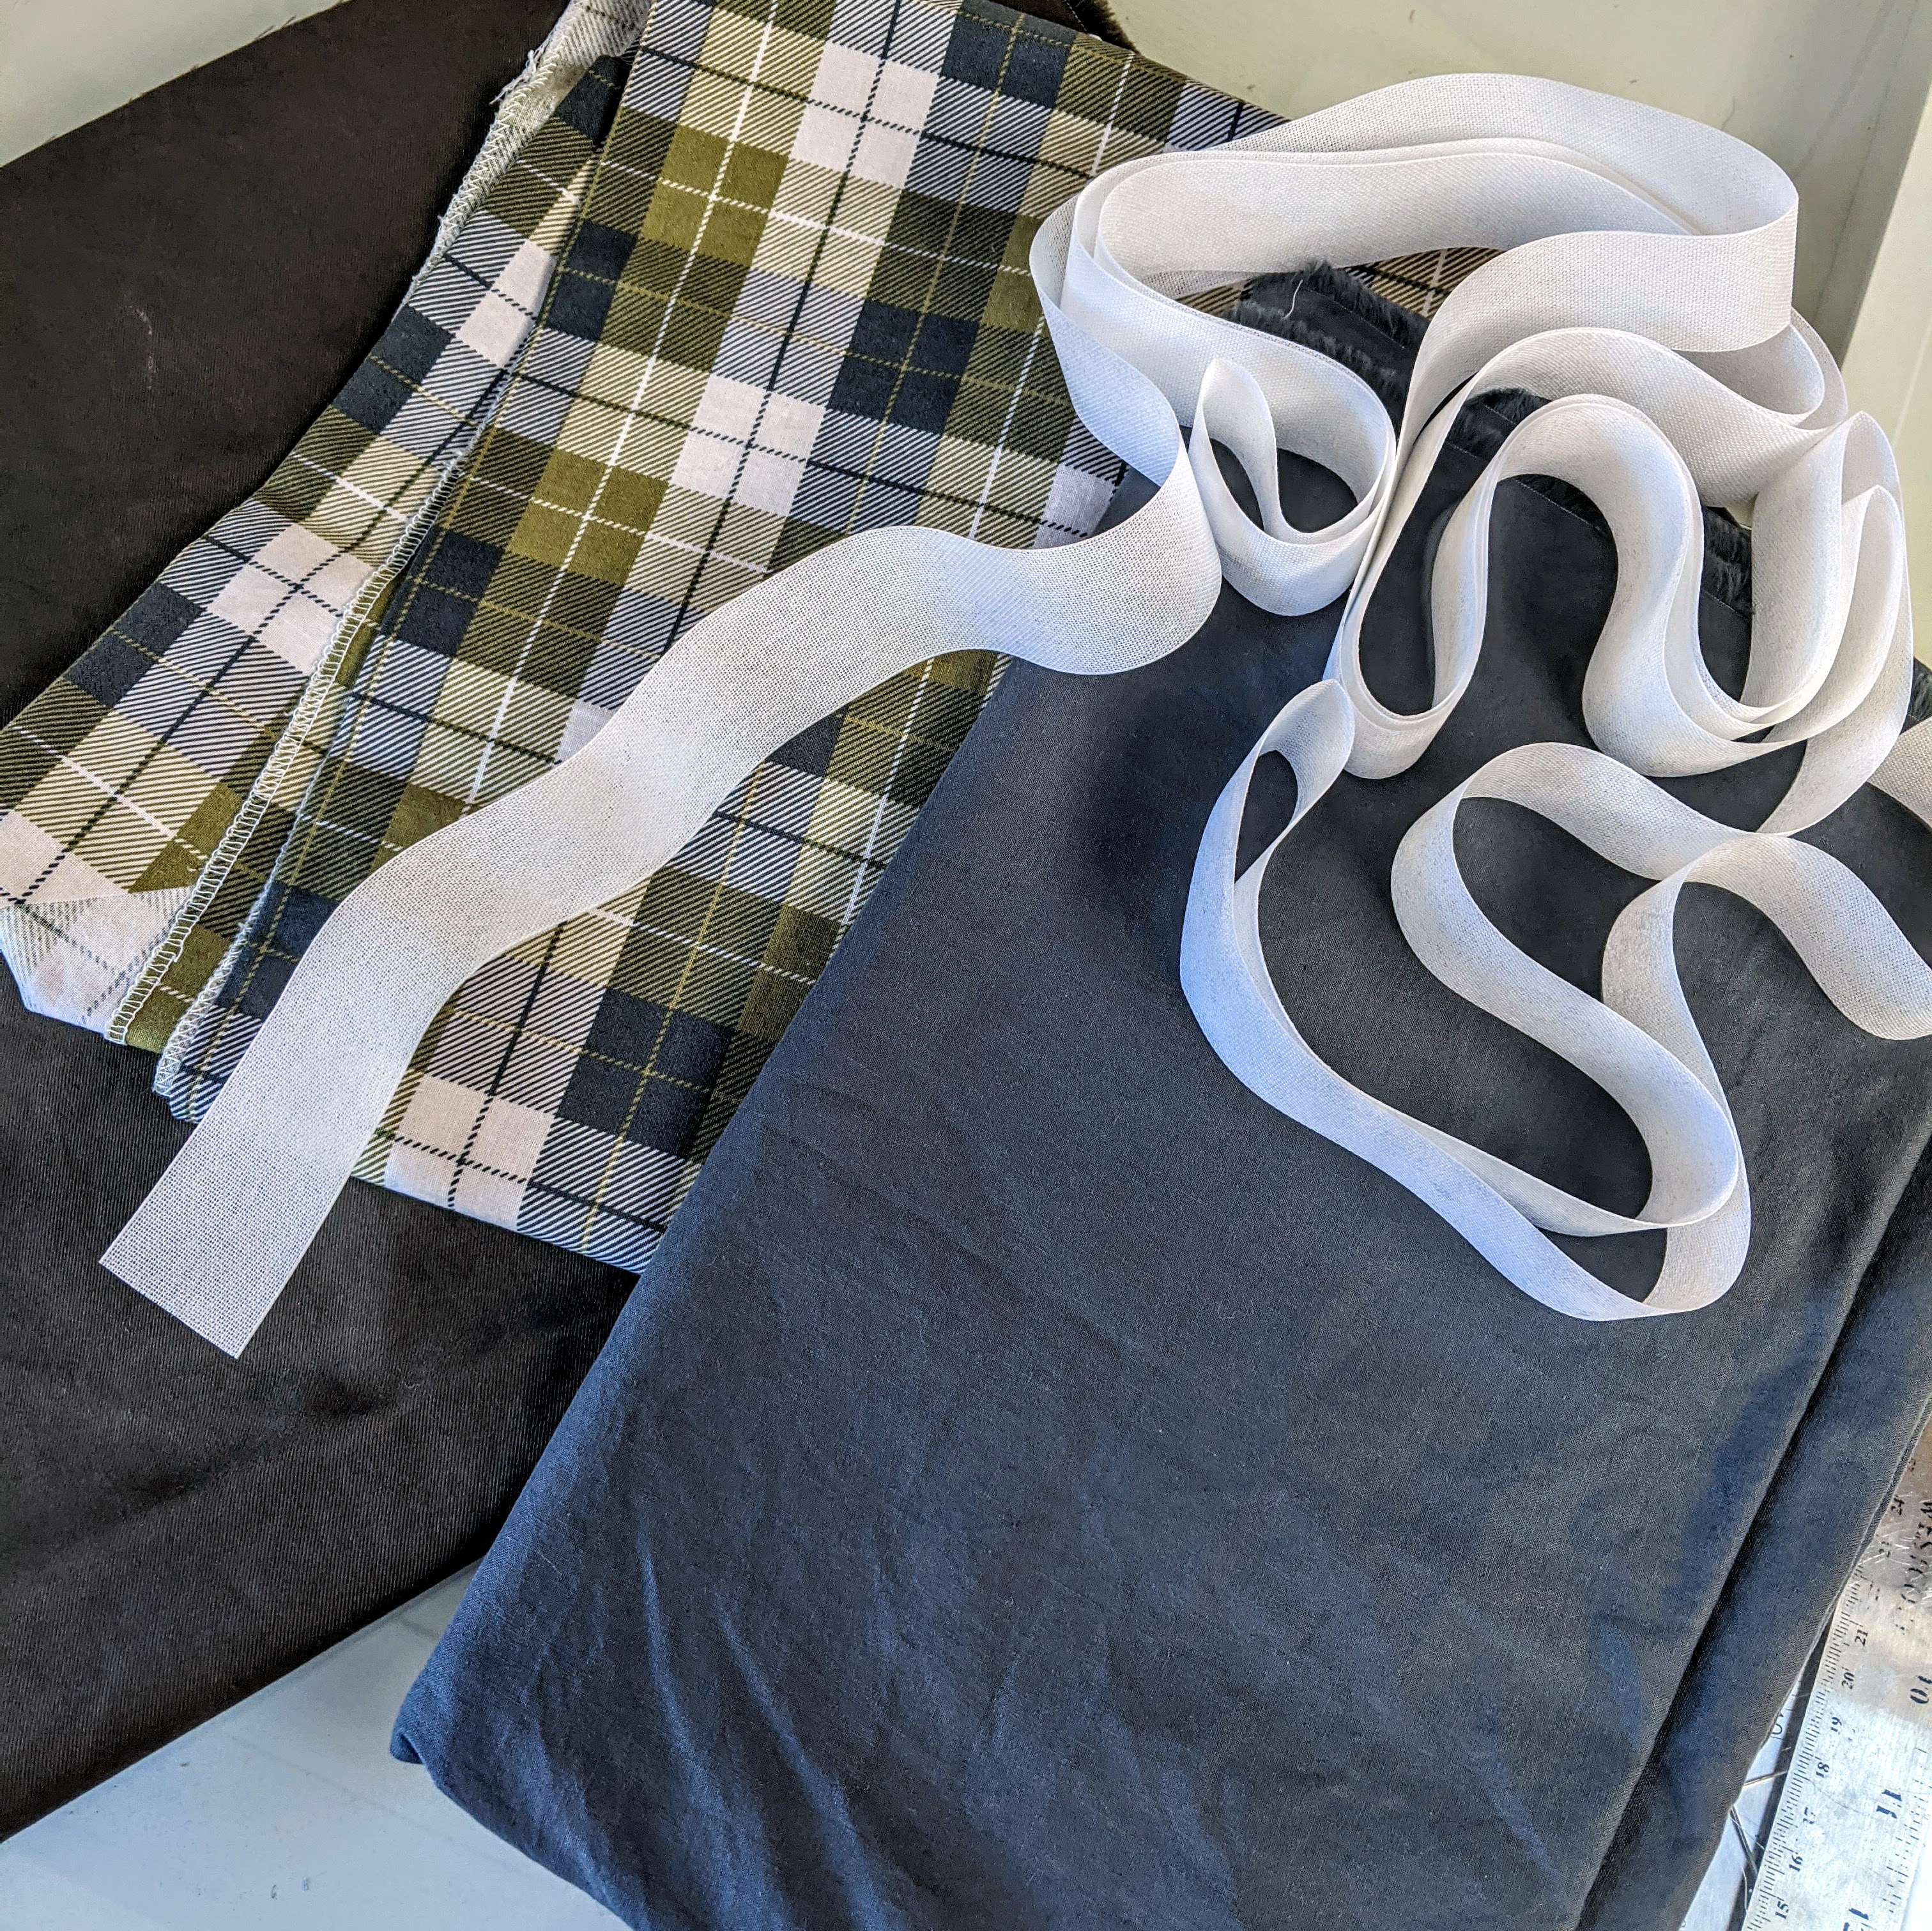
All this white stuff is Ban Roll interfacing, 1.5 inches wide. It’s ridiculously inexpensive, and I usually pick up 5 yards of it at Sil Thread in NYC when I’m there. (Maybe someday I’ll get back!). It makes a great firm waistband, and you’ll feel like you’re wearing a “real pair of pants”. Once you use it, you’ll never go back to what you were using, be that a fusible or sew-in.
I also pick up a yard of quilting cotton at my local JoAnn’s. I almost always have a coupon for 40 – 60% off, so this is another inexpensive way to liven things up. I use it for bias binding, a waistband curtain, and sometimes for the pockets. “Party on the inside!”
The gray fabric here is Italian Silesia pocketing. It’s a finely woven cotton fabric. It’s available in a lot of basic colors from Bias Bespoke in NYC. I had always wanted to try it, and on a pair of dress slacks I would certainly use it. On a casual pair of pants like these, it’s kind of overkill. An inexpensive poly/cotton could do the job for a lot less.


Here’s how I use the Ban Roll. I machine baste it onto the wrong side of the waistband, alongside the seam allowance where it will attach to the trousers. Once the waistband is attached to the trousers, the fabric is folded to the inside and secured by stitching in the ditch from the outside, and the machine basting is removed. Simple. Just be sure to do this before you complete the belt loops. Otherwise, you’ll be stopping and starting at each one. Been there, done that!
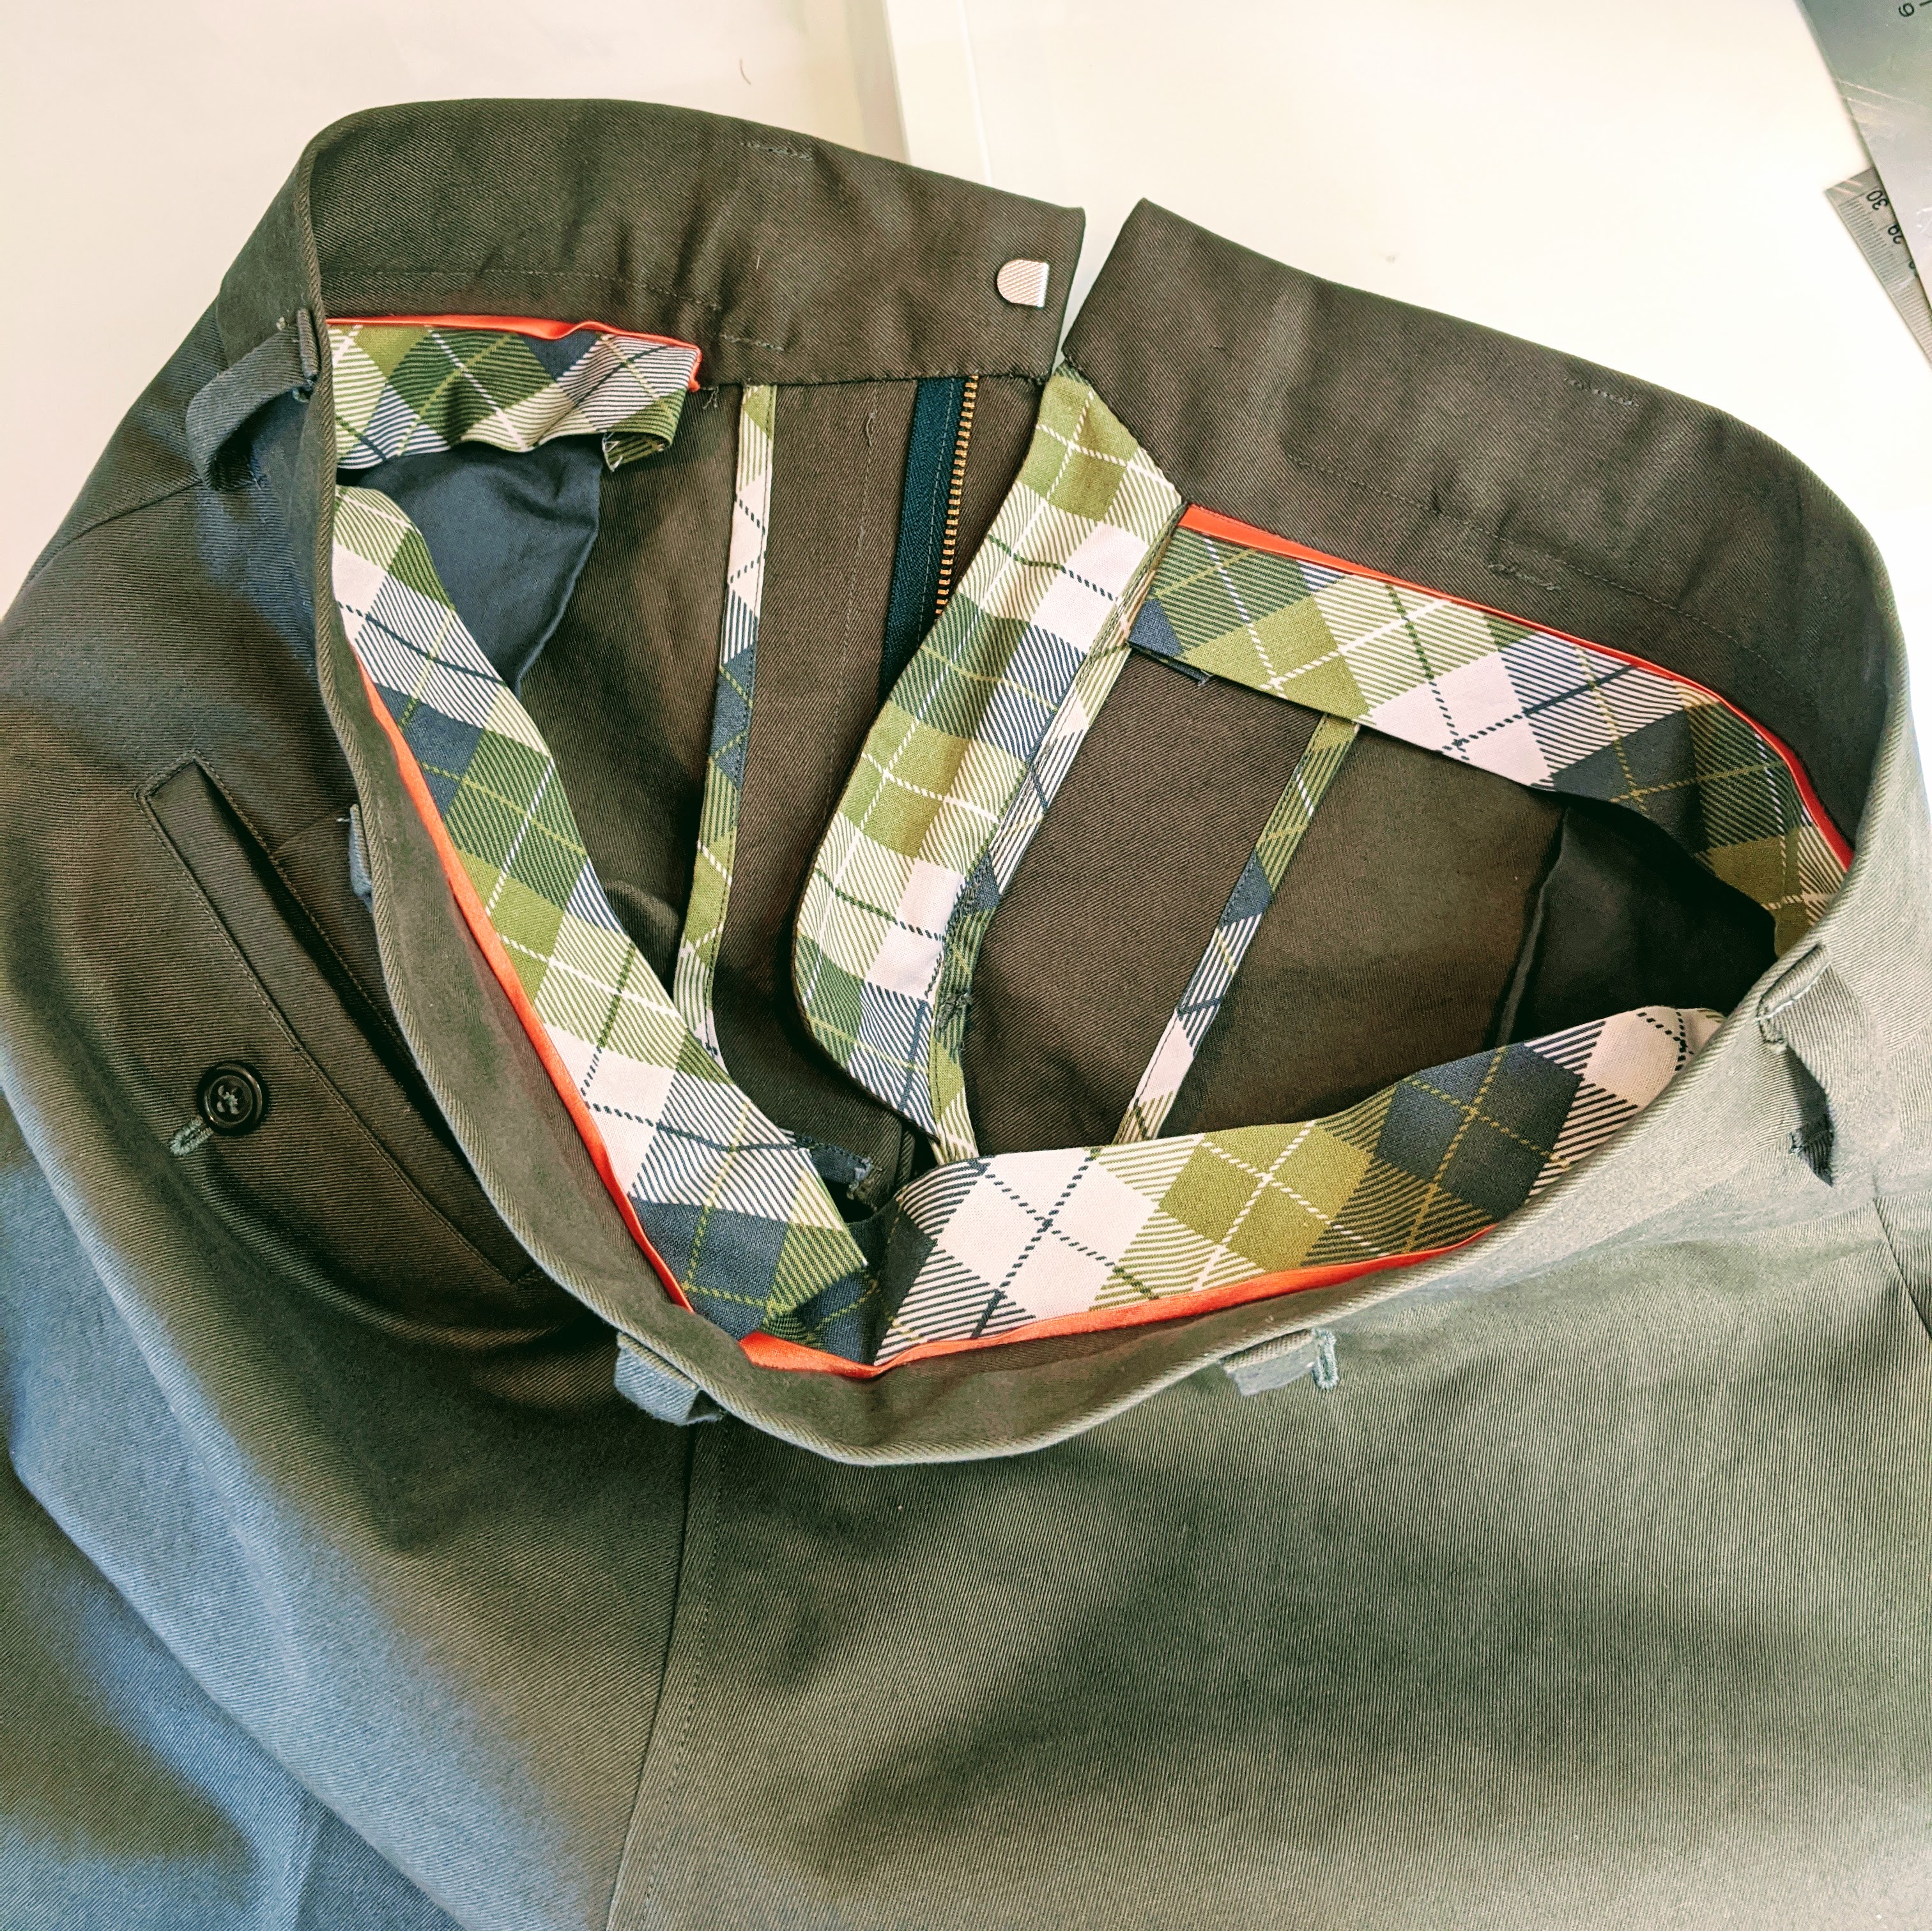
Here’s a peek inside that shows what a little bit of quilting cotton can do. Some bias binding goes a long way, and is SO easy to make with one of the Clover bias makers. I use it to cover all the raw edges of the fly and the back seam. So much prettier than serging IMO.
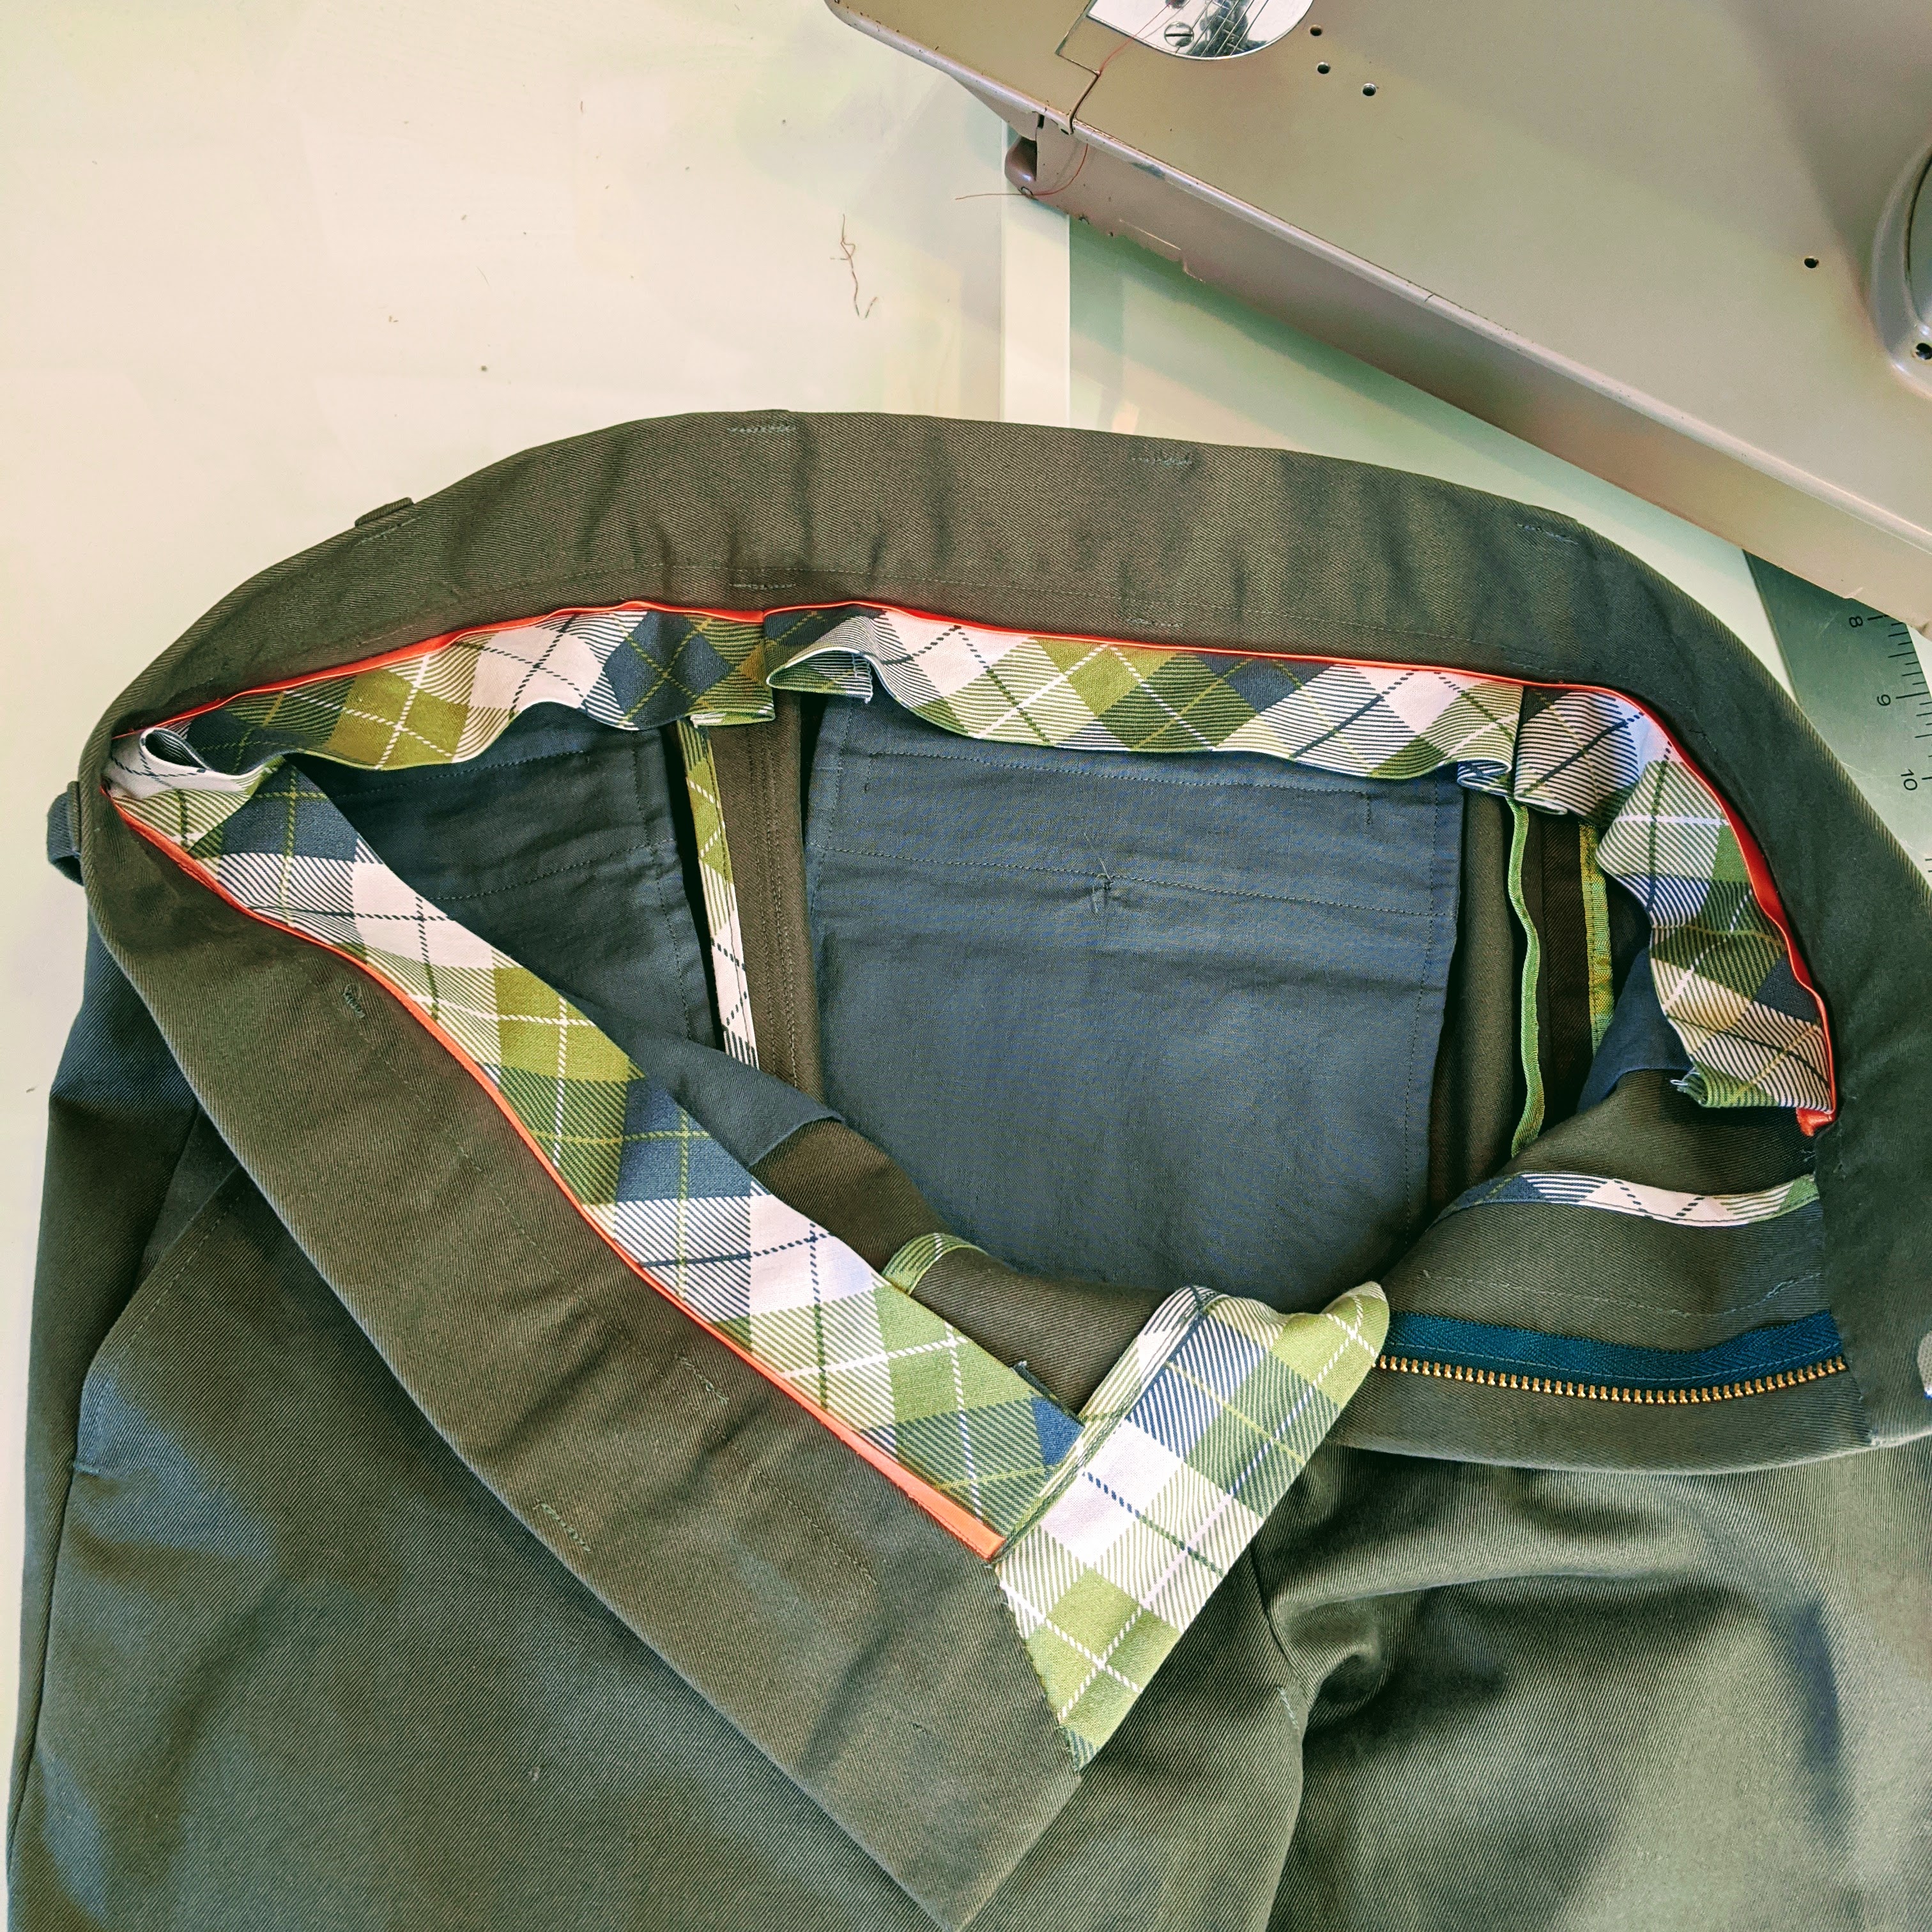
By widening the waistband slightly it’s possible to add a curtain. The curtains (there are two, one on each half of the trousers) are a folded length of bias attached to the waistband. A piece 4.25″ wide will give you a finished curtain 1.5″ wide, but it can certainly be narrower. You just have to take some measurements and calculate some seam allowances. Each curtain folds back at the front and center back. A pleat is formed at the side seam which you see at the upper right.
There’s lots of room for creativity here. On this pair I added an orange satin piping that was left over from a pajama project! The side seams are finished off with Snug Hug rayon seam binding. The inseams are flat felled.
Of course, none of this is really necessary. But the “joy factor” that I get when I put on these trousers makes the extra effort so worthwhile.
I think I’m pretty well geeked out, how about you? Here’s to finding more joy in the clothes that we make. Be safe and happy sewing!

Cheater solution to the “piping outside edge” problem: Cut facings for the openings being “piped” (center front and/or neck and/or armholes) using the fabric* desired for the “piping”. Sew in the facings as usual (NO understitching), but when pressing let the facing fabric roll out towards the front. A little or a lot, depending on how much piping effect is desired. Then, stitch in the ditch, and voila, “piping” appears. No added bulk!
*I did this with a wool melton facing applied to a wool melton vest for DH’s trochen-style vest. Regular piping would have been impossibly bulky in wool melton. For DS’s wool hopsacking vest, I used a Kaufman Mammoth flannel, but needed to interline it with muslin so the “piping” would look full and round.
Hooray for geeking out!
Judith
LikeLike
What a brilliant idea! Thank you so much.
LikeLike
This is so informative and so interesting. Thank
You !
Kind regards
Jo Verity
LikeLike
Such a good post, thank you
LikeLike
Thanks for such a detailed post…..especially the trick of closing the dart with a strip of muslin!
LikeLike
Oh Duane, these look fantastic, the extra work is totally worth it 👍👏😎
LikeLike
So nice of you to share this with the sewing community. Thank you for taking the time.
LikeLike
I am in AWE! I’ve haven’t sewn for years, but as retirement is just around the corner, I will definitely step up my game with the time I will have to devote to sewing/creating. Your work is absolutely beautiful. I have just taken on the project of creating a “southern” Santa Claus costume (something not quite so hot for Santa to wear here in Florida). I will be referring to your techniques frequently. Thank you!
LikeLike
Thanks for your kind words!
LikeLike