Things moved ahead so smoothly with the lining that I completely forgot about inserting the shoulder pads. Oh man, what an ordeal. Not that this is a particularly difficult process, it’s just that there suddenly seems to be a lot of jumbled fabric sitting in one’s lap. It starts to turn into a wrestling match.
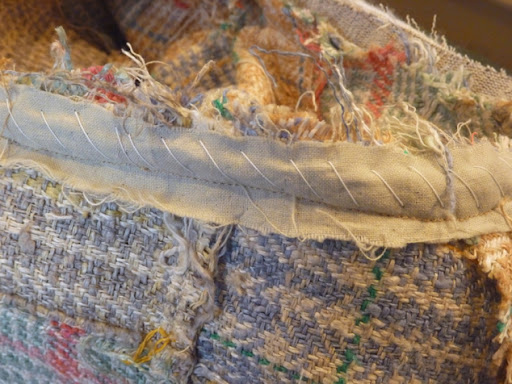
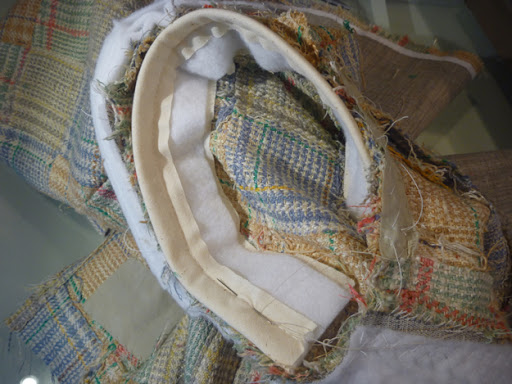
First, all the layers of the armscye seam allowances are basted together so that it acts as a unit. There are a lot of layers here. Two layers of the fashion fabric, the canvas and the pocketing reinforcement strip. It’s also, as you can see, a huge frayed mess.
Now the real wrestling begins. The shoulder pad is placed in position at the edge of the armscye seam allowance. Thankfully, the pad is notched where it should match the shoulder seam. Next, the canvas, which up until now has been basted to the jacket front, has to be peeled back while holding the pad in place. I try to preserve as much of the basting as possible so that the shape of the jacket front is maintained. It becomes a lot of work and attention paid to a very confined and awkward area. Don’t get discouraged.
Next, as impossible as it seems, the canvas is pad stitched to the shoulder pad going through all the layers. At this point the shoulder pad is actually curving in the opposite direction that it will eventually go, so the jacket should be frequently turned rightside out to check that all is going well. Suddenly, a little jacket has turned into what seems like an octopus. The first time through this process was, in all honesty, a nightmare. Man vs. fabric. The second time was a piece of cake. It’s amazing how quickly we can learn some of the more challenging techniques of tailoring.
Lastly, a sleeve head is sewn in. It helps fill out the top of the sleeve so that it will “fall” without wrinkles. Thankfully, this is easy to do and goes quickly. The edge of the sleeve head is placed even with the armscye and shoulder pad edges. It starts at the front notch and goes up and over the shoulder to the back. I back stitch it into the seam with a thread that will match the jacket. The stitches should not be visible from the outside, which would be pretty difficult to do considering all the fabric layers at this point.
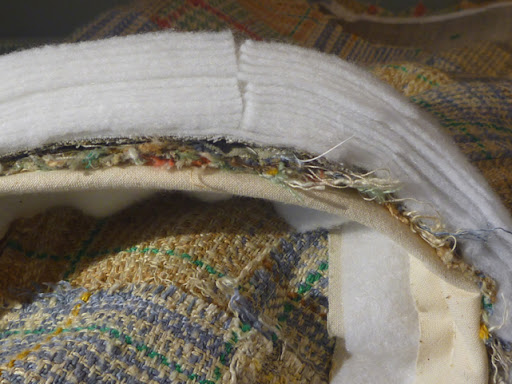
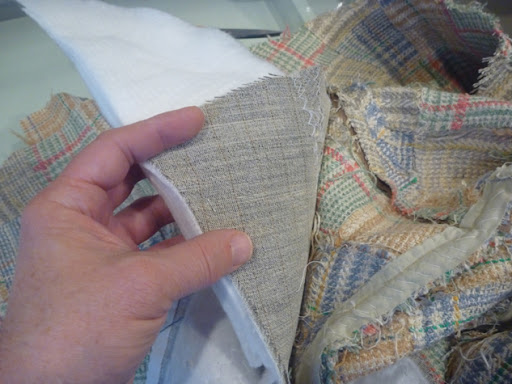
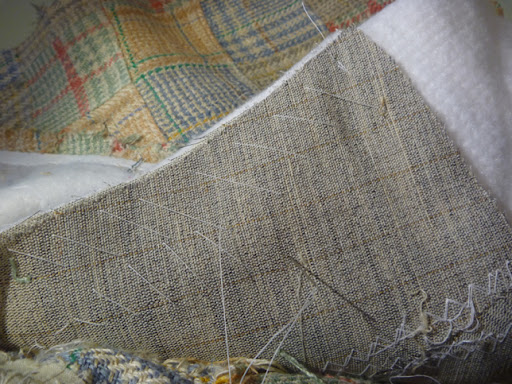
So here is the final shoulder construction in all its layered glory. From the top down –shoulder pad, canvas, fashion fabric and sleeve head. I won’t lie, I’m sick to death of working on these shoulders. But… I’ve turned the jacket rightside out and can tell you that all the effort has been worth it. They look great! Time for a break before attaching the lining.

I agree, working with the shoulder/armscye area is the most difficult part of making a jacket, I found. Can't wait to see it right side out!
LikeLike
Oh, I've been there — the upside down thing is such a challenge. I can't wait to see the finished jacket!
LikeLike
ah yes, the whole shoulder armscye thing can be a nightmare. glad you won the wrestling match, this will be a great looking jacket!
LikeLike
WOW. Incredible. I've spent the last several minutes looking through your posts on this overcoat, and I'm addicted to reading more about it and your process!
LikeLike
This was a nightmare on my frock coat, and I never felt like I got it right. The photo of the “shoulder sandwich” is a huge help – I'm starting to almost look forward to the re-make. No, I do not have any common sense – love a challenge or glutton for punishment? You decide. 😉
LikeLike