


When you’re a global luxury brand, clearly focused ads are apparently tres passé. Hermès seems to have a whole campaign of these burry ads, so I’m following suit. Behold my most recent Summer shirt…

All kidding aside, my Summer sewing almost always revolves around new shirts. What used to be a drawer of polo shirts has gradually emptied out as a result of my refusal to support RTW / Fast Fashion . So as a worn out polo shirt hits the rag bin, I’m needing to replace it with something new. I’m really not a knit sewist, so a fun summery woven is almost always on my radar.
It’s no secret that I like to look at what designers are sending down the runways. Not that I’m going to be running out to buy any of it! But sometimes I’ll see something that clicks, that lights a little spark, and I’m off to make my own interpretation.
Covid 19 really altered the Spring/Summer 2021 menswear “runways”, and several of the big name players produced a video. Kim Jones at Dior always features an artist, and this time it was the Ghanaian painter Amoako Boafo. In the video Boafo paints one of his portraits with his fingers (using what I suppose are oil paints). All the while he’s wearing a long sleeved Dior shirt that probably sells for at least $1,000. It just seems like a ludicrous construct to me. I mean, who would really do that? The clothes, what we see of them, aren’t creating any sparks for me.
If you have a spare 10 minutes take a look. I’d love your reaction.
Which brings me around to Hermès, and a video that had me almost instantly mesmerized. It’s the whole package… The camera work, the sound track, the fabrics, the details, the clothes themselves. All so approachable, so understated, so wearable. This collection by Veronique Nichanian has me firing on all cylinders. I’ve watched it multiple times (and maybe you will too!)
See you in 8 minutes….
It doesn’t appear in the video, but look #13 grabbed my attention immediately. If I was a millionaire, I’d be dressing like this. Luckily, sewing is my superpower, so I can!
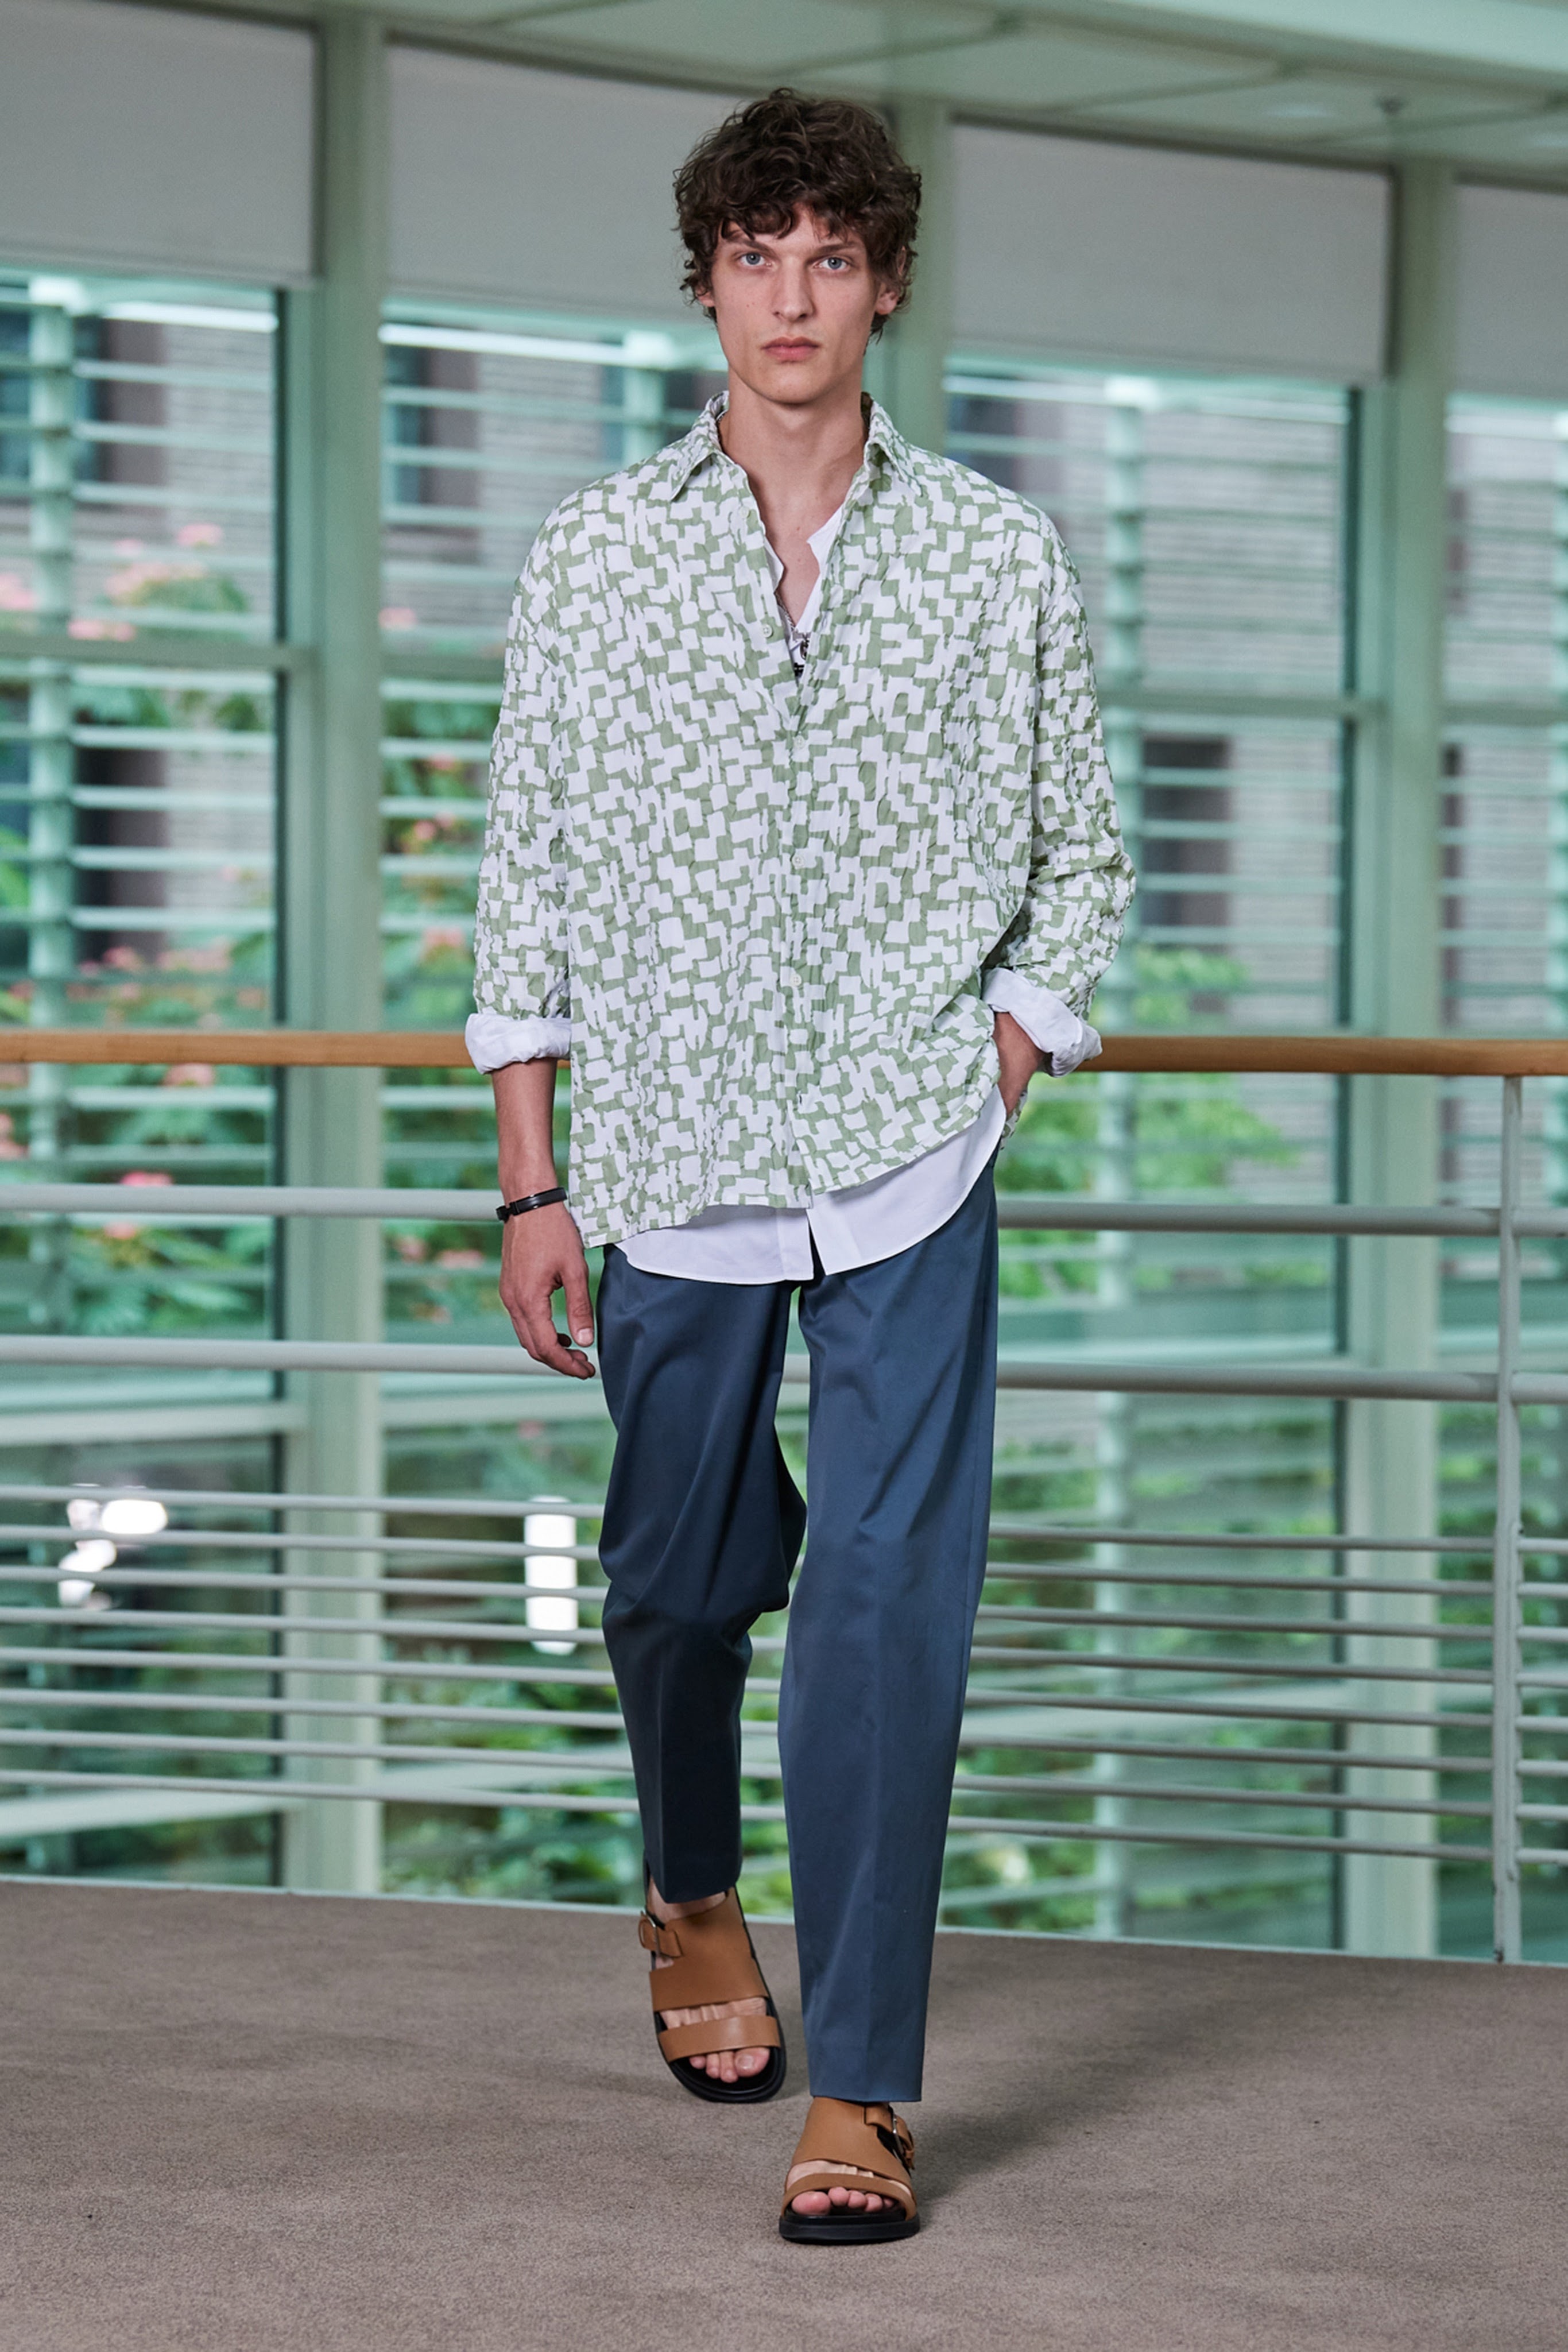
Clearly he’s wearing two shirts. I guess if you can afford $700 shirts why not have two! I love the short over longer look, and the outer patterned fabric over an inner basic white. Completely doable! So I set about making my own version (with some noticeable changes).
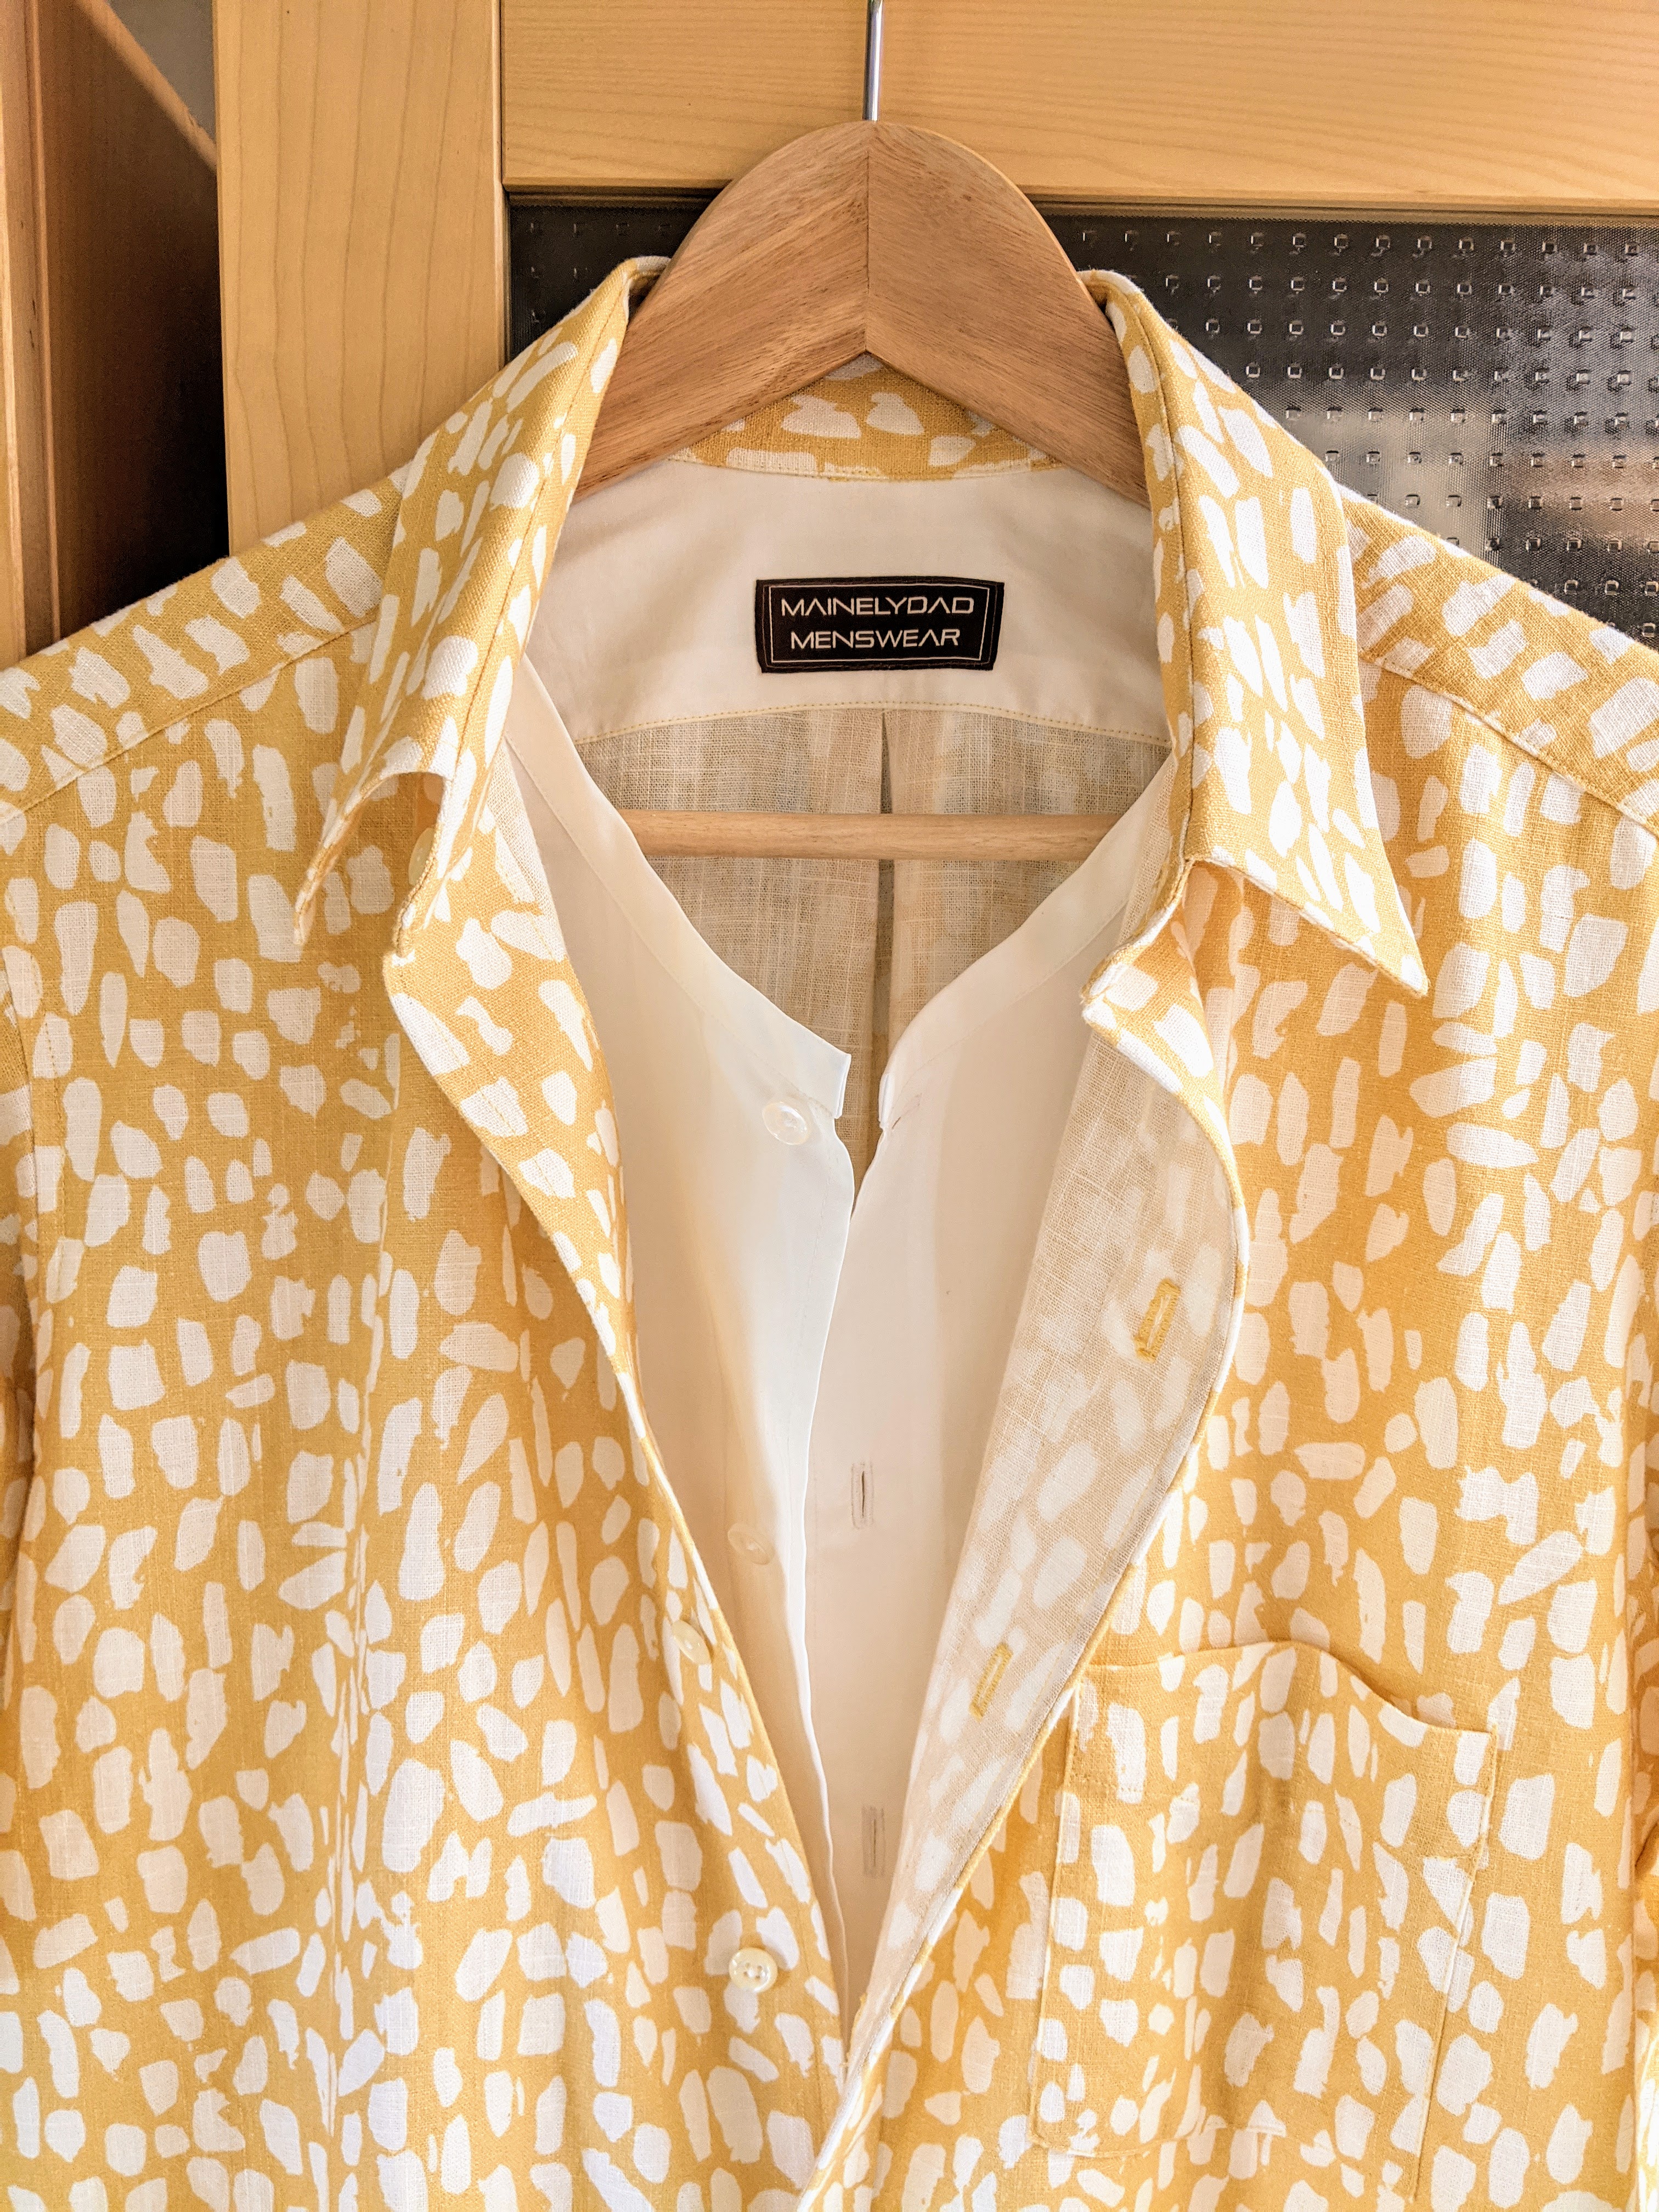
Fabrics — When I saw this linen rayon blend on the Gorgeous Fabrics website I pounced. This kind of buttery / maize / chamois yellow doesn’t appear very often. It’s a color that I love, and it goes great with the olive greens and browns that are the mainstay of my wardrobe. The white shirting is Armani, also from Gorgeous Fabrics. Finely woven and incredibly silky. It was in my tiny stash waiting for the right project to come along!
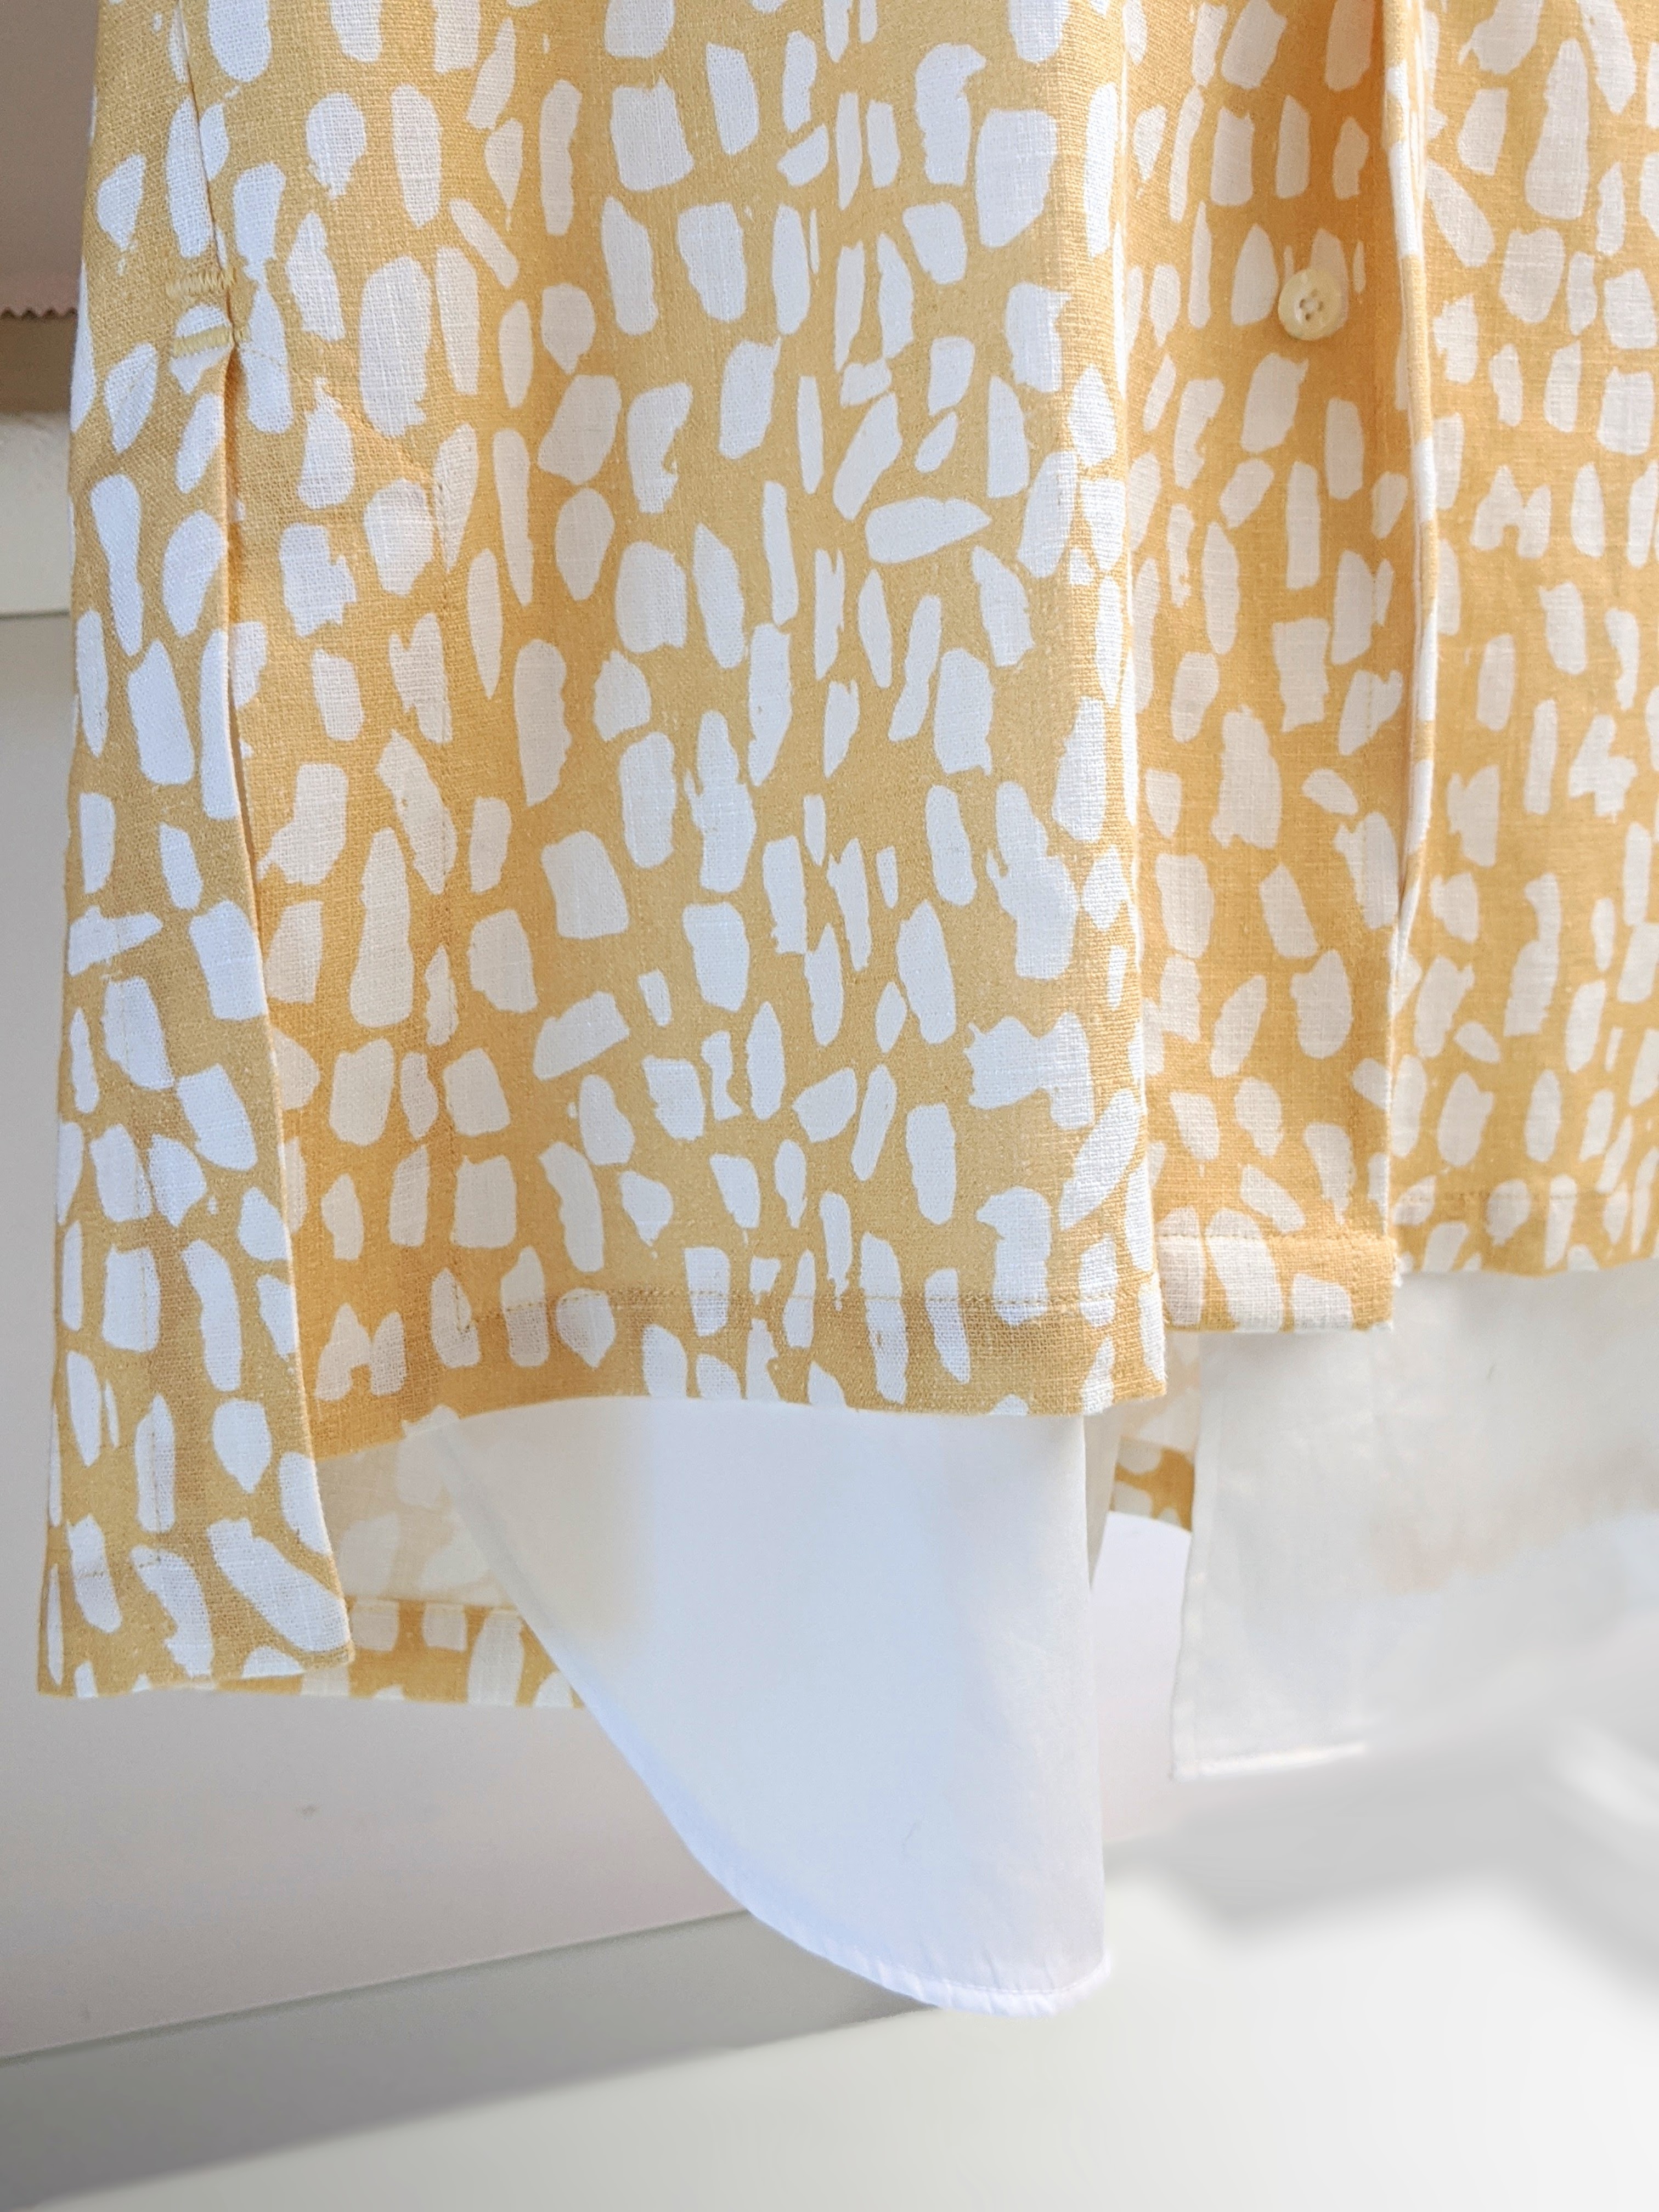
Construction wasn’t really all that difficult. I think wearing two shirts in the summer would be unthinkably hot, so I decided that I would just double up the front to give the illusion. Using my TNT shirt pattern, I lopped off its tails to make a short “untuck” length shirt. The back is 1″ longer than the front, which sort of helps balance the whole look out.
Then using the right front pattern piece, I “carved out” a rounded neckline that would be slightly lower than outer shirt’s neckline. To keep the inner layer as light as possible there is no left side placket or interfacing. The neck edge is a simple bias binding (made with one of my trusty Clover bias gizmos). The goal here was to keep everything as light and unstructured as possible.
Once the inner layer was sewn it was simply a matter of basting the two layers together and treating them as one for the rest of the construction. The outer layer is more structured and interfaced with Fashion Sewing Supply’s, Light Crisp fusible. It’s an indispensable item in my shirtmaking arsenal.


It’s nice to have side vents on a shirt that’s designed to be untucked. It allows for access to your pockets, and it’s just a nice look. I’m always looking for ways to up my sewing game, so I decided to try a mitered corner on the vents.
WOW! What took me so long! As it turns out, it’s ridiculously easy to do, and it really adds a custom touch. A game changer for sure. Threads has a great video online with Louise Cutting, but it’s for their subscribers only, so I can’t share it here.
Instead……Here’s my attempt at a video tutorial. I hope you find it helpful.
Bye bye cheap polo shirts……Hello faux Hermès!


I love this shirt so much I’ve already received fabric to make another! (It will be an Anne Klein / Armani mash up)
This morning was cool, a sign that Summer is winding down here in Maine. Maybe one more shirt will make it last a bit longer. Here’s hoping.

As usual/always you knocked this one out of the park. What a brilliant idea, I so love this look. Bravo!
LikeLike
Love the top shirt and even if I could afford it would not want to wear two shirts as really can’t see the point and for me not a look I would want. But there is a huge amount of fashion I don’t like anyway. The workmanship as always is top notch so love your attention to detail.
LikeLike
I love the fabric you chose–very light and summery. Thanks for the technique of mitered corners–clearly explained. Noticed the geese gathering on the St. John River practising take off and landing, so definitely a sign of summer transition–wear your shirt often!
LikeLike
Absolutely stunning!
LikeLike
Oh this is just awesome. I have to admit that my COVID blazer never got finished (I wasn’t happy with the pattern finish and decided to start again which I haven’t yet) but I have made a few shirts and i love the dual front styling it’s awesome
LikeLike
This is a superb shirt and certainly up there with the best and I loved your fabric choice. Your mitered corner tutorial is great, I have been looking for one and will use it later today. Altogether your blog was a wonderful and enjoyable read as ever.
LikeLike
Awesome look and the detailing is gorgeous. Are there any issues with ironing (I know a somewhat passé term) or pressing the two layers in the front after laundering? Are they ironed together as one layer?
TIA
Barb
LikeLike
It should be easy to fold the outer shirt out of the way to get to the inner one.
LikeLike
Love your shirt, and thank you for the helpful mitre video – see where I’ve been going wrong now!
LikeLike
AMAZING!
Mitered! YouTube has been missing you for TOO long – looking forward to more videos.
You certainly can find needles in haystacks – those fabrics are “brand plausible”.
I’m guessing where ever you are, summer last a little bit longer.
LikeLike
Love, love, love. The color is perfect. Especially like the bias undershirt. Would work well here in Florida in the fall where winter may come by January. I too look for challenges and find Threads a great resource. Thanks for the inspiration.
LikeLike
Oh my! You’ve done it again! Another amazing designer shirt. Swoon! And thanks so much for the video tutorial. I never could figure out how to do a mitre with uneven hems. Your way is so simple and works so well!
LikeLike
Oh my! You’ve done it again! Another amazing designer shirt. Swoon! And thanks so much for the video tutorial. I never could figure out how to do a mitre with uneven hems. Your way is so simple and works so well!
LikeLike
I love the fabrics you chose for your shirt and the style suits you very well. Your tutorial was clear, easy to follow and helpful. I enjoy your projects and find your attention to detail inspiring. Thanks for sharing.
LikeLike
Thanks for the post and super clear video! Lovely shirt and fabrics. I like both collars – really, everything about the shirt!
LikeLike
Thanks for the very helpful video on the mitred corner!
LikeLike
Such a wonderful shirt Duane 👏 keep making them & summer will HAVE to stay!
LikeLike
It is no exaggeration to say that Louise Cutting’s mitered corner method changed my (sewing) life. I miter EVERYTHING now. I go out of my way to miter!
Some patterns have incredibly complex cutting lines for mitered corners – totally unneeded. Just cut the two edges straight so they fold over each other, as you’ve shown. Yes, uneven width edges are fine, AND angles. As long as the two edges fold over each other, a miter is possible. (Even a 5/8 SA can be mitered, though it is a bit fiddly.)
I no longer use the pins, just mark with a small dot of chalk or marker pen. Likewise, with practice, I think chalking in the line between the two edges can be eliminated. Eyeballing the stitching line to create the miter is totally doable. Miters are so fun!!!
LikeLike
This might be my favorite post of all time. First, your shirt is pure luxury and surely Hermes would be envious of those mitered slits. I just tried your method and it was a complete success. I mucked up my hermes version by doing slits with the 5/8 seam allowance and they are puckered and do not hang straight. Now I know better. The Dior video was puzzling🤨 I am a huge fan of the artist but did not see a connection between his beautiful paintings and the blurry (I got up and put eye drops in, twice) oddly proportioned shapes dissolving in front of my eyes? No this collection which I could not see was not inspiring. Please consider having a youtube channel with patreon support, or collaborate with the new craftsy if they are viable. Your tutorial was so clear and also fun. You are a natural for videos.
Thanks for all the great info and inspo!
LikeLike
I wondered how you made that! Thanks for sharing.
LikeLike
May I ask a construction question? I’m at this point on a short sleeved Closet Core Cielo. For shirts, what seaming do you use to attach sleeves? french seams don’t seem a good idea, which is the rest of this shirt’s seams. I’ve used flat fell other times when all seams are flat felled – would it look ok here as the only topstitched seam?? Or a regular seam with — a snug hug encasing? 😊 Thanks.
LikeLike
Heather, I went to look at your pattern. It seems to be a fairly large drapey sleeve, so I think a lot depends on your fabric. If you’re using a drapey fabric I would snug hug the raw edge of one layer and trim the other and press everything towards the sleeve. On a crisper fabric you could make a flat felled seam, but it would be a more sporty look. I would not do a French seam as it would be too bulky.
LikeLike
Very COOL! What camera do you use? tx
LikeLike
Nothing fancy. I use a Google Pixel 2xl on an inexpensive tripod with a bluetooth shutter device.
LikeLike
Love your shirt, and the mitered corners. I enjoyed your video – it just looks too darn easy! (And your comment about your ironing board cover cracked me up. I just recovered mine, and I’m not sayin’ how long it had been. Ah hem….)
LikeLike
Wonderful shirt combination!
LikeLike
Beautiful shirt, and your instructions for it are inspiring.
Also like your miter tutorial, but it could be confusing, as the fabric for the vent side should have been folded on the seam line, not the cutting line. The way shown, it would not work for construction of a shirt.
LikeLike
Thanks for sharing your methods so freely. Mostly I just love seeing what you make even though I might not make it myself. I actually got fabric for this one last year and got distracted. Back on it now and hoping to get it done while summer is still here. 😊 Question: how far down the side seam is the under-shirt attached. Is it connected all the way to the vent?
LikeLike
I like this layered look a lot! Like you, I don’t really like knits, so nice woven fabric appeals.
LikeLike