I’ve been wearing the same LL Bean barn jacket to work for years. It’s served me well, but it’s in disgraceful condition. The corduroy cuffs and collar are frayed, the front is permanently stained with coffee, it’s missing a button, I could go on. For someone who can sew, it’s an embarrassment. So I’ve had in mind to make a replacement.
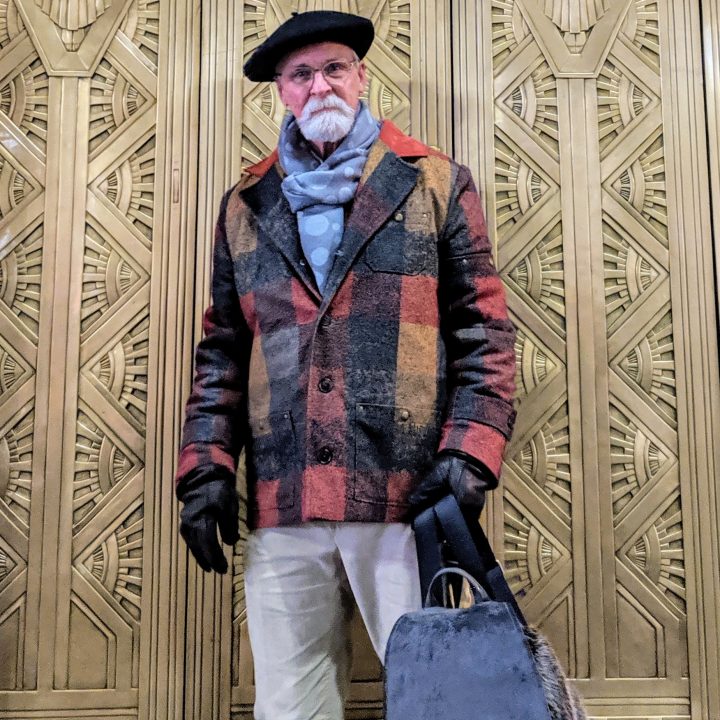
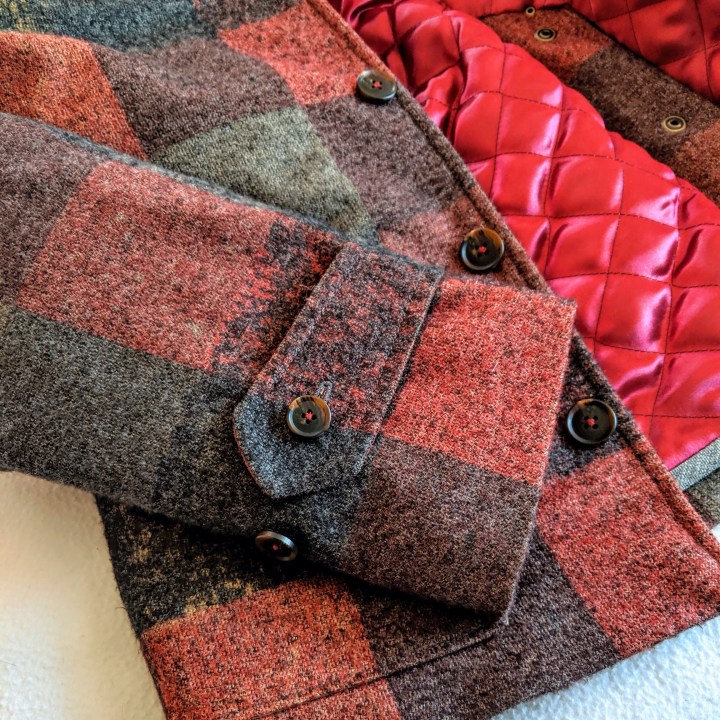
At the MPB Winter Frolic last year, my friend Kyle Burkhardt picked up a great checked fabric in sort of “autumn tones” at Metro Textiles. I would never have noticed it without her. It’s actually a double knit with stretch crosswise, but not lengthwise. I love the colors… rusty reds, golds, grays. It has a slightly brushed finish and “wooly” look. The idea of moving away from the conventional solid color canvas jacket, to something more unique suddenly became very appealing. And isn’t that the super power of being able to make our own clothes? I walked out with 3 very generous yards and visions of a new coat swirling in my head.
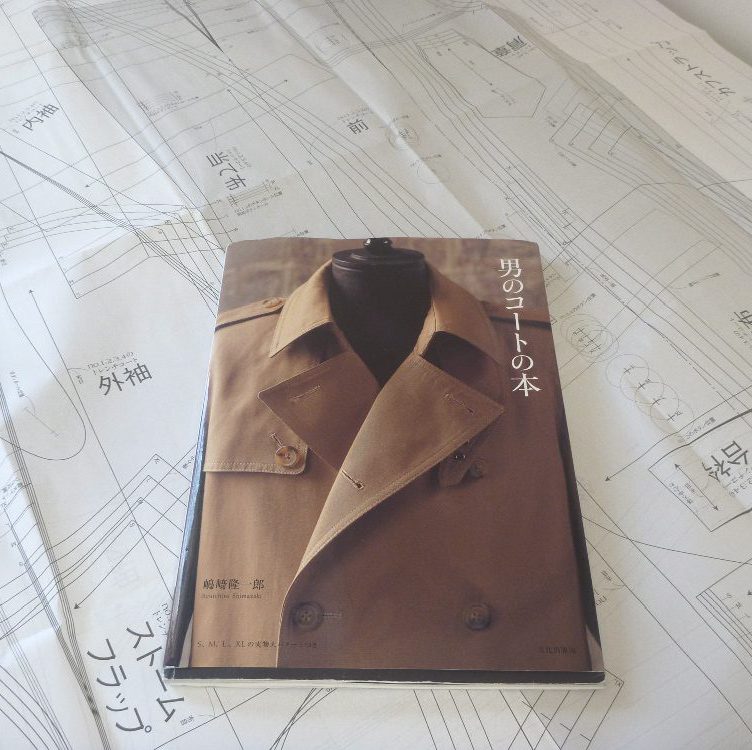
I picked up this pattern on Etsy. Barn jacket, right?
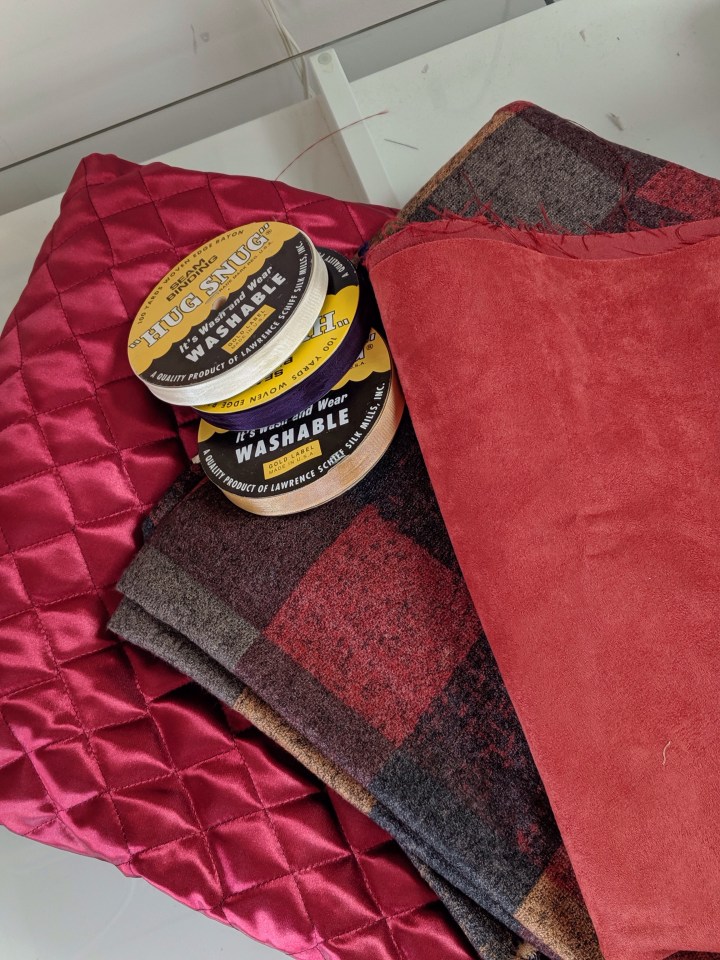
Then at this past Summer’s MPB Day, I picked up the other bits that I’d need. A quilted lining from AK Fabrics, and a coordinating faux suede from Mood. (Also buttons from Pacific Trimming).
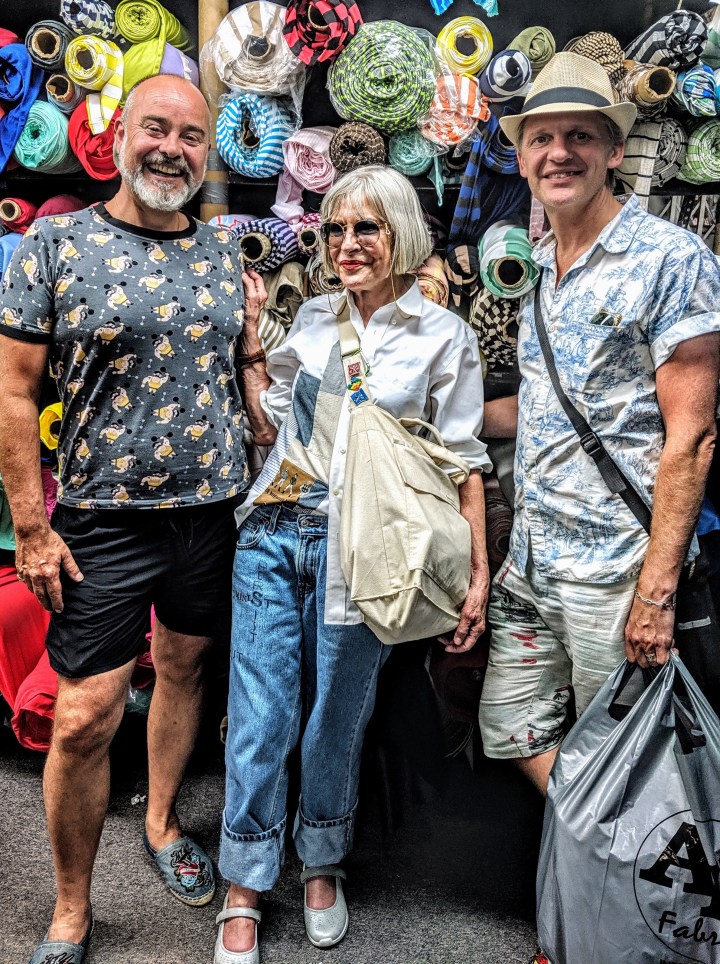
And who could forget my accomplices in the journey! From left to right…Mr. A, Blanca and Sew Andrew. AKA Blanca and the Brits. The best fabric shopping enablers ever.
SO……..
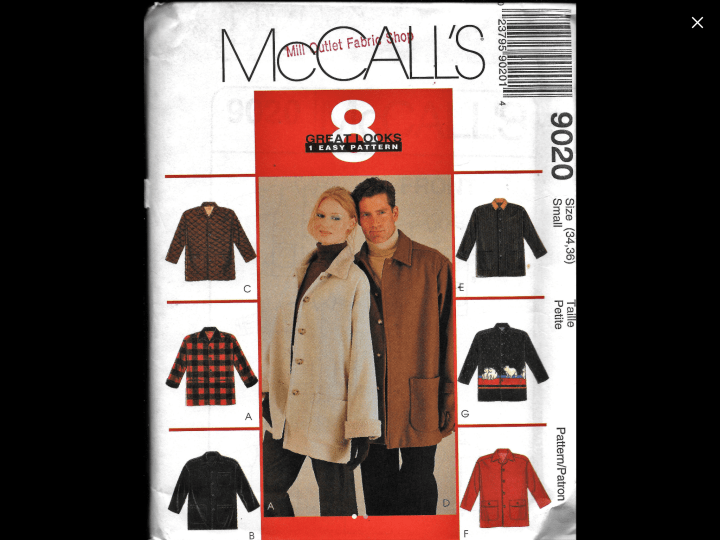
I trace off McCall’s 9020 onto Swedish Tracing Paper. But as I’m tracing off what seem to be just big rectangles I’m thinking……I’m not going to like this. I press on and make up a muslin. And while I’m sewing away I’m thinking…..I’m not going to like this. I try on the muslin, which is an oversized drop shouldered mess, and…..all my intuitions were right. I hate it.
There was a time when I would have soldiered on, determined that I could “fix it”. But there just wasn’t enough “goodness” in this pattern to warrant all the work. There were zero redeeming details. None.
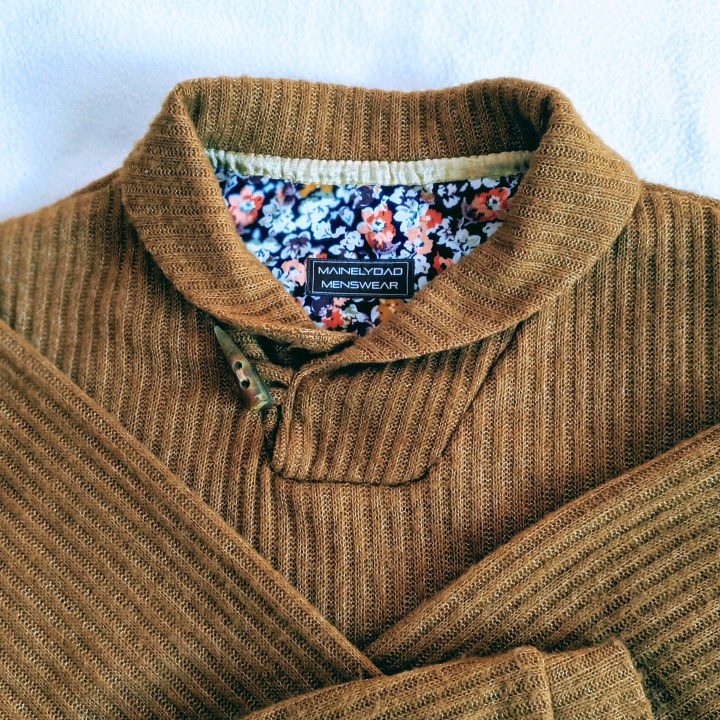
So I abandoned ship and made a Thread Theory Finlayson Sweater instead!
(Sweater knit from Oak Fabrics….so soft!)
Then…..the miracle happens! Heather Lou of Closet Case Patterns releases the Sienna Maker Jacket.
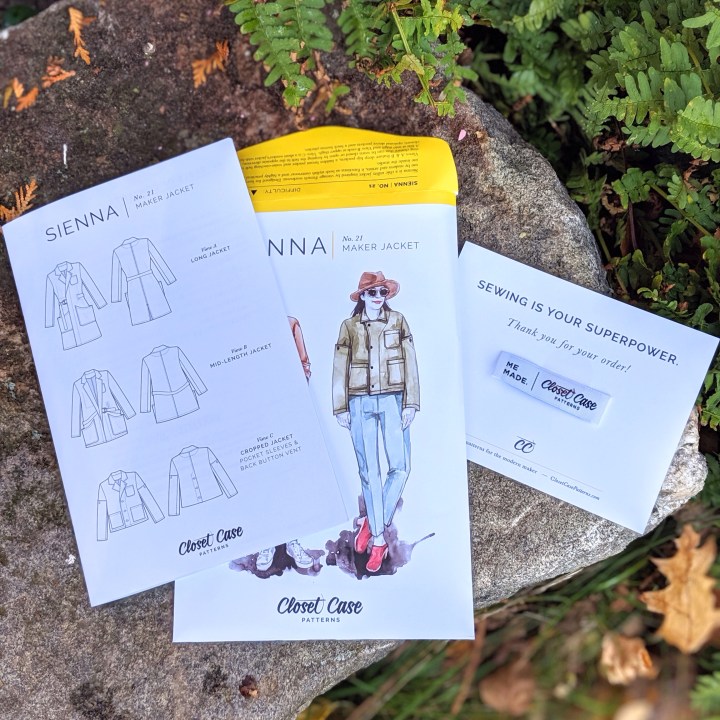
One look at the line drawings for view C, and this guy is back in the game.
OK, I won’t lie, working from a pattern designed primarily for women wasn’t exactly a walk in the park. But I would never discourage anyone from giving it a go. The details of this pattern make it SO worthwhile. I mean, take a look….not just a two piece sleeve, a two piece sleeve with a pocket in it! Then there’s the great button up back vent. It’s the whole “work wear” vibe, just kicked up an unexpected notch or two.
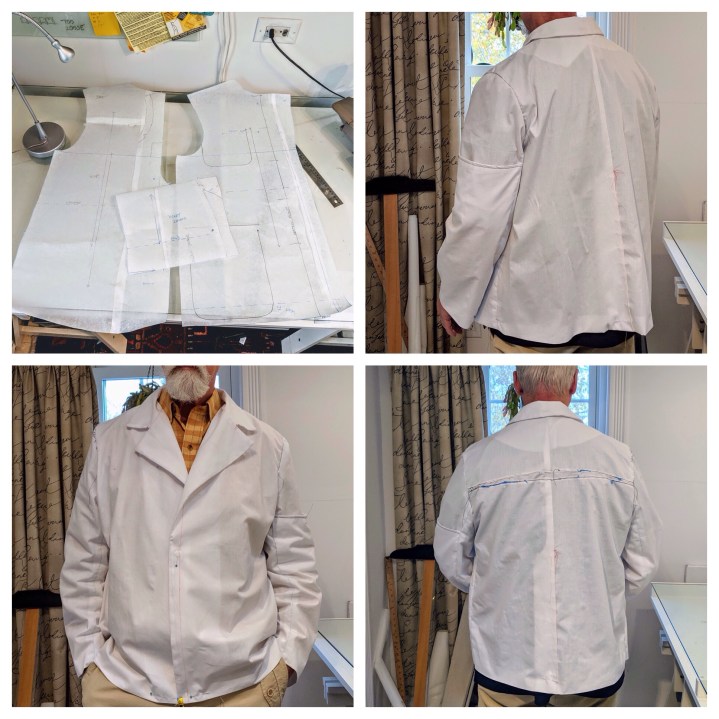
I ended up making 3 muslins. I can’t go into all the details here, but here’s a synopsis that might be helpful for other guys making this jacket. The shoulders run a little narrow IMO. I’m not a big guy and I needed the full size 20 at the shoulder. At one point I was convinced that I might need a sloped shoulder adjustment, but that fit issue became minor as work progressed.
With the shoulders fitting well, there was too much ease through the chest and body. The solution was to grade from a 20 at the shoulder to a 16 through the chest and body. It can be done. Just remember that the sleeves also need to be tweaked. Otherwise they will be too large for your adjusted armcye. This is where Swedish Tracing Paper shines, because you can cut away or tape on endlessly until you get the fit you want.
And speaking of sleeves, there is minimal ease to the sleeves on this pattern. Thank you, Heather Lou! It makes them very easy to set, and the end result is a very professional, well tailored look. I considered adding a sleeve head, but with the quilted lining I used it became unnecessary.

I removed all the flare from the back and side seams, a purely personal decision. I also squared off the back hem (it has a slight curve) to accommodate my very blocky fabric.
Lastly, I lengthened the jacket by 5″. Again, this was a personal choice. I’m a RN in a small Urgent Care here on the coast of Maine. When I head off to work, I’m basically walking out the door wearing little more than a pair of cotton/polyester pajamas. I wanted something a little longer than my scrub top. Plus…..it can get damn cold up here!

The muslin graveyard.
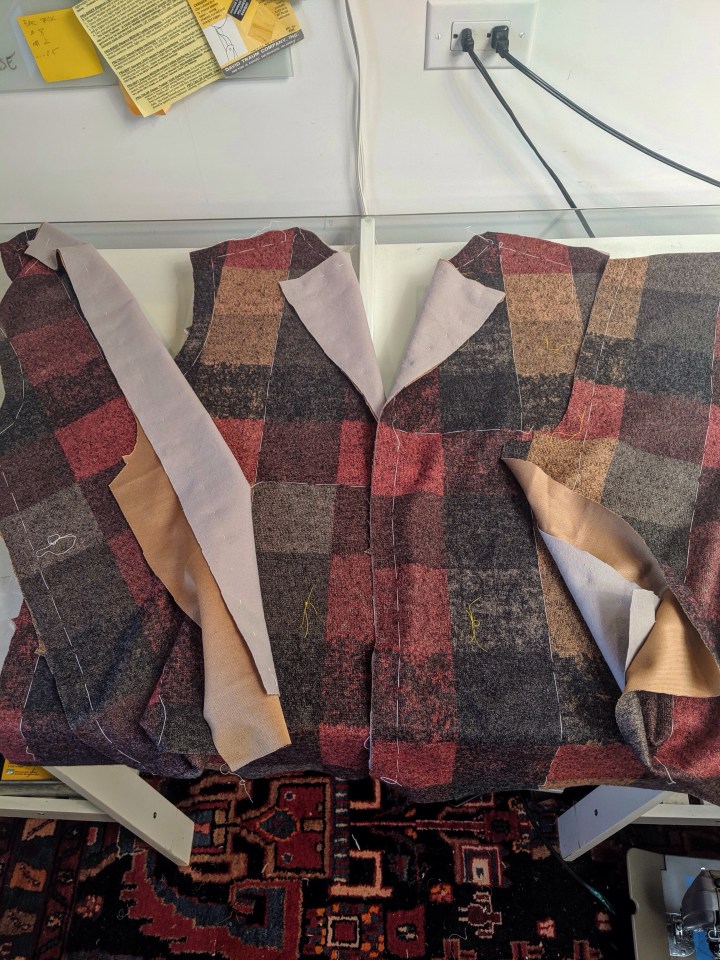
I underlined all the pieces with cotton flannel for extra warmth. It’s not difficult to do. Cotton basting thread makes the job go quickly. I just find that little steps like this pay off in the end. The two layers are treated as one during construction, and the excess bulk in the seams gets trimmed away. Slow sewing.
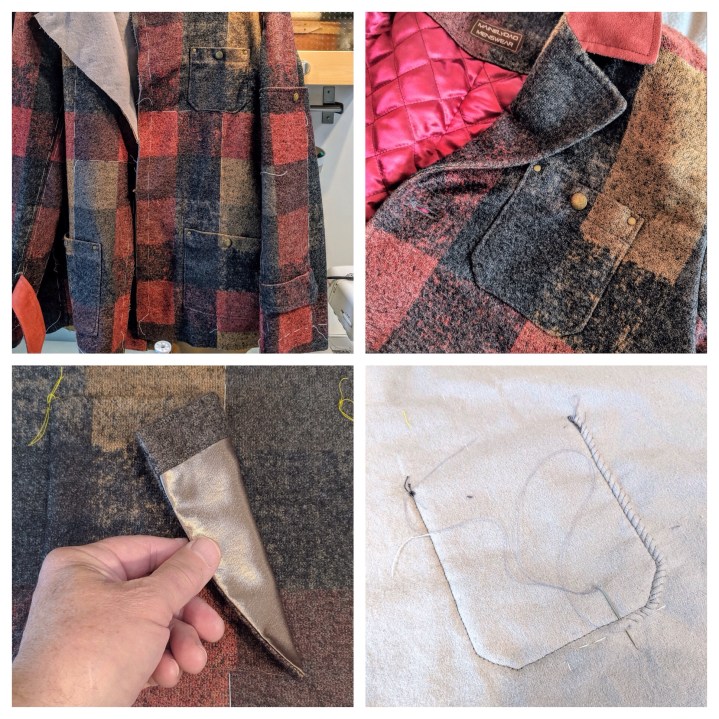
I lined all the pockets with some scraps from my embarrassingly large scrap stash. I also interfaced the top of each pocket to make them stronger and less likely to sag. I really dislike patch pockets that look like they’re pasted on. So after they’re topstitched on, I work a quick and dirty diagonal stitch from the backside to tack down the edges of the pocket. It gives a much more professional look. Jamie Kemp over at Male Devon Sewing takes a slightly different approach. He slip stitches the pocket on first, then does the topstitching. Either way, it really improves the look of the garment and is time well spent.
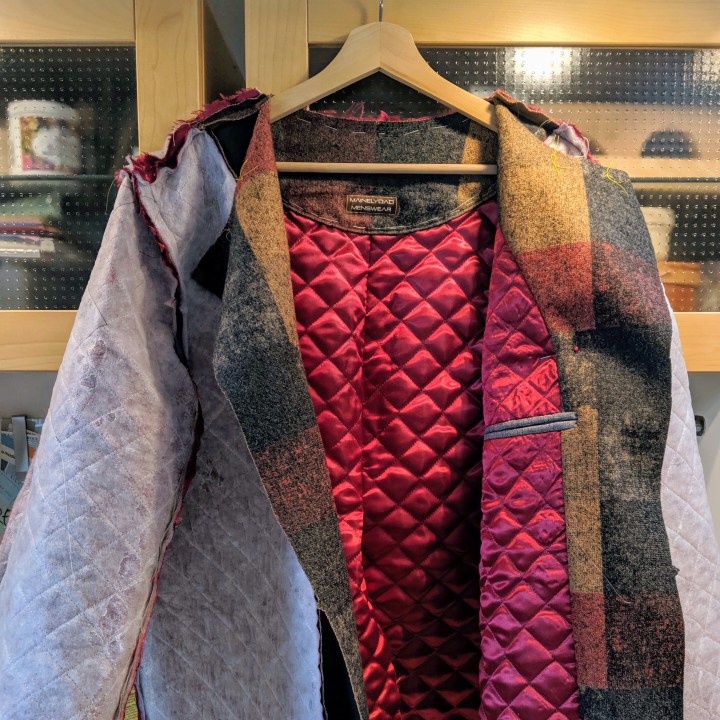
I’ve never worked with a quilted lining before, but I can assure you it’s nothing to fear. Just lower the setting on your iron. The poly batting melts easily and will gunk up your iron , AND it smells like your house is on fire!
I use The Bishop Method of Clothing Construction as a guide whenever I have to line a garment that doesn’t include pattern pieces for a lining. It’s a great resource for all kinds of techniques that modern patterns just don’t include. It was written before the advent of fusible interfacing, so it’s very old school. (Right down my alley) The results that can be achieved are couture quality. So I return to Edna Bishop’s instructions time and time again.
The double welt pocket is from Roberto Cabrera’s text on menswear tailoring. I’m a big believer in having the features you really want in your clothes. Having an inside chest pocket is one I can’t live without.

The lining in this jacket is hanging free. The bottom edge is finished off with a bias Hong Kong finish. There is a thread chain at the side seams to keep it in place. I had never done this technique before (there’s always something new to learn!). Susan Kahlje has a great video for Threads that makes it so approachable. Proof once again that there is nothing difficult in sewing, there are just the things you haven’t done yet.
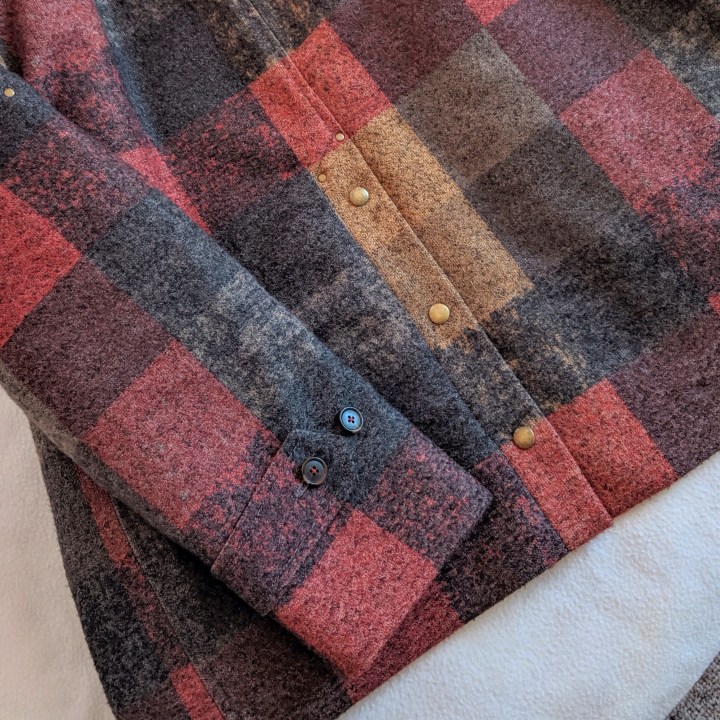

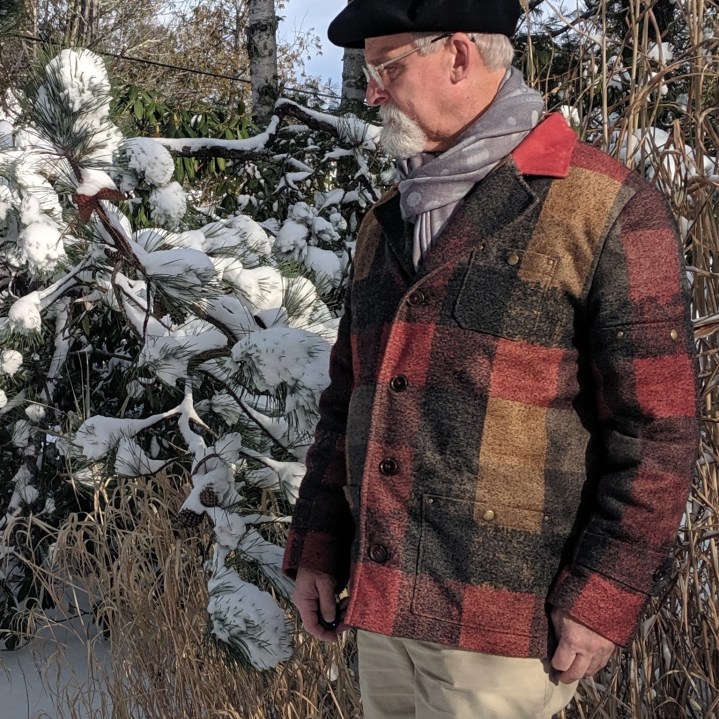
I didn’t have enough buttons for this project since I had an entirely different coat in mind when I picked them out. The solution was to add antique brass snaps on the pockets and back vent. The brass rivets are just icing on the cake. (I love setting them!)
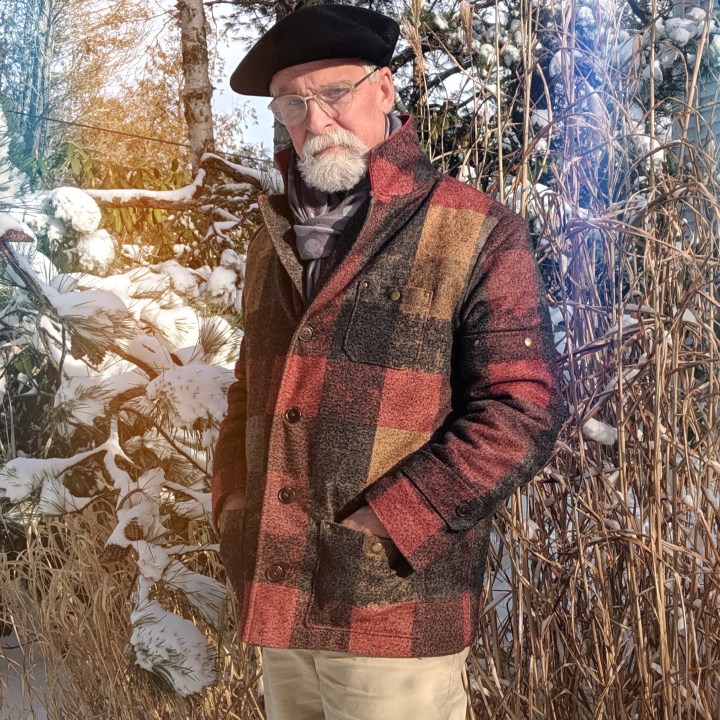
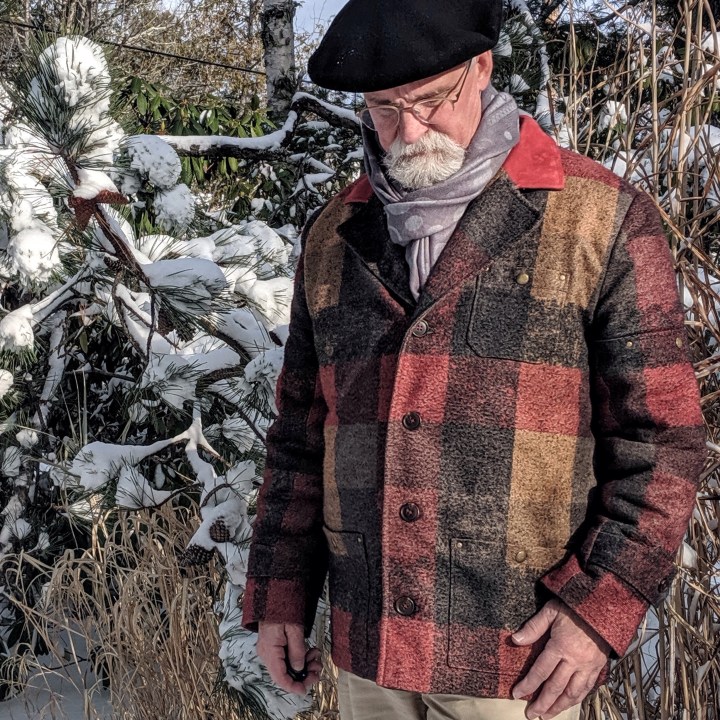
We had a little snow yesterday, which always improves my backyard photo shoots. So here’s my version of the Sienna Maker Jacket in the wild.

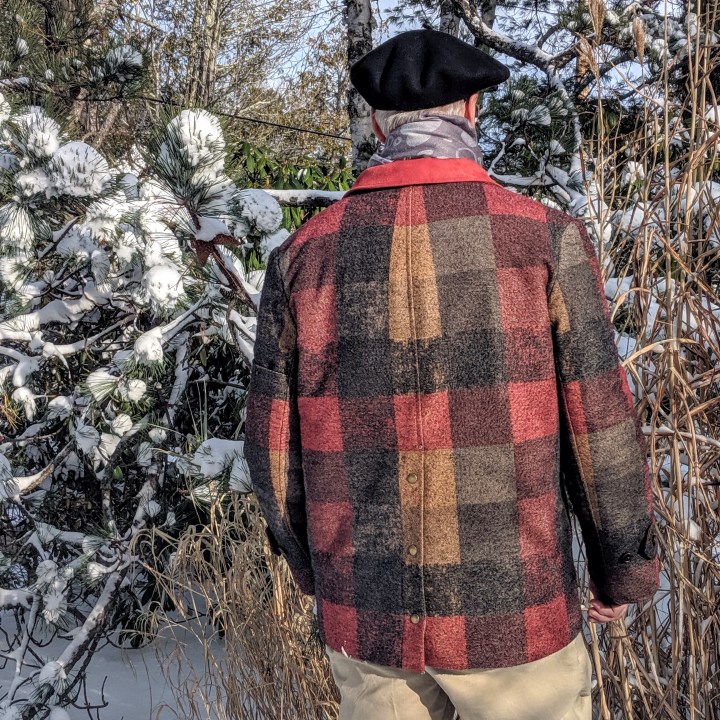
The grid on the back is skewed by the “dowager’s hump adjustment that I need to make on my coats. I’m sure I’m not the only one who finds it disturbing. Without the adjustment, the collar pulls away from my neck. In retrospect I might have avoided this look with two back shoulder darts. Yes? No? I’m sure someone out there knows. This is where my lack of fitting knowledge gets frustrating. There is SO much I still don’t know. Yet, I’m more than thrilled with how this jacket turned out, and wouldn’t hesitate to make it again. Plus, I never see the back when I’m wearing it!
The popularity of this pattern is easy to understand. I can totally see myself making the belted version somewhere down the line.
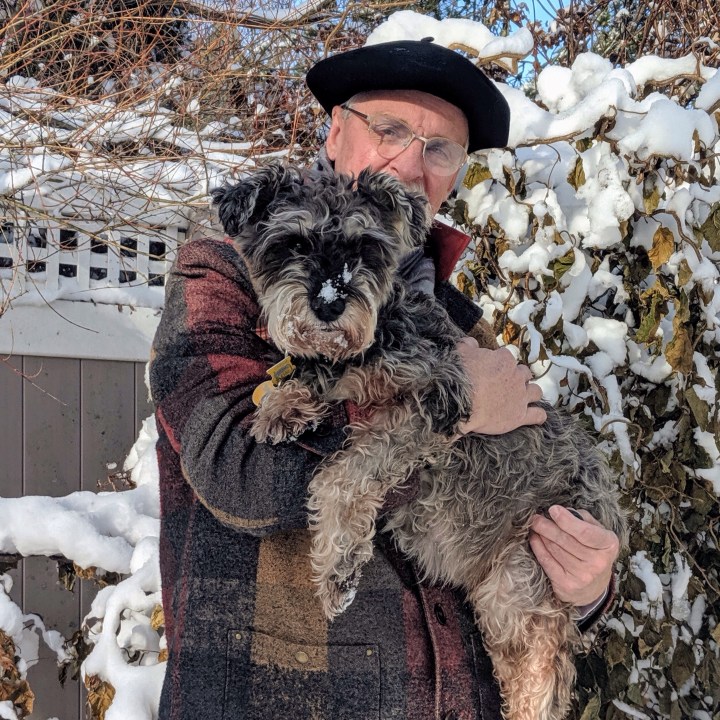
Next up…… a matching coat for sweet Homer.
Be well, stay warm and happy sewing!
Credits:
Fabric — Metro Textiles
Faux suede — Mood
Lining — AK Fabrics
Buttons — Pacific Trimming
Interfacings — Fashion Sewing Supply

Awesome job, yet again, great jacket, you and Homer will look styling together. I looked at the pattern and I could make this work for me, I would need a big size 26 to work for me. Features I could go with a beautiful wool gaberdine, or even a boiled wool fabric, which means i could either line it or not. I really like the button back feature and would be dramatic if i made a long version of the coat, the patch pockets i can live with but would line and leave the shape the same, the chest pocket i could live with out or round out the shape of the pocket, it is truly a versatile pattern for both men and women. I think you could make yourself a matching messenger bag to go with the coat.
LikeLiked by 1 person
I had an aha moment reading your post. Having trouble with the shoulders and neck on my muslin and now think I will try the two darts and the forward shoulder seam for my dowagers hump. That tip about the pockets is brilliant. Your jacket is perfection and so luxurious it almost upstages Homers little snow nose. Thanks so much for this helpful sewing and fitting post, and for the mention here 😎 with me hauling around a huge bag of fabric at MPB. When you retire will you be offering tailoring courses? The husband swore if I made this for him he would wear it forever.
LikeLiked by 1 person
Great sew-manship, as usual! Where did the faux suede go?
LikeLiked by 1 person
It’s on the upper collar. It doesn’t get much visibility because I usually have the collar up.
LikeLike
Loved your jacket on IG and I LOVE it even more after seeing it here. Your attention to detail is leaving me a little woozy. 🙂
I do high round back adjustments on my Closet Case patterns. Most of the time it means I end up with two little darts at the back neckline. I have, on one occasion, been able to rotate those little darts out to a dropped shoulder seam. That being said, I don’t see the narrowing of the plaid as a negative at all. After you pointed it out, I had to look twice and even then thought it was a result of the pattern draft.
Your patch pockets are perfection. Thanks for sharing your tips! I’m gearing up to tackle an insulated winter jacket and I want my pockets to look as fine!
LikeLike
BRAVO!!!! This read like a novel in front of a cozy fire. I love what you did with the snaps and how you tackled the back fit. I found I had to do a similar alteration for a nightdress I recently made. My collar was also pulling away. If you hadn’t pointed it out, I wouldn’t have noticed the shift in print. I ADORE that contrasting Hong Kong finish on the lining also. Well, done!
Also, my dad was an RN also! My mom too, but you don’t see quite as many men in nursing as women.
Congrats. This coat is glorious.
LikeLiked by 2 people
You are absolutely amazing! I love all the details! Your jacket looks fabulous.
LikeLiked by 1 person
A beautiful coat – particularly like the free hanging lining finished with binding instead of a hem (will do that myself next opportunity), the studs on the pockets instead of buttons, and the contrast collar.
Dowagers hump ideas: neck darts OR shoulder darts OR lowering the back armhole by 1″ and then adding onto the back length so the side seams match (this gives you extra length over the back). I rarely mess with the centre back seam. Always difficult to fit yourself but harder when it’s the back.
Great pattern matching too; a joy to behold.
LikeLiked by 1 person
Thanks for all these fitting tips! It’s been the biggest challenge in my sewing journey. I just never considered what the back would look like as I made my “usual” adjustment. There are SO many things to consider in the whole cutting out phase. File this under “lessons learned”!
LikeLiked by 1 person
This is such a awesome make, I absolutely appreciate the techniques displayed. I love your work, so much to learn, thanks for sharing.
LikeLiked by 1 person
Thank you so much for sharing! Great pics! Lucky inspiration for me, as I’m about to start on my Sienna. Wish you the best up there in Maine. ❤
LikeLiked by 1 person
You really took this pattern up a notch with your amazing rendition. I truly enjoyed your thoughtful, detailed review of the pattern and coat-making process. From one RN to another, poly/cotton scrubs mandate longer coats, and quilted lining. Thanks for sharing your wealth of knowledge!
LikeLiked by 1 person
This is fantastic! I always love your work, but you really hit it out of the park with this.
LikeLiked by 1 person
I love everything about your glorious new coat!
LikeLiked by 1 person
Your jacket is beautiful. Thank you for the detailed post.
LikeLiked by 1 person
I always admire the quality, precision and care in your sewing, another great coat and it looks wonderful on. Thanks for the tips you pass on as well a great help, also I have managed to get an old copy of The Bishop Method of Clothing construction.
LikeLiked by 1 person
I’m sure you’ll find that book helpful. More than anything it’s made me care about the quality of my workmanship.
LikeLike
Absolutely fantastic jacket. It’s a very satisfying feeling when the right pattern pops up for a planned project/fabric – and great that the pattern being designed for women didn’t stop you from seeing its potential
LikeLiked by 1 person
I’ve got my Sienna in the pattern stage still but it’s next on my list. I decided to do the long jacket, use the button front and back button vent from the short version and add a belt with belt keepers. I love your version, especially the lining. I have used military poncho liners for quilted linings in previous barn coat sleeves and wish I had access to your lining sources. JoAnn’s has nothing but cotton. Homer needs his coat soon if you already have snow. Don’t forget to show us.
LikeLiked by 1 person
Great work, I will keep this post for future reference.
LikeLiked by 1 person
One question please Duane.
As I haven’t yet sourced the Bishop Method of Construction…I’m wondering if leaving the lining loose at the bottom hem is for function or aesthetics?
Thank you!
LikeLiked by 1 person
Sue, with a typical lining fabric I would fold the lining up to create a pleat at the hem. This allows the lining to move without pulling the bottom of the coat up. The quilted lining I used would have created too much bulk. The Hong Kong finish provides a clean edge with minimal bulk. Attaching the lining with thread chains allows it to move within the coat without distorting it.
LikeLiked by 1 person
Very helpful, thank you Duane!
LikeLike
Your construction and modeling are equally FANTABULOUS!!!
As for the root cause analysis of the quirky and unexpected – with her vacuumed lawn, all roads lead to Kyle, always.
LikeLiked by 1 person
Love the jacket. You did a great job. I don’t mind the back of the neck solution myself – you have matched perfectly so it looks intentional. An alternative would be to make angled darts into the neckline and add a little length vertically too. You’d still get a bit of narrowing visually but not as obvious. Looking forward to seeing what you do for Homer.
Thank you for sharing your beautiful work.
LikeLike
This coat is so good looking in every possible way! I absolutely love it! Thanks for sharing the details!
LikeLiked by 1 person
Just WOW!!
LikeLike
Fantastic 👏👏 your work really paid off 👍 and I can’t wait to see Homer in his matching coat! You two will be turning heads!
LikeLike
Another gorgeous, high-end coat! I always learn something when reading your blog posts – this time it was the extra stitching for a patch pocket. Beautiful!
LikeLike
that is fantastic, and what a great fabric choice/combo. and the muslin graveyard – that describes it exactly 🙂
LikeLike
What a piece of art. Well done
LikeLike
Beautiful! I am very inspired. I think it looks fab and the defending checks don’t bother me none. I can’t wait for winter here so i can make some coats😁
LikeLike
Great jacket, good work!
re: the back, and the round upper back adjustment; would a separate yoke create a smoother pattern match?
Carol
LikeLiked by 1 person
Carol, that only occurred to me when the whole thing was finished. Hindsight is always 20/20, right?! I’m always learning more with each project. It’s what keeps me moving forward.
LikeLike
Wow Wow Wow , I have just read your interview with “Closer Case Patterns ” beautiful coat , talented Man ! I bought the pattern last week , I have now been inspired to get off my arse & start sewing again , maybe Mr Mills will be getting one too ! Thank You !
LikeLike
Wow, what a great make!! You have an eye for fabrics with wonderful color and texture. Your garments reflect this. I had thought of making this pattern in a wool for winter outerwear. Your jacket helps me consider this possibility. Time and thoughtfulness well spent. Great matching of the plaid. Great details in the construction of this garment. Fantastic!!
LikeLiked by 1 person
How amazing to discover your sewing, blog and Instragram site via Closet Case patterns! I’ve only had time to read a few of your posts, but your descriptions and tips are extremely helpful. I’m just now getting “into” sewing and am beginning to understand why it was such a passion for my mother. I’m relying on grade school experience and a few college level courses for guidance. Your use of vintage patterns is inspiring. I hope, someday, to sew for my husband at a level of quality that would allow and encourage him to wear the garments. Thank you for this gem.
LikeLiked by 1 person
After discovering your blog on Closet Case Patterns, I spent a bit too long this afternoon going through your posts. I am in awe of what you have created.
You said that you want people to see your clothing and think, “man, that old guy has the coolest clothes.” Well, I don’t live in Maine so I don’t have the good fortune to see your clothing in person, but I can say that you brought some joy to my corner of the world as I browsed through what you have made. I think your clothing is incredible and your talent is inspiring. I hope that I can develop my skills to the level that you have done.
I hope that you will continue to share what you have made.
LikeLike
I, too, found you thru Closet Case! My passion is historical sewing, all by hand. However, I’m smitten by what you’ve done w that jacket! Gorgeous!
Because we don’t have any sewing manuals from the High Middle Ages, that I know of, I drool over historians’ sites & books delineating what stitches & techniques were actually used.
Now, I’ve discovered my other love: the late Victorian/Edwardian period w their tailored jackets, vests, & walking skirts.
I don’t have a dressmaker’s double, nor the $$ for one. So, off into a a new vocab including slopers & pattern blocks from the Tudor period. I’m sure the info gleaned will help me when I begin sewing for the Edwardian period. ☺
Now & then, however, a modern garment catches my eye: a Filson wool vest &, now, your incredible jacket!
Gorgeous & it looks grand on you.
Before your next one, do try another commenters’ suggestion (or I may have to! See me being lazy?!) about adding a yoke for those of us w a widow’s hump. I will definitely have to deal w mine.
Yrs, Jennifer
LikeLike
Ditto what Nancy said! I’m inspired to make my own outerwear now (with the help of your blog that is). Thanks Duane.
LikeLike
Thanks so much for your post! I, too, have an old LL Bean barn coat that needs replacing. Your take on the Sienna is exactly what I’ve been looking for! It will be my first coat as a maker. Your fearlessness has inspired me to take the leap!
LikeLiked by 1 person
Greetings from Lockdown England! I stumbled across your beautiful make on a google search and I am so inspired by your Sienna jacket, I am going to make one for my husband. What a great article with such helpful photos. Thank you for the great tips and links to other articles. They will doubtless be invaluable. I hope you are staying safe and healthy in this strange period of life. Sewing definitely helps me stay sane so thanks ever so for the inspiration. Warmest wishes, Emma
LikeLiked by 2 people
I’ve loved this post ever since it went up, having found it through a search on images of Sienna Maker Jackets. My husband was also inspired, so I’ve finally got around to my version for him – we are both super pleased with the result, but I’d never have thought of giving it a go without your pioneering skills in the area! So thank you from us both!
LikeLike
It’s here if anyone fancies a look: https://herringbonestitch.wordpress.com/2020/05/22/mens-sienna-maker-jacket/
LikeLike
Thanks so much for sharing your version. I’m sure you’ll inspire more sewists out there. You’ve nailed the work wear vibe completely.
LikeLike