
We’ve had a couple of rainy days here in Maine, so work has progressed on the feather shirt. Otherwise, I’d be out sailing; trying to take advantage of every last warm day.
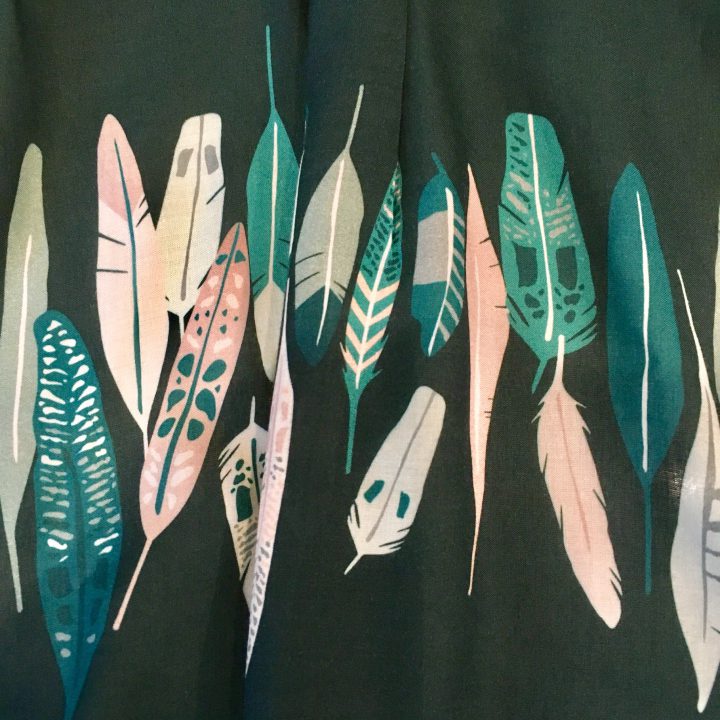
If you haven’t seen it on Instagram, the fabric for my current shirt is a fluid rayon border print that I fell hard for at Stonemountain & Daughter. It’s a deep green with teal and blush pink feathers running in a band along both selvedges. I was immediately drawn to both the color combination and the graphic. It was a classic “impulse buy” . This falls in the luxury category for me, a special occasion shirt that gets worn infrequently. But I knew I’d suffer “fabric regret” if I passed on it. I’m pretty sure we’ve all been there! Little did I know the challenge that awaited.
The fantasy eventually fades, when reality sets in. This fabric, while being delicious to touch, is quite thin and a little on the sheer side. It’s also extremely shifty, so I’ve had to use every means possible to keep things accurate and straight. This means LOTS of basting, healthy doses of spray starch, and the occasional “wonder tape”.
Making a shirt is not an “instant gratification” project. It’s all about little steps, executed as precisely as possible. You’re either into that sort of thing, or you’re not. I’m always a slow sewist, but this fabric has me at a crawl. But in its own twisted way, I’m actually enjoying it.
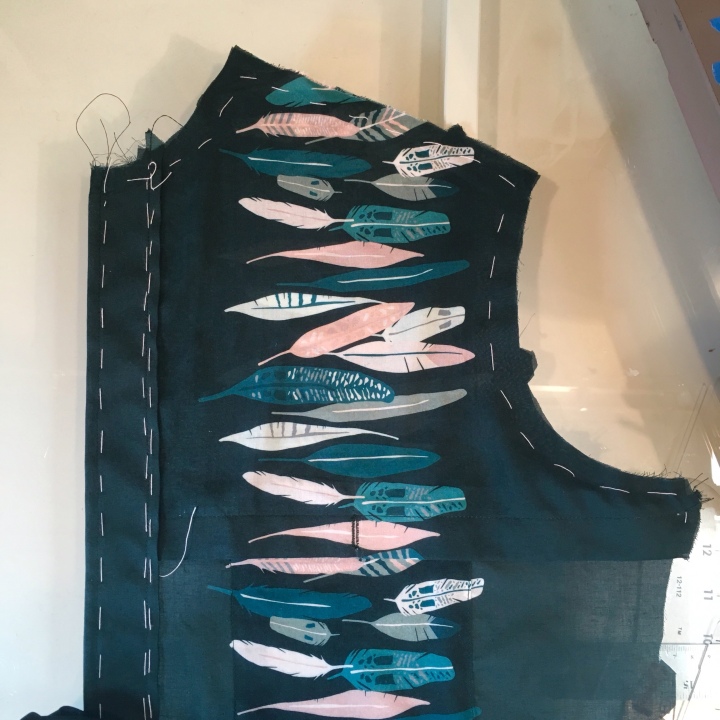
Border prints open up lots of design possibilities. My plan…
- Asymmetrical front with the border running vertically on the left
- Storm flaps on both sides to provide double fabric at the neck and chest
- Left storm flap to button over a pocket which is pattern matched
- Border print running horizontally across the upper back
- Feather print used for contrasting inner yoke, collar stand and inner cuffs

The bottom edge of the storm flaps are interfaced with Fusible Light Crisp woven interfacing from Fashion Sewing supply. The top edge of the pocket is interfaced as well to keep it from drooping. In this picture I’m working on the pocket matching /placement.

After a liberal dose of spray starch, I applied Wonder Tape to the pocket edges, stuck it on, and then edgestitched it in place. I love Wonder Tape! It makes this kind of pattern matching so much easier and accurate. It should be in every shirtmaker’s bag of tricks.

The feather print was slightly visible through the back yoke, so I inserted a piece of black silk organza to make it completely opaque. It also adds a bit more structure, which is never a bad thing in my book. I never dreamed I’d be sewing with silk organza, but the stuff comes in handy.

With the yoke attached I moved on to the collar. I’ve made several shirts over the years, and the collar / stand has always been the hardest part. I always come away feeling it could be done better.
There really is no sense in sticking with techniques that aren’t leading to a satisfactory result, so I decided to rethink my whole approach. And here’s where that journey lead me.
First up. After reading a recent article in Threads on industry standard seam allowances, I redrew both my collar and stand pattern pieces. By reducing the seam allowances to 1/4″ I eliminate the need for trimming; which, most of us would agree, is a big waste of time and effort. (Note: I did keep the 5/8″ allowance at the neckline for safety sake, but I envision whittling it down as I gain more confidence). I also drafted separate pattern pieces for the interfacing, something I should have done ages ago. I highly recommend it. Keep reading, you’ll see why.
Sad collar points? Watch this video by Jamie Kemp and kiss those lumpy collars goodbye!
The real gem of this blog post, though, is this video; which I have watched over and over and over. There is no spoken instruction so just watch, rewatch, analyze, stop, take notes, watch again.
This has been my game changer! If you’re into shirts, I hope you find it useful.

The result is, hands down, the best collar and stand I have ever done. The “Big Takeaway” is that the interfacing NOT the fashion fabric is running the show. It occurs to me that the collar and stand pattern pieces could be eliminated entirely. Just fuse the interfacing to a rectangle of the fashion fabric, and then cut the pieces around it. I’m sold!
This same process is also applicable to the cuffs.

Reduce the seam allowances to 1/4″ and stitch just outside the edge of the interfacing. When the cuff is turned the outer cuff can be pressed back and none of the contrasting inner cuff will be visible. The only trimming needed is at the corners. Sweet!
Attaching the sleeves is less efficient / attractive.
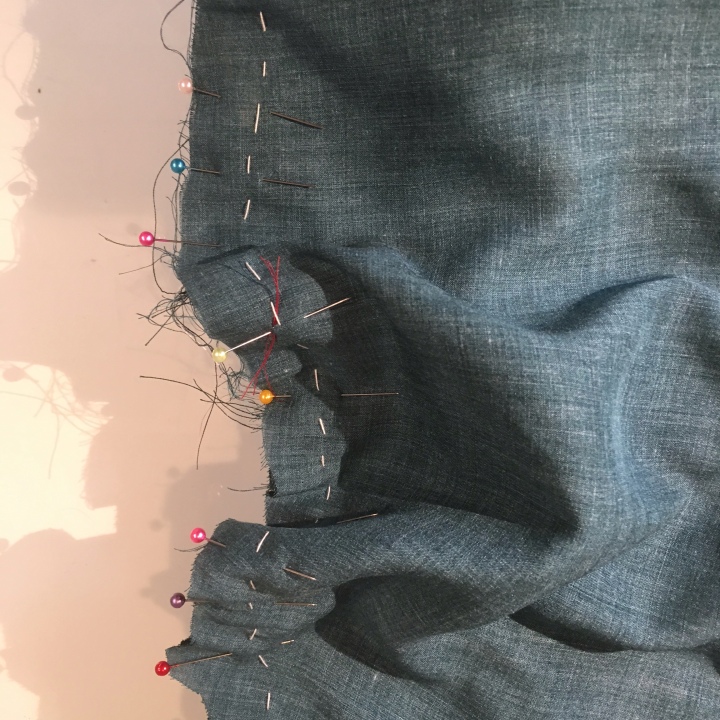


Note to self…. maybe someday I’ll get one of those felling feet and stop all this folding, basting and top stitching. But for now, this will have to do.
I’ve run on long enough.
Enjoy your sewing projects, whatever they may be. Sometimes we have to go through a little sewing hell to end up with something heavenly!
Photo shoot soon, weather permitting

Thanks a lot, especially for the links! 🙂
LikeLiked by 1 person
Your pocket and storm flap matching is a joy to behold! And many thanks for sharing the second youtube link on collars -using thread to pull the collar points out is genius! Have you seen my book The Dressmaker’s Companion? It has some shirt sewing techniques you might enjoy.
LikeLiked by 1 person
I understand shirt love! Four years ago, I started my shirt making journey and at this last week’s ASG sewing retreat, I finished my 28th shirt (for a relative). I also half-finished shirt #29, out of Pendleton wool (for DS). THICK wool – probably too bulky for a shirt, to be honest – which has put me through a different variation of shirt heaven/hell.
I love your fabric and can’t wait to see the final design. Especially the intriguing chest flap. You inspire me!
In thanks, here are a couple of shared shirt nuggets:
At https://kelly.hogaboom.org/2013/11/flannel-shirt-sew-a-long-lined-pocket-sleeve-placket-and-yokes/ you will find my favorite method of lined pocket construction. I started using it because DH’s shirt pockets must have lining – he is a shipwright and always putting screws, drill bits, and other assorted sharpnesses in his pockets. Now I use it for all shirt pockets because it is so easy and classy. (And yes, Wonder Tape is essential!)
AND, I am a recent convert, TOTALLY, to the stitched-in string method of collar point turning. Both of the links demo the method on relatively “easy” collar points, but I’m here to say that it also works a treat on sharply pointed collar points sewn in thick fabric – almost the only kind of shirts I sew for my guys. Here’s my first tip: use Silamide nylon handsewing thread for the pulling thread. It is thin, so no chance of it getting caught in the anchor stitch and it will NOT break when tugged upon to pull the point out. Second tip: leave the thread handle in place until done with collar edge/top stitching. It works great to gently pull on while stitching around the point, so the point doesn’t get jammed in the feed dogs.
Thanks for a great blog!
LikeLiked by 2 people
Thanks for that link. I’ll have to try that lined pocket on my next shirt. But first I have a new winter coat to make!
LikeLike
It is an absolute joy to watch this shirt coming together! And I could watch that collar video over and over again! (… I think I’ll have to if I want to catch all those amazing techniques!) thank you for sharing! 🙏👍👏😊
LikeLiked by 2 people
Love watching this come together! It’s beautiful fabric whatever its challenges may be. Can’t wait to see the completed shirt!
LikeLiked by 1 person
How about a modeling down at the dock, showcasing all your handiwork?
LikeLiked by 1 person
The shirt is gorgeous. Thank you for the extremely useful links. I’ve really just started to make shirts for my husband. Those tips are going to help.
LikeLike
Thanks for naming the storm flap for me. I saw it recently on my son’s ready-to-wear shirt and was wondering what it was called. His had the pocket free-hanging underneath the shirt front and a zipper at the top under the flap. Very cool. And less pattern matching – though yours is highly admirable! I’m looking forward to the modeled shots!
LikeLiked by 1 person
You do SUCH beautiful work!! It makes me day every time I see that you’ve written a post. I’ve lived in Alabama for decades now, but I was born and raised in the Lakes Region of New Hampshire and spent time most summers in Maine……I haven’t been proper sailing since I moved, but the hubs and I like to dream about building a sailboat one day….. Thank you for your blog.
LikeLiked by 1 person
I certainly enjoy every post you document of your shirtmaking process. I looked at the video links you included, but will need to review the new collar process more for clarity. The shirt point video made that process crystal clear, and I will be using it for the next shirt for my son and grandsons. I didn’t find the pattern number for the shirt you are creating here, but I believe it is the same one I made for my son recently from a red/white seersucker. Yours is going to be beautiful. I did want to mention I purchased a felling foot recently, and once you find one for your machine, you will always wonder why you didn’t do it sooner! Do it! I am also delighted that you have discovered my favorite fabric store (Stone Mountain and Daughter). I have been a customer since the father was the onsite owner and ‘the daughter’ was in college. That was decades ago, back when they had layaway program that aided my sewing habit. Ah, the good ol’ days! I keep learning from bloggers like you, and hope you continue to inspire and motivate those that follow and admire your work.
LikeLiked by 1 person
Awesome videos!
And I LOVE your shirt.
LikeLiked by 1 person
Just when I was sure you couldn’t top the last shirt, you did. This is such a cool print and your pattern placement is so Italian couture, Dolce, Versace. Great idea about the interfacing and the collar video’s are excellent idea. So many techniques in this shirt. Look forward to the next one.
LikeLiked by 2 people
I am in the middle of an assembly line project, making three shirt dresses. I was just ready to start the collars today when I read your post while I was catching up on my blog reading. I also dread collars. But THAT VIDEO!!! amazing. I knocked out all three this afternoon and they are the best I’ve ever done! Thanks for sharing the wealth. I really am grateful:)
LikeLiked by 1 person
I’m so glad to hear you had the same experience I did. Somehow sewing a great collar can put us on top of the world!
LikeLike
Thanks for the video link. I had seen Devon’s one and used that technique. But after seeing that second one I decided to try that on my latest shirt. Definitely going to keep doing them that way. Now I’ll just have to adjust my patterns to the 1/4″ SA. Already drew new collar and collar band patterns.
LikeLike
WOW…both of those videos are great! The second one surely needs to be watched over and over as the speed of sewing must be revved up somewhat or can people sew that fast? Love the planning that is going into your new shirt!!! I learn something new every time I read your blog!
LikeLiked by 1 person
Reagrding the video: Doing the cuff in the same way as the collar band did not go as easily. Maybe it is because I like the interfaced part on the outside of the cuff, and this technique puts it on the inside (I flipped the technique to keep the interfaced part on the outside). This will make edge-stitching not an option. Not really a problem because I normally top-stitch my cuffs. It did make adding the pleat a lot easier. You just start stitching the cuff on from the top part of the placket to where you want the pleat to be. Then switch to the other side and stitch until you’re almost back to the other side. The pleat will have formed almost by itself. Just position it, press with a nail, hold it, and stitch it in place.
LikeLike
Thanks for sharing the video. I too am always in fear of the collar application. I subscribed to ‘Appearance’ about two weeks ago, but did not explore at the time. I want to show you the link that drew me in. I have no intention at this point to try to duplicate this garment neckline as it does not really fit into my lifestyle, but: who knows? “Only the Shadow knows..” https://www.youtube.com/watch?v=MUfWyZLS2EY
LikeLike
Thank you for the ink to Appearance Design Studio videos on YouTube. I’ve become addicted. I will stick to patterns, however. I’m not THAT good. I sent the link along to Carolyn; I agree, she is a champion with piping.
LikeLike
I love the fabric & colors & I certainly know what you mean about buyer’s regret! There are a couple of things I passed on & have never gotten over! Anytime something catches my eye, I go through the process of determining whether I will regret more if I buy it or if I don’t! Good choice, buying this fabric!
LikeLike
Helllo mate great blog
LikeLike