
I will just preface this post by saying that none of what I’m showing is at all necessary.
The Jedediah pattern has a perfectly fine waistband. It can be very attractive if one takes the time to add a bias binding. In fact, the whole interior of a pair of Jeds can really be dressed up with a contrasting binding. So by all means, go out and get one of those Clover bias gizmos and go to town.
I’m taking a slightly different approach by putting on a two piece waistband with an inner facing and attached curtain. I dubbed this “The all day waistband” way back when I first attempted it, and that’s pretty much unchanged. It’s essentially a two part process. First an outer waistband is constructed using the sewing machine. Then an inner “waistband” is attached by hand. If you’re not a handsewing fan, this probably won’t be your cup of tea. If you try it though, I think you’ll find that all the effort is more than worth it in the end. And … you may grow to enjoy hand sewing as much as I do.
My guide, as usual, is Roberto Cabrera’s book on menswear tailoring. It’s indispensable.
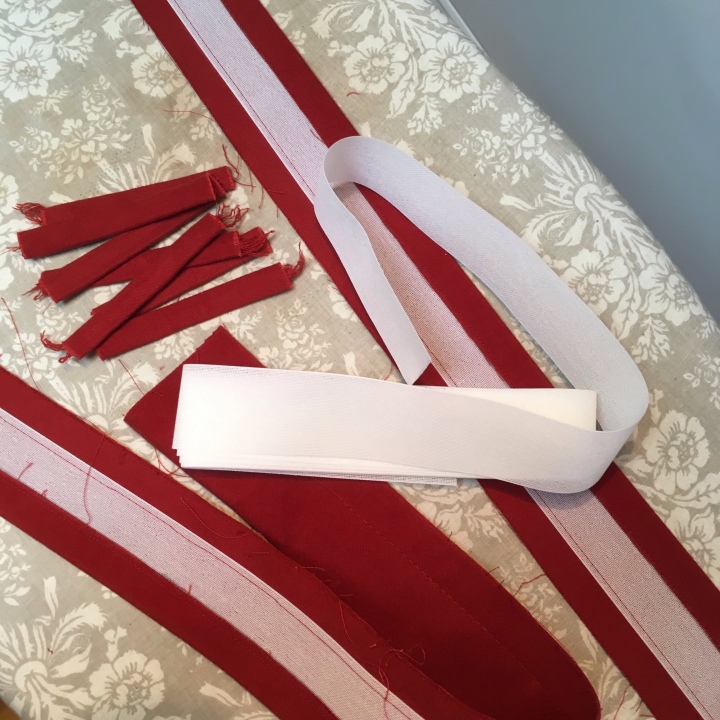
These are the components of the outer waistband.
My fellow tailoring nerd, Enrique, encouraged me to pick up some waistband interfacing while I was at MPB Day in August. It’s 1.5″ wide, dirt cheap, and what they use at FIT in their tailoring classes. Good enough for FIT = good enough for me!
The outer waistband sections get wrapped around it, and then sewn onto the top of the pants. The belt loops are caught in the seam at the same time. Speaking of belt loops–I really need to break down and get one of those tube turners. Turning these belt loops with a hemostat was a PITA! (And it took seemingly forever).

Here is the waistband all sewn on with the belt loops in position. The belt loops are folded over the top of the waistband and tacked securely into the seam allowance by hand. Easy. It gives a very clean look. (The stitching at the bottom of the band is temporary and gets removed in the end. )
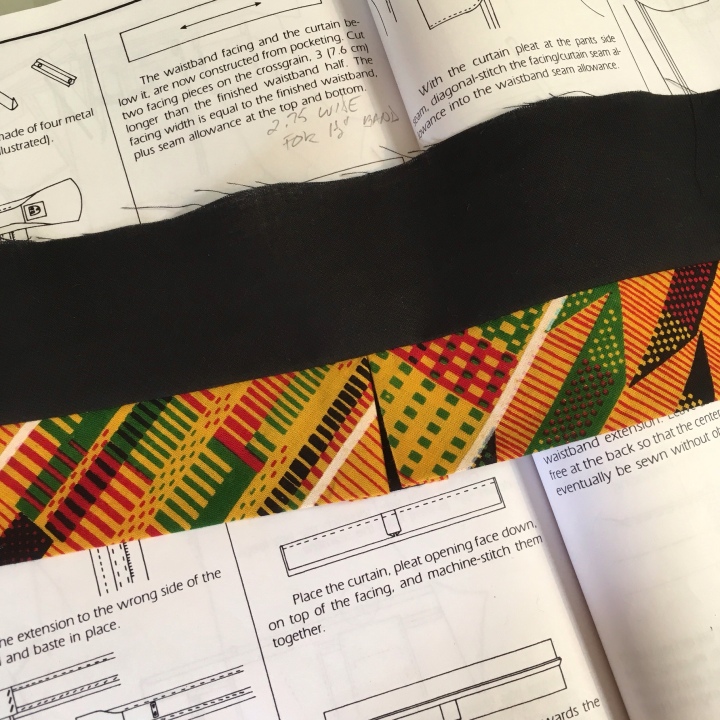
The “inner waistband” consists of a facing and attached bias curtain. It’s all very simple to make from rectangles. No pattern pieces!! I used a black quilting cotton for the facing. Nothing fancy. The curtain is a wider piece of bias cotton folded over to be double thickness. A pleat is placed in the middle. The pleat will eventually end up over the side seam of the pants.

The rest of the waistband will be finished by hand. The seam allowance of the facing is stitched to the seam allowance of the waistband. It’s a diagonal stitch, and it goes very quickly. This stitching will never be visible so there’s no need to agonize over it.

The top edge of the facing is pressed back and hand stitched into place. Again, it really goes quite quickly.
Hate hand sewing? Here’s a tip that makes it more enjoyable. Wax your thread and then press it with your iron in a folded piece of paper. It melts the wax into the thread, making it much less likely to tangle. Plus, you get to pretend you’re in a couture atelier! Sometimes a little fantasy makes everything easier.

Before you know it you’re here! Now it’s just a matter of sewing up the inseams and the back seam.

There will be excess curtain at the center back. It gets folded back to form a pleat of sorts, then hand stitched into place.

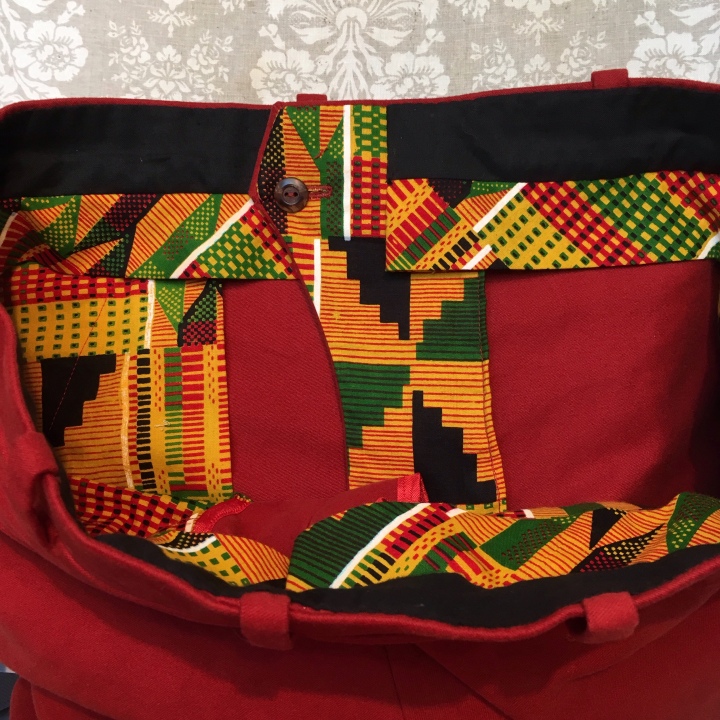
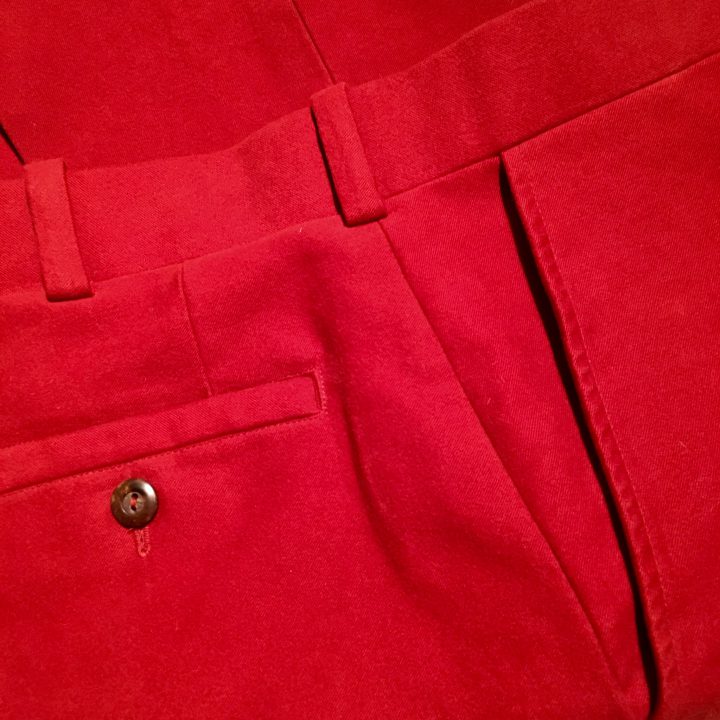
The completed waistband. So worth the effort IMO.
Homer and I both need haircuts, so the backyard photo shoot is on hold until we’re looking less shaggy.
In the meantime, “Agnes” is finally in the water! I’m trying to get in as much sailing as possible until it just gets too cold.
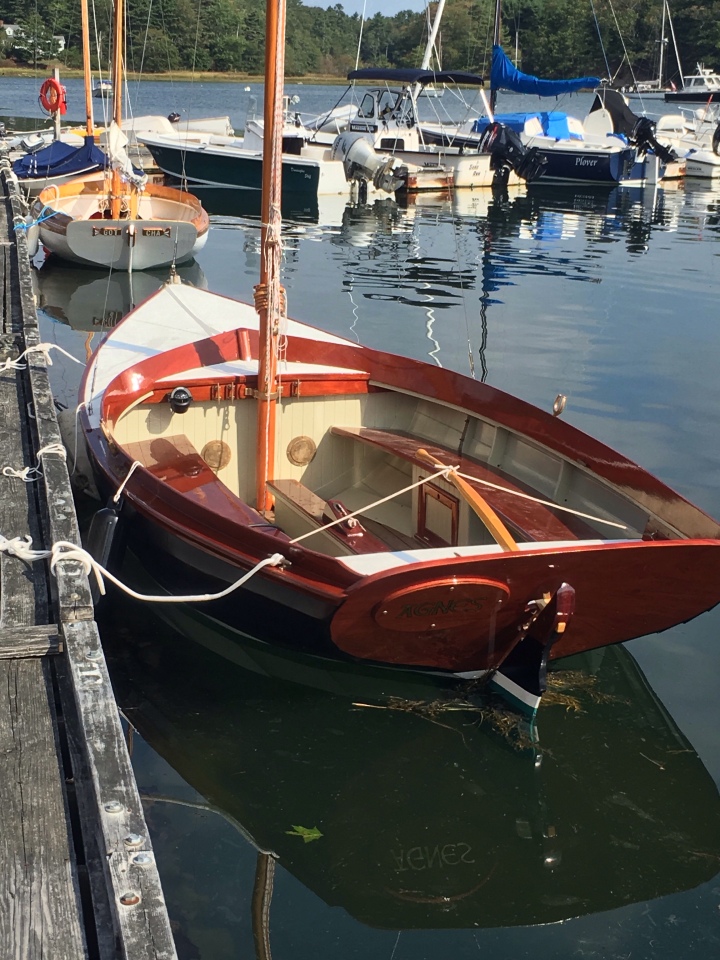
Needless to say, she’s become quite the sensation at the marina.
Be well, and happy sewing!

Wow—-Gorgeous!!! Your construction techniques are beautifully precise. (I enjoy handwork too—-I’ve been trying to practice hand rolled scarf hems.) Please do keep us posted on the comfort & wear of the waistbanding. I’ve tried it & wasn’t thrilled. I’ve been most happy with hair canvas-stiffened waistbands—they seem to give and stabilize really well. Thank you for documenting your work—your projects have inspired me to push myself to improve my fitting and tailoring!
–BethS
LikeLiked by 2 people
Can’t even say which I was more delighted by-the gorgeous curtain, or seeing Agnes in the water! (And I had never thought of pressing waxed thread, that could be the solution to all of my thread woes…) Congrats on your fantastic pants!
LikeLiked by 1 person
Gorgeous pants! Thanks for sharing the interior details. And so glad Agnes is finally in the water! I hope she sails as beautifully as she looks.
LikeLiked by 1 person
Agnes is such a thing of beauty, bravo! She certainly is elegant and has charisma. The red trousers are also a marvel, I am going to try this as the waist band looks as though it supports the trousers letting them hang smoothly. The skimpy waistbands just dig into fleshy bits and cause muffin top issues. Great tutorial, thanks so much. Off to search for the book.
LikeLiked by 1 person
Wonderful work! I have the fabric, pattern and notions, and a husband who’s willing to wear it. With the very neat guide you’ve done here, I hope to succeed! Thanks a lot!
LikeLiked by 1 person
I didn’t think it was possible, but they’re even more beautiful on the inside than the outside!
Agnes looks great! I hope the weather stays mild a little longer for you! Looking forward to seeing you both with your new haircuts! 👍🙏👏
LikeLiked by 1 person
You and Enrique were joined at the hip at MPB Day! It’s no wonder, you two operate on the same frequency – quirky perfection.
The boat astounds me, but I’m inland a bit, and in a place where demolition derbies can be populated with combines, the big haunted house in this area is the well advertised (via bumper stickers) “Haunted Hoochie”, and man buns and t-a-l-l lady buns are still the rage/thing/default.
Those pants are technically “reversible” – they’re that gorgeous (and you certainly know how to insert fun into whatever you’re doing!).
LikeLiked by 1 person