
Do you remember that I was considering making a “French Couture jacket”? It was ages ago. You’ve probably forgotten the whole thing. I armed myself with Claire Schaefer’s book, cranberry wool tweed woven by my mom, bronze buttons and some foufy mohair trim. So what the hell happened…..where to begin?
The general consensus from you, my readers, was that the froufrou trim had to go. I’m just not Pharrell Williams enough to pull that look off. On me, it would be “ladies who lunch” gone WAY wrong. So I went back to the trim stores in NYC and settled on a burgundy faux suede with contrast edge stitching. Decidedly simpler but not flexible enough to conform to my pattern’s curved collar and lower front edges. Rather than fight with the trim to make it curve, something it was NEVER going to do, I squared off the collar and jacket fronts. In sewing, as in life, you have to pick your battles.
Overall, the pattern was fairly easy to fit. I increased the width of the collar (there just wasn’t enough room for the trim), shortened the body by about 4″ and added extra curve to the upper back (the dowager’s hump adjustment, ouch! Like that doesn’t make me feel ancient). Then the real games began.
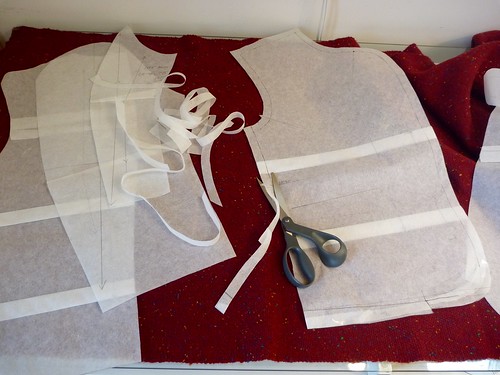
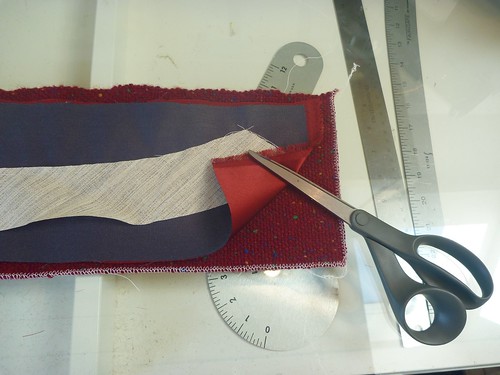
Straight up….if you’re looking for the most complicated and time consuming way to construct a garment, this “Couture jacket” will be right up your alley. None of it is particularly difficult….cumbersome is the word that comes to mind. Here I’m cutting off all the pattern seam allowances to start.
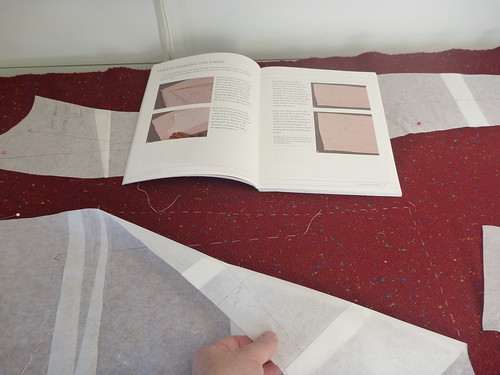
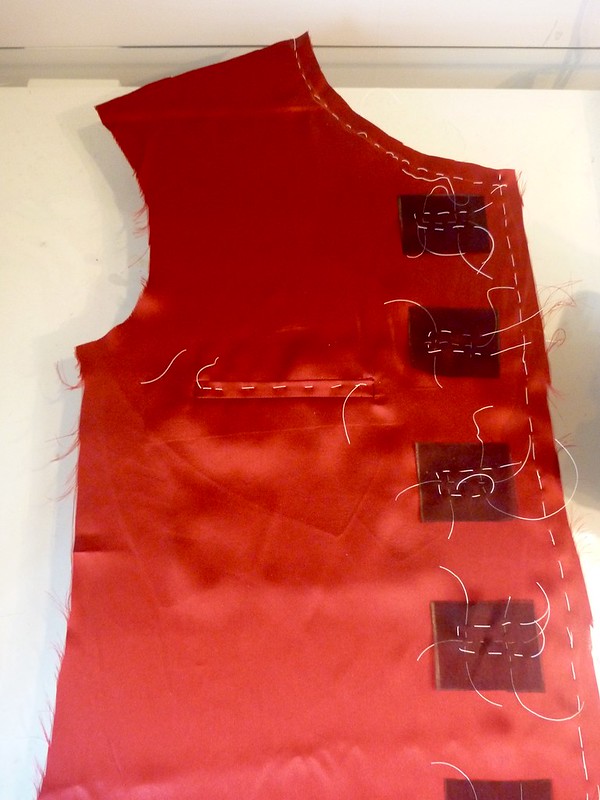
Then the pattern shapes are thread traced onto the fabric. There is, of course, a very specific way in which this is done. Thankfully, Schaefer’s book is well illustrated. The grain line, notches and any other marks are also marked with thread. Get ready to use a huge amount of cotton basting thread!

Each thread traced piece is on a rectangle of fabric. I swear, the real “luxury” of this construction method is the shear waste of precious fabric that ensues. The fabric gets handled extensively, so I ran all the cut edges through my serger to prevent raveling.
This is about as far as I got sticking to Claire Schaefer’s directions. I started to veer off on my own course… more tailored jacket, less floppy cardigan.
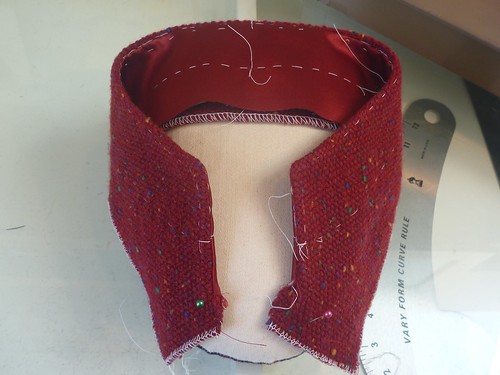
I’m sure Coco rolled over in her grave on this one. I interfaced my jacket fronts with a lightweight hair canvas. The “couture jacket” has just the tiniest strip of silk organza selvedge caught in the front edge openings. I also stabilized the shoulder seam with a semi-bias strip of lining material. That’s a Roberto Cabrera thing.
Veering even further of course, I wanted welt pockets and bound buttonholes. Not the patch pockets and handworked buttonholes that are the hallmarks of the couture jacket. Oh, and that “Coco-ism”. — “No button without a buttonhole”. Forget that!
I don’t know about you, but I always like to practice the tricky bits before I launch into something that has the potential of ruining a project. So….
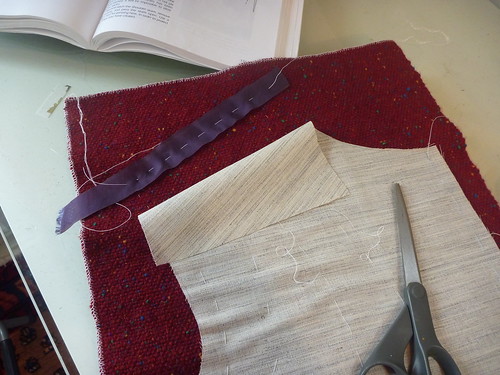
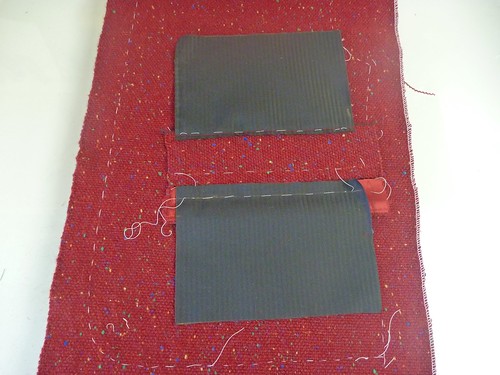
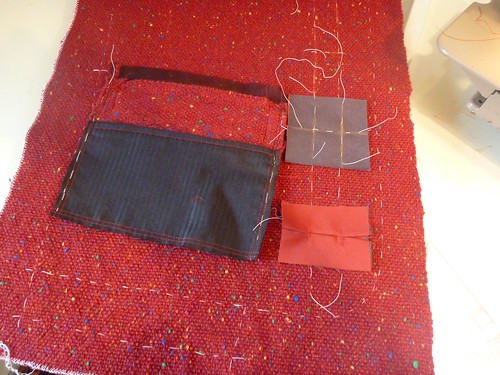
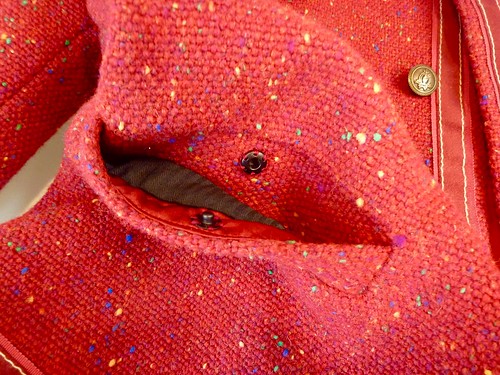
This is a mock up welt pocket that I made with left over scraps. I used Edna Bishop’s method. She calls it a “regulation welt pocket”. It’s surprisingly simple and straightforward once you get up the nerve to start slashing your fabric! For this jacket, I needed to prove to myself that it was going to be possible, considering the bulk of the fabric. I tried to reduce bulk in every way possible.

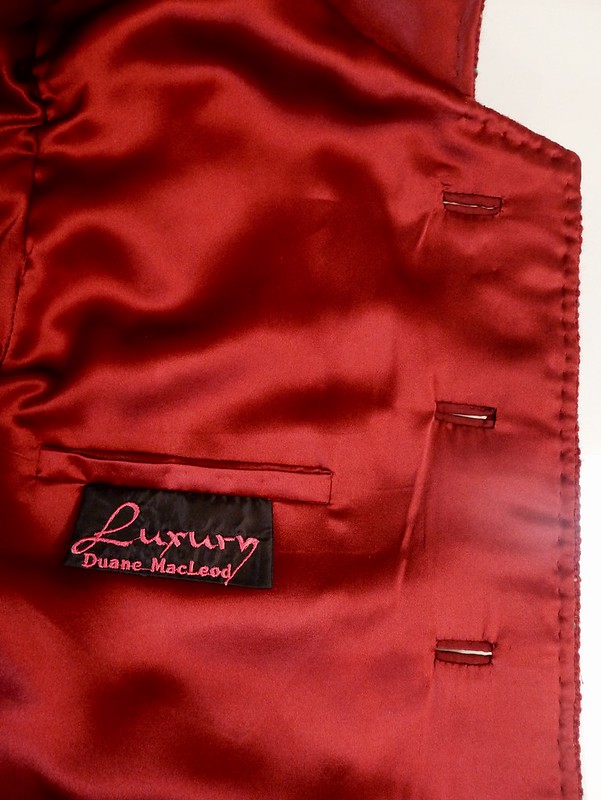
As luck would have it, making the pocket was entirely possible. The welt is lined with silk charmeuse to reduce its thickness, and there’s some serging that will never be visible to keep some seams flatter. So the welt pockets are a go.
I also made a trial bound buttonhole. The welt is the reverse side of my silk charmeuse beefed up with a scrap of Fashion Sewing Supply’s Pro-weft Supreme fusible. Reassured that these features are indeed possible, it was full steam ahead.
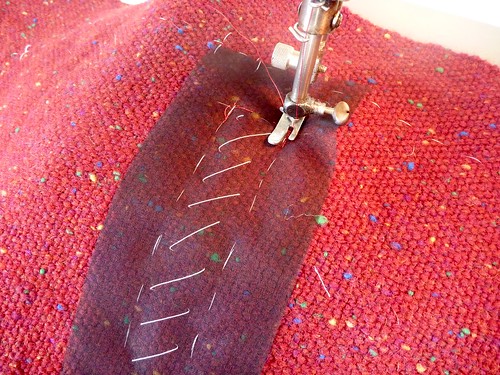
A piece of silk organza was used as a reinforcement for the welt opening.
The pocket in process. I baste a lot! But it’s always time well spent.
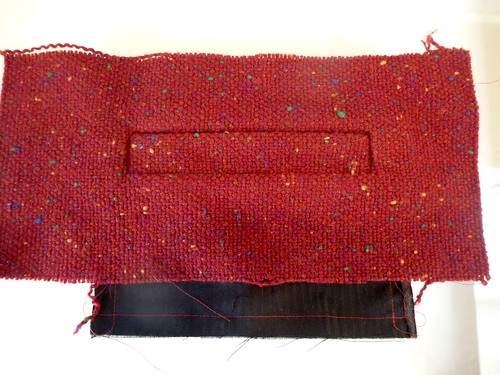
Here is the finished pocket (a success) , and the beginning of a MAJOR screw-up. Maybe you see it. I positioned the welt for the second buttonhole on the WRONG side of the jacket. I blissfully followed Laura Mae’s fabulous bound buttonhole tutorial (here), marked, stitched, cut open and flipped everything to the….
WTF have I done moment!!!!
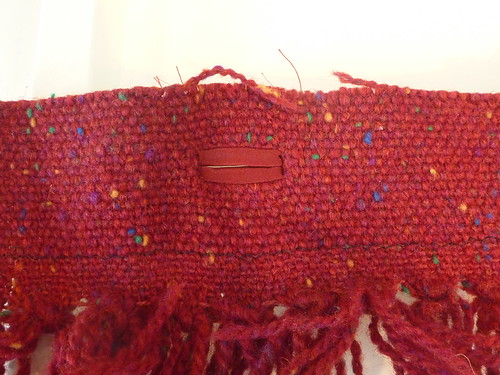
Once my blood pressure was back under control, I set about correcting the mess I’d made. I positioned a new welt piece onto the outside of the jacket (where it should have been in the first place) and restitched everything directly over my original stitching. I then very carefully cut the incorrect welt away as close to the stitching as I could get. With tweezers I was able to remove any remaining fibers. Disaster averted. The buttonhole may be a touch smaller than the rest, but I don’t think anyone else would notice. Fortunately, there were no other screw ups.
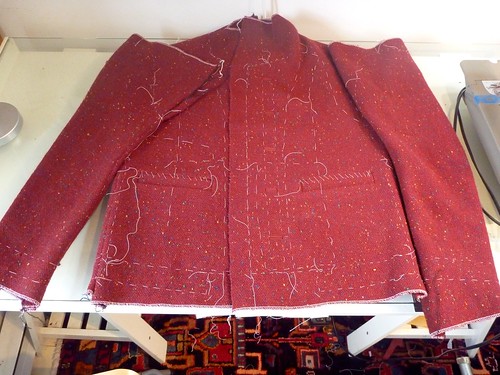
Arcane construction becomes the norm. Mon Dieu! I quite honestly can’t remember how I attached the sleeves, but somehow it happened.
But I’ve blabbed on long enough. If you’ve stayed with me this far, scroll down through more “in process” pics to see the final result.

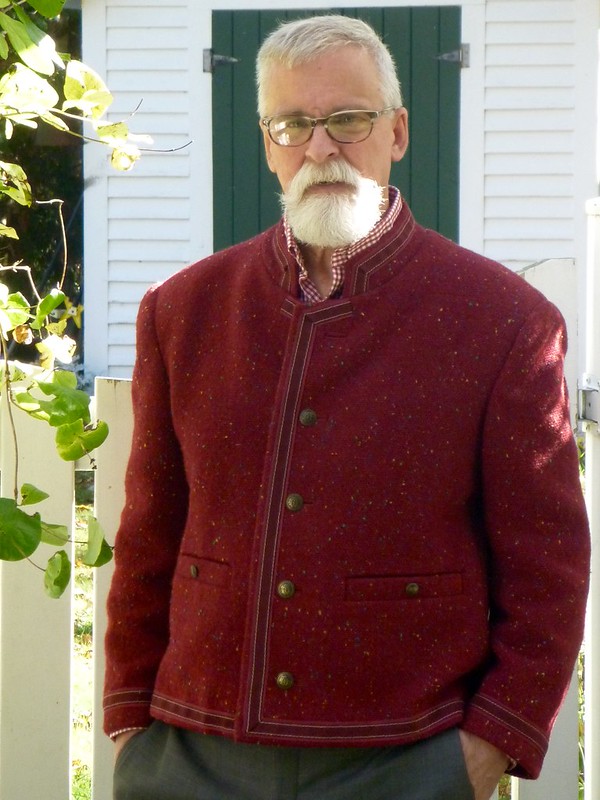


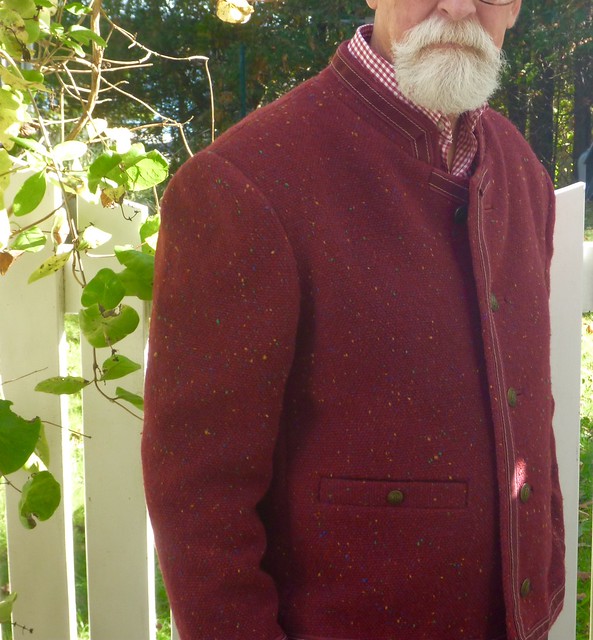
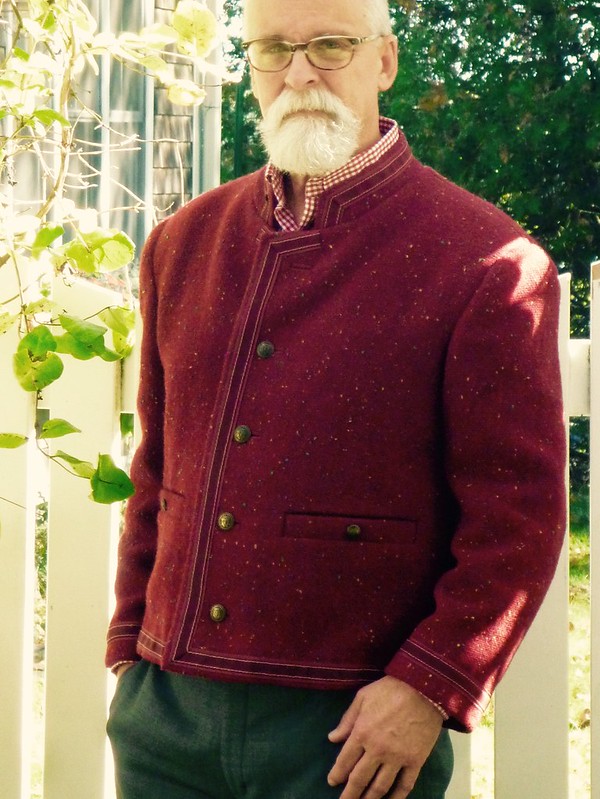
I wore this outfit to host a rehearsal dinner for my son’s wedding in October. By then, all the complexities and frustrations of constructing the jacket were a thing of the past, and I just enjoyed wearing it. It truly turned out to be exactly what I wanted. My idea, my execution. A way to honor my mom’s artistry and craftsmanship. A little bit French inspired (without the “Ladies Who Lunch” vibe), a little military, a little tyrolian, tailored (but not overly), with a hard to describe sensation of wearing something truly special.
As always, I am so grateful for the support and inspiration I receive from the sewing community. I’ve sort of fallen off the blog bandwagon a bit, but I still have projects to share. Be well, and happy sewing!

Your jacket is absolutely beautiful! I admire your hard work.
LikeLike
Oh yes, Tyrolian for sure. In the best way! It's gorgeous, and such a tribute to the beautiful tweeed!
LikeLike
Great job, i enjoyed your, well, anti-cardigan girly jacket with trim and opted for a much more masculine take on it. The use of fusible interfacing or any interfacing was good as well. I made one of these 'coco jackets' from a picture for my mom, the project took me close to 3 weeks and way too much hand stitching. I used Claire's book and articles from threads magazine to do mine. Black boiled wool, silk lining, quilting each piece, hand stitching in the lining, hand worked buttonholes, hand stitching in the chain weight, let alone the muslin and fitting. By the end, I can honestly say no wonder they charge a fortune for a custom Chanel jacket, let alone pret a porter. Again great job, the trim looks terrific on the jacket.
LikeLike
Your jacket is perfect!
LikeLike
So impressed!
It looks amazing, and i'd say it leans to the tyrolean part of it's “look”.
Great job – you are a natural.
It's beautiful.
LikeLike
Wow-great work! Your mother's fabric is beautiful too.
LikeLike
Nice jacket. Very Tyrolean The fabric is wonderful and you look absolutely smashing!
LikeLike
Truly, it's GORGEOUS!
LikeLike
Beautiful!
LikeLike
It turned out SO well. I love the trim with the fabric- definitely has a military vibe. Great interpretation of the Coco jacket for a man.
LikeLike
You turned a flat piece of fabric into something magical! Do you realize that the jackets you create are future heirlooms? The care and photos and documentation for the future generations will be greatly appreciated and loved!
LikeLike
Stunning jacket and such a special way to honour your Mum's fabric.
I also know how much work you put into this jacket as I am still trying to finalise my jacket.
LikeLike
Awesome!!!!!
LikeLike
It's fantastic! Impeccable workmanship. Love it.
LikeLike
First time commenting, though I've been reading your blog for a while. I was intrigued but dubious when you started the project… I don't care for Chanel jackets for women, so I couldn't imagine liking the look for a man, but you interpreted (rather than translated) the look very well! I love the final product!
Re: the time-consuming process of cutting Seam Allowances (SA) off the paper pattern, basting the seamlines on a rectangle of fabric, then sewing the seams all before cutting the edges of the SA's… it is arcane, for sure! The only justification I can imagine for it is that when a piece gets handles so much before sewing the seam (as, for instance, getting quilted, having buttonholes and pockets installed, et cetera), there's a danger of the fabric stretching and warping on the bias areas, like the curves of the neckline and armscyes. Most pattern instructions call for cutting the pieces out and then stay-stitching or interfacing these areas, but doing it the couture way may yield better results. Question: Is it difficult to baste and sew curving seams before cutting the pieces out? I'd think all the excess fabric bunching up everywhere would be more cumbersome than useful. Do you think the results are actually better than typical construction?
LikeLike
Stunning! Glad to see that you finished your jacket journey, and that it yielded such a beautiful, and to my eye very wearable piece.
LikeLike
Karen, I think the whole method exists because the usual fabrics used are loosely woven tweeds. They want to start falling apart just by looking at them! Is it a superior way to make a jacket? I don't think so, but it sure is a whole lot safer when one's using fabric that can't be replaced if something goes wrong. The construction can be challenging, and there's a lot of problem solving that happens on the fly. You have a vision of what you want, and have to figure out how to get there.
LikeLike
Just fabulous. The trim you sourced is a wonderful match, both in style and colour! I love it on you.
LikeLike
Your mother would be astonished and proud of what her beautiful fabric has become and of her son who looks so dashing. Congratulations. I don't understand most of what you did but in looking at the finished jacket, none of it appears superfluous. Luxury indeed!
LikeLike
Spectacular!!
LikeLike
Wow so much work, but you did persevere and get a great jacket that will be an heirloom piece. Must have been like cutting off your own arm to cut away all that much extra fabric that required so much of your Mother's time.
LikeLike